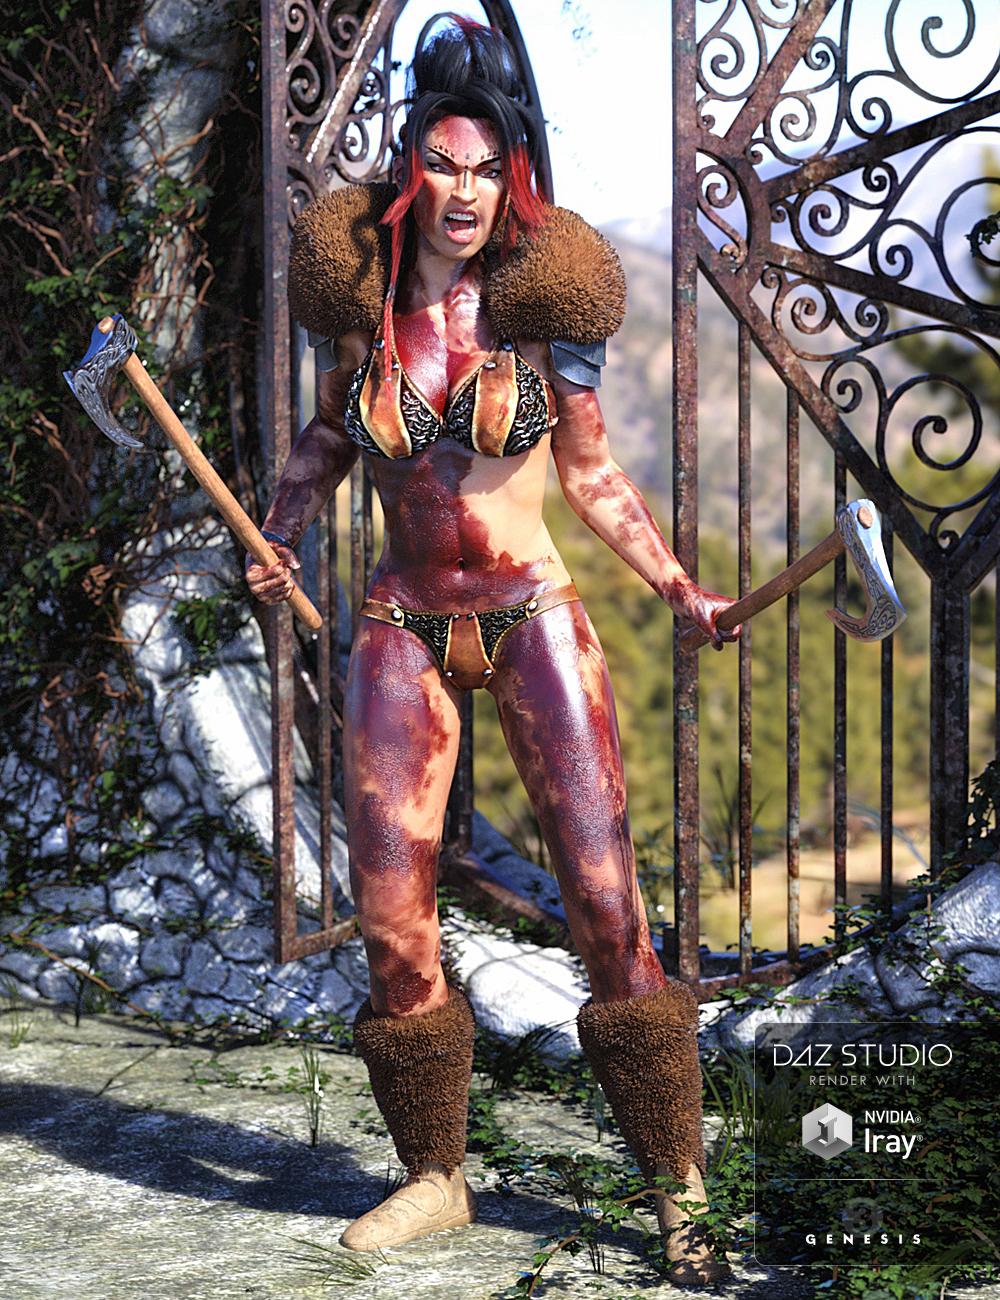
Ultimate Blood 'n Dirt for Genesis 3 Female(s) [released] [Bonus Content] [Commercial]
 Tolero
Posts: 34
Now for Genesis 3 Females!
After the Release for Genesis 2 Females, this time I have put much more efforts in doing
a realistic Skin. I hope you will enjoy this release.
For any questions and suggestions, please use this Discussion.
[Bonus Content]
If you are interested in having the Layered Image Editor Presets with Rune7 UV's,
then you can send me an Email with your receipt of purchase, either from
the G2F or G3F Package and you will get it for FREE.
Send it to: [email protected]

Here's a short Presentation/Tutorial of UBND for Genesis 3 Female:
Thanks for your support in buying my stuff!
Tolero


Popup_01.jpg
1000 x 1300 - 1M
Post edited by Chohole on


Comments
Sorry to question you about this (I have comments as to my confusion in another thread)
- What to do about males? You have an add-on, unisex workaround or another product coming?
- How do I get the blood on the outside of their clothes?
It looks like I'd have a bloody character in clean clothes? Is that the way it works?
(I'm wondering if, as a workaround, you have that thing where I can adjust the fit outward and maybe the blood moves further back and lands on the outside of the clothing?)
Hey AVXP
-Males have a different UV Set as far as I know. So the whole work has to be redone. And there is also no conversion Tool available.
There was a Trick with Gen2 Figures to achive that, but for G3 I don't think it's possible that way.
- Clothes have their own Material and Textures. So that has to be seperate done.
- Yes you will have a bloody character in clean clothes. But there are bloody clothes available here at Daz. (Check out the links in used Products in Promoimages
in the description)
This Pack was also intended for user which have bloody or dirty clothes but no dirty character. ;-)
There is also one Top and Panty included with blood and dirt maps that fits perfect with the blood shape.
G3M and G3F do indeed have different UVs and a different mesh so you can't simply load the UVs from one figure to the other like you could gor G2.
But there's a pack providing G3F UVs for G3M and vice-versa: http://www.daz3d.com/genesis-3-uv-swap-male-and-female-base
If you have this I think you could then use Map transfer to convert the textures from G3F UVs to G3M UVs.
Looks awesome! Skin and clothing are very separate items, and each clothing set is different from all the rest. Would be very difficult to make something like this to fit the character AND whatever they happen to be wearing AND their hair etc.. I use things like this on the characters then add blood and dirt to clothing, hair etc in photoshop (or any other paint program like GIMP etc.)
Thanks! Exactly, that would be nice, if sometime something is available that projects a map overall items in one go ...
...
but I don't tink so...
Grabbed it and waiting for a male Gen 3 version.
Hilarious tutorial video too.
[Bonus Content]
If you are interested in having the Layered Image Editor Presets with Rune7 UV's,
Sorry to be that guy, but what is the Bonus Content for?
I'd think exactly what it says: LIE pre-sets for the Rune 7 character.
Not sure why Rune 7 would differ to the other G3F characters.
I did a search looking for a Vendor called Rune 7. Didn't know it was a character.
I read it as Rune 7's (UV Product)
http://www.daz3d.com/rune-7
The Bonus Content is what it says, right. It is for the Figure Rune7. The reason behind it is the following:
Every "special" Figure like Rune, Olympia, Teen Josie ect. has a slightly different UV Layout.
(Victoria 7 is an exeption, she has a very close UV Setup to the G3F Base Figure.)
So let's say you wanna use a Olympia Skin on the base G3F Figure or vise versa. You can do that, but there wil be
visible Seams where the Texture dosen't fit the Model. (IF you leave the original UV Set in the Surface Properties!)
In Example: You have Olympia or any other "special" Figure in the scene selcted and then apply a Skin from an different Character.
It will fit perfectly, because with the applied Skin, the UV Set will also be changed. That means, you have now Olympia, but with the UV Set
from Victoria7 i.e.
(This is the reason why the full Skin Textures will work on any G3F Figure)
But not with the LIE Presets!
Let's say you have Rune7 in the scene,which has its own different UV Set and wanna use her original Material (also Makeups),
the LIE Textures must have also the Rune7 UV Set!
If you change the UV Set from Rune to G3F Base, the original Rune Texture will be distorted!
This Limitation occurs only with the LIE Presets and is also statet in the Product description.
(LIE Presets only compatible with G3F Base and Victoria 7)
Hope this was not too complicated writen and clears the question about it.
Thanks!
Didn't know about that, thanks for posting!
Didn't know about that, thanks for posting!
Please buy it and test it for us. lol
I guess that conversion Tool won't do the trick to 100%. It will work yes, but only with full Textures (Skin and Blood/Dirt on same Map) not with the LIE Maps.
I have described the context above in the Bonus Content.
Decide by yourself, if a clear and fine woman skin would look great on a guy. I don't think so.
The guys have more hair on the skin ect. So the only way would be to use it with LIE, but that's not possible.
The LIE Presets should be in the G3 Male UV Set for that, but their are in G3F UV Set!
If you change the UV Set on the Male Figure to Female UV Set and leave the original Male Skin on it, it will get distorted.
The Idea of this Tool is, to use a female skin instead.
I tried with Elija and the uvswap http://www.daz3d.com/genesis-3-uv-swap-male-and-female-base and it work ok, like the other skin swaps do as well. I can post a render if you like ( only took a brief look at is and then discarded that)
What I would like to know, as it is the skin get changed too when using the blood and dirt. If I want to dirty up some of my characters in their original skin I will have to go throug LIE it seems, but I had troubles deciding what hat to go into which channel, can you give us some hints there which way your maps can be used ?
Seems those are the markers layered for... reading helps.
However if I understand this right, for the makeup I would use the makeup shader to keep my original skin? That seems to no be applied to my figure. Using the Dirt makeup ( which changes the skin) works fine
Sorry, you don't understand it right about the makup shaders. These presets are just to re-apply the correct shader, because when you choose
the Makeup (medium,low,high,verylow) the shader for wet/liquid will be also applied (for the Face only). So if you have first selected "cracked high" preset, then
you have to re-apply "cracked high" preset after the makeup from the makeup shader folder, because it's default shader is "wet/liquid".
If you want do dirt up your characters with the original maps, then you will use the LIE presets. These are only 100% compatible with Base G3F and Victoria7 based characters.
(As stated in the description)
You can try it out with other characters, but you may encounter seams.
Hope that helps
Thanks for the clarification, yes that helps. I got the makeup thing wrong. I take it then that there are no makeup options in the layered images?
The seams are there with other characters but its ok, that can be mended in postwork.
Right! The Layered Presets have no Makeups included. It was mentioned, that the original Makeup will be used and the Blood/Dirt gets over it.
So, I have purchased the uv swap thing and have done some tests.
Thanks to you all guys with your comments, I have found finally a solution, to use the LIE Maps on every Male Figure. (and don't touch or change the original skin map)
With the regular dirt and blood maps (Skin&blood on same map), it is no problem as posted above from Linwelly.
I can confirm that now too.
The workaround for LIE: (it's a little bit advanced, but if you are, take a hand on it. For all others, I will check if I can make an Addon)
Select your male character and create a geometry shell.
Hide the unneeded parts of the shell in the properties.
Apply via the uv swap the G3F UV Set to the shell.
Apply the iray base shader to the shell if necessairy.
Apply the regular blood or dirt material, not the material from the LIE presets folder to the shell.
Search for every mainpart of the figure (torso, legs, arms, face, nails, lips, ears) the entry "cutout opacity" in the surface properties.
Browse to the texture directory where all the maps resides. If you have trouble to find it, just copy and paste the diffuse map into "cutout opacity" and then click it to browse.
Search for the Maps with TC at the end like "G3F Blood Torso TC 1002.jpg"
Add all corresponding maps to "cutout opacity"
Done!
There is some alteration needed in the chest area, you see. This isn't the way to absolut perfection, but better than nothing ;-).
Maybe I do an Addon which is based on this, but I have to first figure out all tweaks and possible problems. It should be the same Quality and Convenience as it is for G3F. (I hope it is in your eyes..)
So, if I understand it correctly, you use the top coat maps as opacity maps and those are the results? Not only does it look very good, (even with the weird chest) but it also allows people to use your product on other g3f UVs using the same geoshell workaround (and makes me much more interested in it). This is one of the reasons why I prefer geoshells for this kind of things, even if they don't always play nice with geografts.
Also, regarding the problem of having clothes match the dirt and blood on the figure, maybe using the same maps on an iray decal would give good results? KindredArts product certainly looks nice enough when doing blood splatters, although it obviously lacks the detail of something specifically designed for a human figure. It may be a worthwhile experiment.
Yes you're right. I'm not using geo shells till now, because when I'm right that doubles the polycount and I 've encountered some issues with cloth. Even
with that simple pants he's got on. But with some tweaking it will work anyway.
just wondering if the rune 7 presets have been mailed out yet? really looking forward to using them.
:)
j
So is the plan to WAIT for you do an [free] add-on to THIS PRODUCT (for Gen3 males) and just be patient?
Or are we supposed to buy the Geneis 3 UV Swap product http://www.daz3d.com/genesis-3-uv-swap-male-and-female-base and your add-on will allow us to use that with your product?
To avxp:
If I do an Addon, yes you have to stick with the UV swap tool. Otherwise I had to paint all new and that wouldn't be free.
I have to look, which is the best way, till then, yes patience is the word for it.
Thanks
I will check my the mail and send you the link. Sorry, I have a newborn at home, which keeps me very busy.
Okay I will wait for you to release the male version. I'm fine with post work till then.
...take your time, but ..um....hurry up though.
Congrats on the baby! I've emailed about the preset. I'm in no hurry. I have little ones too and know what it's like!
congratulations! that's great!
no hurry...
j
Thanks for the congrats! Yes it's great, but also veeeeery demanding ...
...
Thanks god, she's sleeping from time to time, so I can use some time for you guys .
.
There will something coming for a G3M workaround via the swap uv tool as discussed above. It looks not bad till now.
Tolero
Funny if you start making baby stuff.
UBND for G3M Geometry Shell workaround ( Needs the UV Sawp tool, see above)
Or you must be able to give the Male Geometry Shell the female UV Set. (This is in fact was the UV swap tool does)
I don't know if there is another (free) way for that.
So here we go......
https://www.dropbox.com/s/zs732q1gti5htfs/UDNB G3F Shell.zip?dl=0
Copy and integrate the folders from the zip file into your content folder.
You will find the new presets in: D:\YourContentfolder\People\Genesis 3 Male\Materials\Tolero\BloodNDirt\Geometry Shell
1. Select your male character and create a geometry shell via the create Menu.
2. Apply the female uv Set to the shell with the UV swap tool.
3. Uncheck all unneeded surfaces in the properties tab of the shell.
4. Apply the presets to the shell.
Done
The chances are not bad, that there will be an upcoming native G3M Version, without the disadventage of geoshells.
If Daz like that, i will do it.
Cheers
Tolero
Finally I wanna add some hints and tricks, to get the most out of the product.
There is nothing worse, than buying any content in the expectation in doing great stuff and it turns out not as intended.
So here we go:

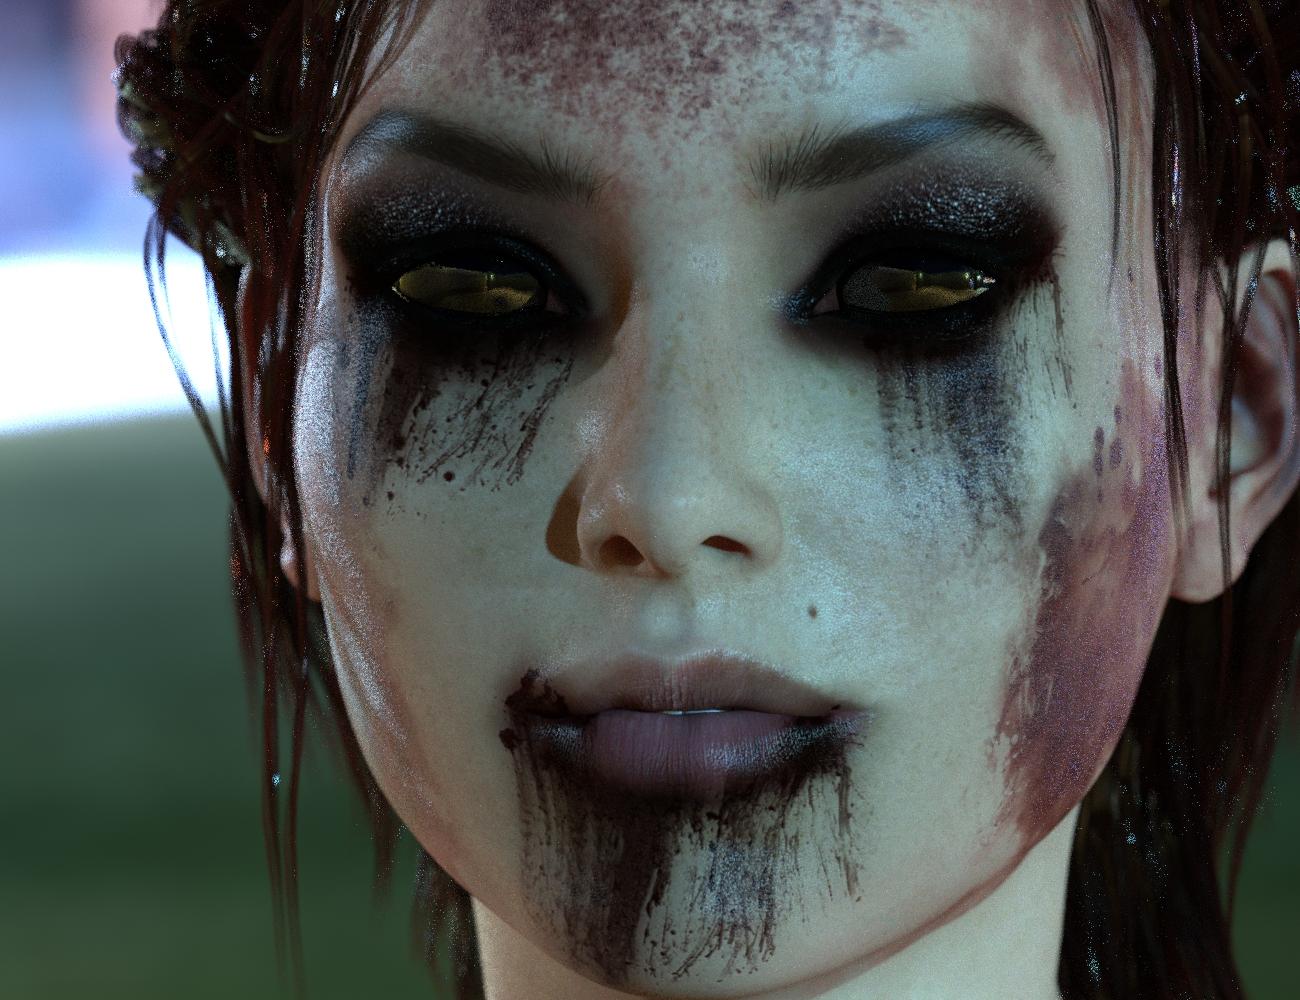
One of my favorite Shot was the Face closeup rendered with an HDR Image.
This is a raw rendering as you see, and it's pretty much like the final promo Image.
I usually only add a little sharpness and lightness/contrast to my promo Images. (And a little Lensflare Magic in the post)
This shot is very easy to reconstruct. See the settings:
I have removed all additional lights for this purpose. Only the HDRI.
The key of HDRI rendering is to find the right spot in rotating the HDRI. In this case 306 degree.
Add some depth of field to the camera and the shot is done.
Another example:
This is a studio shot without HDRI illumination. There are some lights from left and right nothing fancy.
The key to get the white lines in the reflection are some quads with an emissive Iray material in the back of the camera.
Check this image:
Hope that helps and giving some input for your considerations.
Tolero