No color on tongue in Big Cats 2
 alex_bb8aa5da
Posts: 107
alex_bb8aa5da
Posts: 107
in New Users
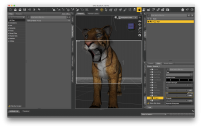
I got big cats 2. Did I break it when I was learning the setting? Nothing inside the mouth is coloring... I closed studio, reopened a new canvas, loaded a new cat, opened his mouth, applied a general material skin... and still get this:
What now?
THank you so much for bearing with all my questions. I swear I try googling a you tubing first!
Screen Shot 2017-10-29 at 12.08.10 AM.png
3104 x 1970 - 792K
Daz 3D is part of 
Connect
DAZ Productions, Inc.
224 S 200 W, Suite #250
Salt Lake City, UT 84101
Licensing Agreement | Terms of Service | Privacy Policy | EULA
© 2024 Daz Productions Inc. All Rights Reserved.
Comments
I believe it uses a shader that only shows when rendered and in 3dl, it won't work when rendered in Iray.
So big cats 2 is not comparable with iray unless the mouth is closed? Is there a workaround or should I be returning the product?
If you run the Iray Uber Shader on all the surfaces you will need to put the appropriate .jpg files in the Diffuse channels for the inner mouth, teeth and tongue before they will show up. It looks as if the .jpg files aren't being loaded, even in 3Dlight, even although they are listed in the drop down menu when you click to add them.
A couple of quick renders. Both have had the Iray Uber Shader run on them. The lighting is different because I had to add a distant light in 3Delight to get light as the Iray one is only the Dome Environment which doesn't render in 3Delight :)
The first one is in Iray and the second in 3Delight.
Fishtales, thank you!!! To make sure I understand (and also let me learn, so I can figure out my own questions better in the future), please tell me if the following steps look right:
1) Load Cat 2 with an open mouth. Daz will automatically deal with everything but the inner mouth, even though it looks like the picture of the toungue is there in the map icon.
2). Select ALL the surfaces and run an uber base shader. There is no visible effect on screen when I do that, but it changes the way the program looks at stuff behind the scenes. if I was to render at this point, the inner mouth would still be missing and the rest of the Cat would look very much (but not exactly) like the rendered Cat in step 1. At this point I should also see the inner mouth maps that were present under "surface --> editor --> diffuse map" in Step 1 dissapear.
3) Go to Serface tab - editor -- diffuse map. The little square next to the map should be emptly. I need to click load, find the jpg file for those inner mouth serfaces (the one that existed in step 1 and dissapeared in step 2) and select it. Now i should see the difference on screen.
Does that seem right? :))
That sounds about right :) When you click on the square it will open a menu with all the loaded images. If you look through these you will find the relative ones. Just click on the one you need to load it.
Awesome!!! thanks Fishtales. the is the simplest solution of everything i've seen online. Step 2 is the one that didn't occur to me to try.
My test render has grown a bit :)
OMG, FISH, that is GORGIOUS!!!!!! Please please please explain what you did here. Especially, how is your tiger orange instead of the lighter beige from the first test, and did you apply anything other then Big Cat + Uber Universal Shader to make him so fuzzy and hugable. I am looking at getting a magic "make my genesis stuff look better please" product (other thread) and i'm wondering if you used anything specific on this amazingness.
To get him darker.
1) In the surface tab click on the SkinBody and SkinFace
2) In the Base Color channel click on the square with the image. In the menu that appears go to the top and click on Image Editor... and change Image Gamma to 0.00 and Accept.
3) To get it darker you can lower the Base Color from the default White to Grey, that image has the Grey set to 0.54:0.54:0.54
As far as the fuzziness goes I never touched anything it is just as it comes.
I hope that helps.
Amazing!