How to render dreamy hair?

I've just picked up Daz again after several years. I'm excited about all the new products, and the high quality of the new Genesis models.
Lighting, shaders and mats was always my biggest weakness. I never learnt how to set them right to make the best possible render my computer could do. But now I see a different kind of look that I adore! It looks so dreamy, almost like it's illustrated. Mostly, I see it on hair, but also on characters
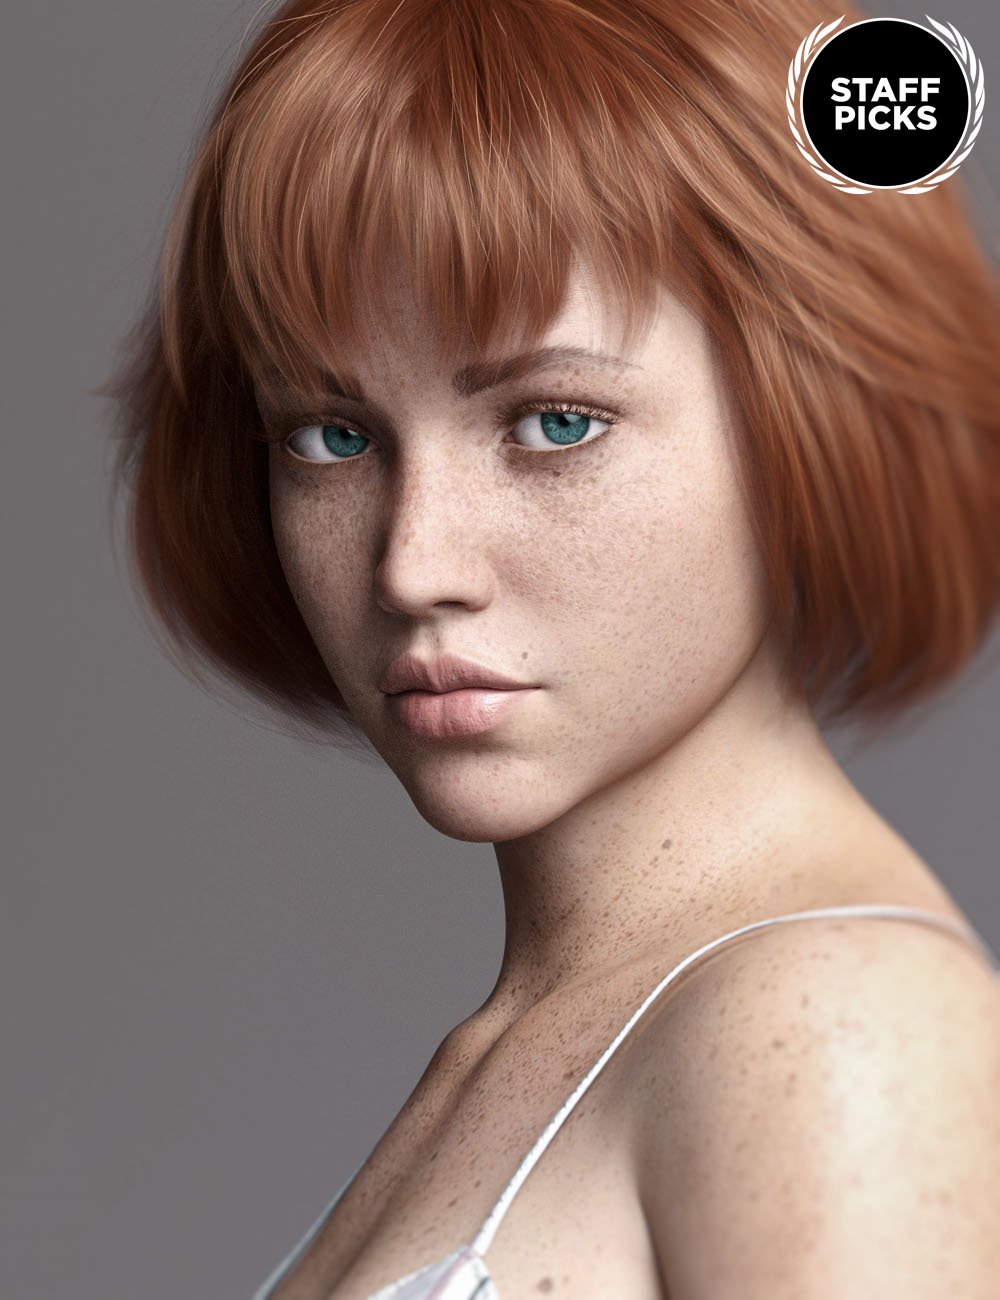
Examples of what I mean from Flora hair and Sienna HD for Genesis 8.
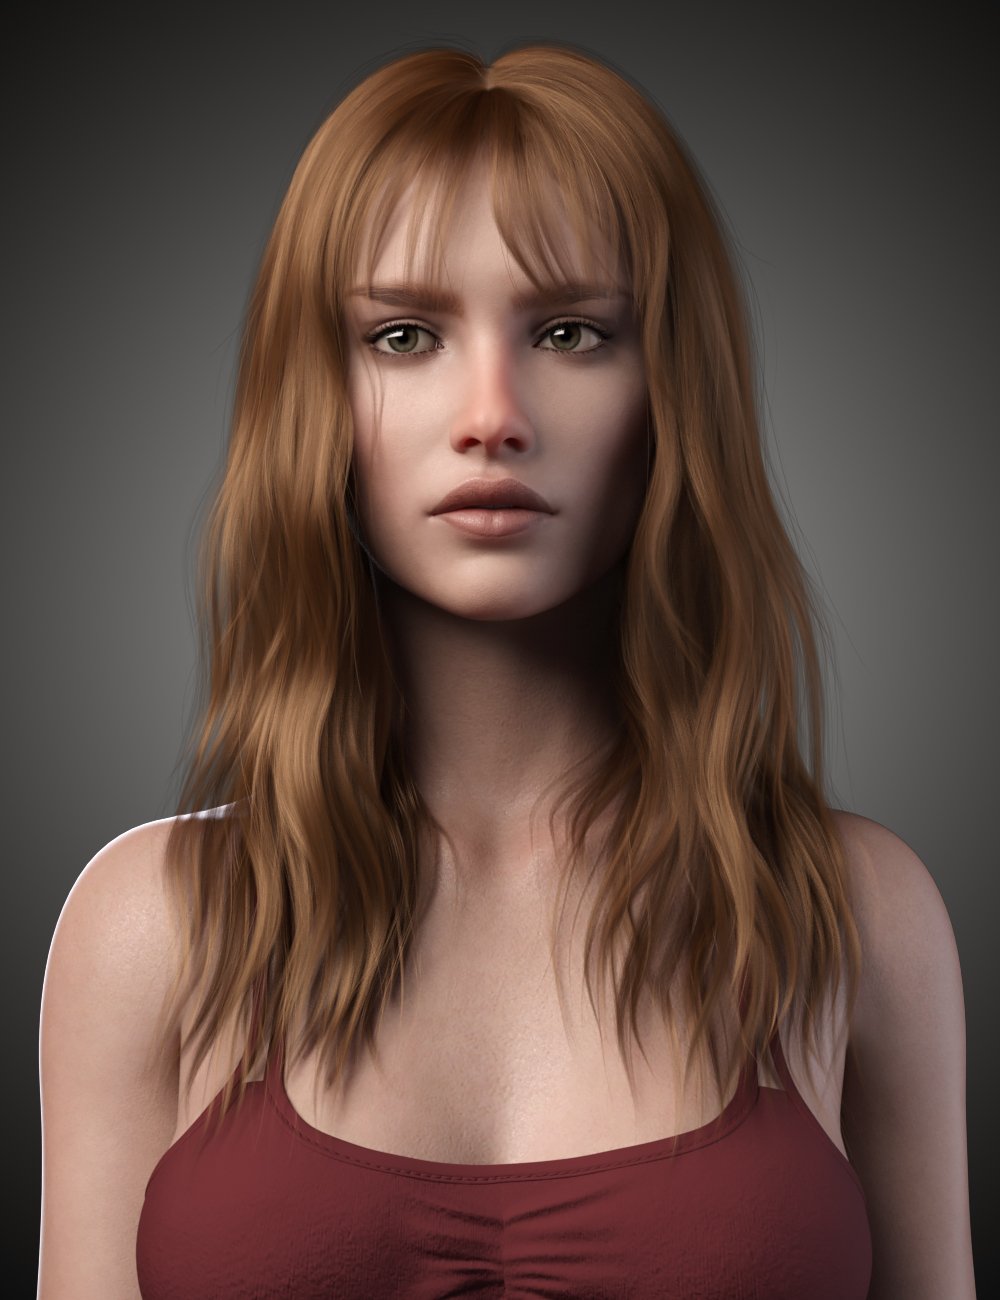
How can I make a render like this?
Daz 3D is part of 
Connect
DAZ Productions, Inc.
224 S 200 W, Suite #250
Salt Lake City, UT 84101
Licensing Agreement | Terms of Service | Privacy Policy | EULA
© 2024 Daz Productions Inc. All Rights Reserved.
Comments
Looks like standard portrait studio lighting.
Since Iray is an unbiased PBR renderer, real-world photography techniques will carry over easily.
For the second image, it looks like she's lit with a single spotlight to the right of the camera, at about forty-five degrees. You want to emulate what's called a "softbox". Change the spotlight's geometry to "Rectangle" and make it 50cm to 100cm in size. The bigger the softbox, the softer and more even the light will be. That's how you get those gentle shadows on her face. Then just turn up the lumens/turn down the exposure until it looks nice. The PA might've also done some postwork in Photoshop, by adding a subtle "Soft Focus" effect.
The second image is much the same, except the key light is to the left of the camera. There's also a weak fill light to the right and a rim light separating her from the backdrop. This isn't Daz-specific; just Google "three-point lighting" and you'll find a million articles and videos on how to achieve this.
Has nothing to do with lighting or materials, but the 2nd one especially uses Depth of Field and possibly Bloom, perhaps that's what you mean? Maybe look into those subjects.
Is it possible that the effect you're liking is created by those renders having used the Post Denoiser? Depending on when you have the Denoiser kick in, it seems to massively soften the details of hair in my limited experience...
Just in case you're not using it already and want to try, you can go into:
Render Setting Tab > Filtering
Post Denoiser Available > Set to ON
That adds Post Denoiser Parameters under it...
Post Denoiser Enable > Set to ON
Post Denoiser Start Iteration > This can be played with to try and find the right mix between affecting the Hair this way and possibly doing too much of the same to everything else in the Scene...
^ This Setting may depend on how many Iterations your Render(s) are generally requiring based on how the rest of your Render Settings look...
You can try the Default Setting of 8 and watch it continue to render from there, or try 100, 300, 500, 1000, etc. to get an idea of the difference.
Oh my gosh, yes that's it, Phatmartino! Thank you so much!
Oh good, happy to help... and happy rendering to you!
Sometimes, in portrait renders, you just want the dreamy hair, but you want the figure's face a bit more focus/sharper looking, you may want to try this other method I use often. Use Depth of Field.
Instead of using denoiser. I would completely turn that feature off. In Render Setting>Filtering> Pixel Filter Radius : Set to 1.0 or lower (default is at 1.5 <<This will give you a sharper render.
Next set your Camera' depth of field on. Using the depth guides to focus on the face, make sure the red line isn on the face. Set a low number for the F/Stop the default 22 is a good number for portraits. If you look at the guides the hair should be outside the focus area, while the face is in focus.
Using denoiser blurs out the entire render.
Using DOF you have a little more flexibility.
The disadvantage of the DOF method is it takes a bit more time to render your image.
Thanks a lot! I'm using both and playing around with them, trying to find out what works best for what I want.
As for the red line on the DoF crosshair...I thought that was supposed to be the outer border of the focus, so that the red/green crosshair would be at the nose, for example? Wrong?
The 'red' line is the focus, There are two other planes on each side of that red line. As you increase the F/stop, those planes grow farther apart giving you a larger focus area. The area outside those planes are blurred
Yes, then I've used it correctly. I was just unsure about the "don't let the red line be on the face".
Thanks for all these great inputs, guys! Really helpful!
Since no one has mentioned this, I'll add another way that might work for you. in addition to using DOF like JVRender sugested (I almost always use DOF - a great way to help focus attention), an easy way to get the soft focus effect you might be looking for is to take the last layer (unsharp mask layer) from my post you commented on in the other thread on detailed renders, duplicate it, run a Gaussian blur on the layer, then adjust the opacity/transparency to match the look you want. This can give a very pleasing soft focus effect, while retaining the enhanced details from the unsharp mask. (as others have noted, bloom can help a lot too).