Anamorphic Process in Daz 3D Iray
 Shoe_Lac3
Posts: 0
Shoe_Lac3
Posts: 0
Below is a copy/archive of the Deviant Art Journal I posted.
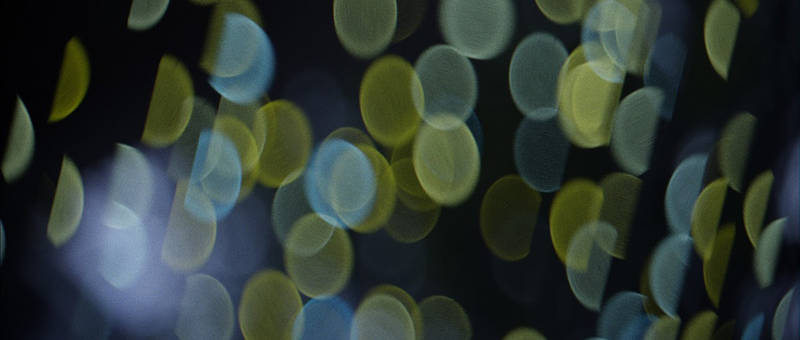
This is a detail write up on the experiments I've done and the methods with which you too can easily achieve the coveted (by select cinematography nerds like myself) "Anamorphic Bokeh" in Daz Iray.
TLDR instructions at end of the post.
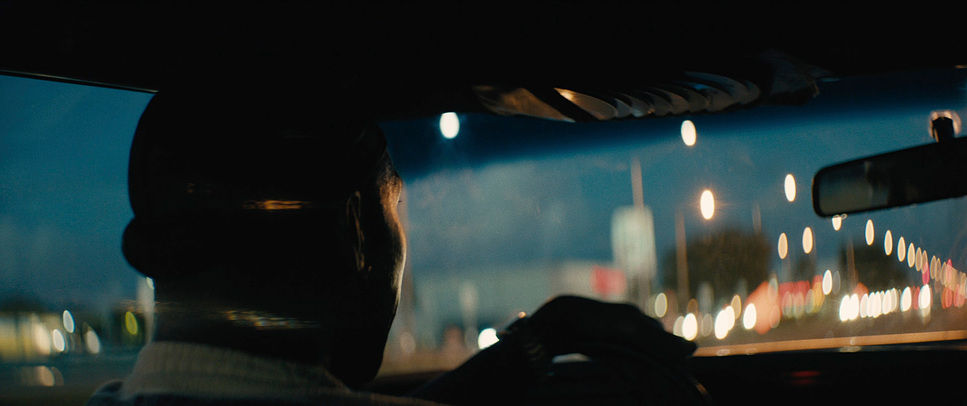
MOONLIGHT (2016)
Cinematography by James Laxton
Background
Ever since I started my Daz3D journey (roughly a year ago), I've been trying to find a way to achieve the "anamorphic look" with Daz Iray.
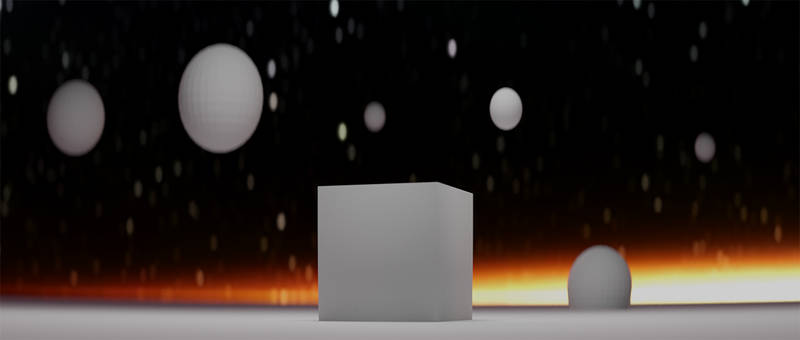
Blender Anamorphic Test
Since there are no render settings like the Aperture Ratio in Blender (other names/settings in other render engines), that can easily turn the bokeh into an oval shape, I first tried the post processing method - using a depth pass with a post process capable of producing anamorphic bokeh. In my case, I used a bokeh plugin in After effects, feeding the depth pass and adjusted the Aperture Ratio.
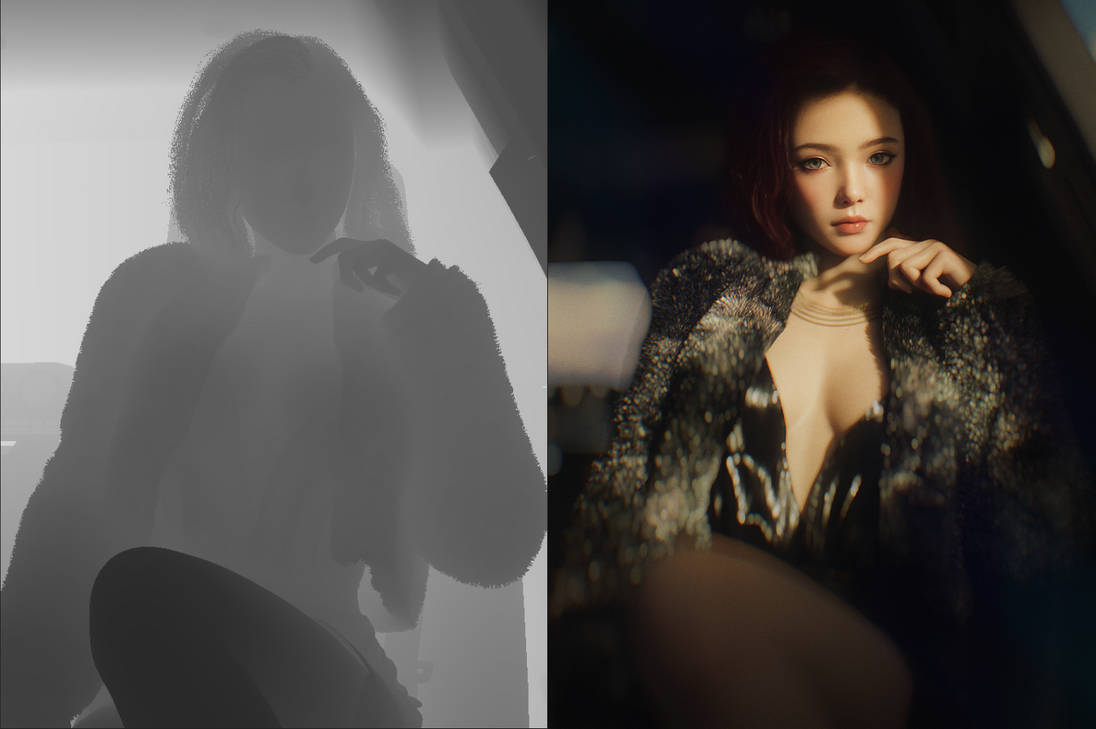
As can be seen here, while it can be somewhat workable, the effect is nowhere near the desired look. There are obvious ghosting around the subject edges, bokeh exposure needs constant babysitting and so on.
As far as I could tell, after a rather extensive set of testing of settings as well as different post-processing methods (photoshop, blender compositor, etc), the ghosting effect while minimizable to an extent, is not avoidable with the slew of options I had. (There are probably methods that doesn't have the ghosting problem, but I wasn't able to find one.)
* I've also tried Octane in Daz. But the plugin implementation was so half-assed and anti-user, I could not be bothered to give it a honest try. Where or not it has a bokeh setting I cannot remember. But hey, who needs Octane if it can be done in Iray, right?
Method
A while ago, by sheer accident/luck, I discovered the method by which the PHOTOGRAPHER 4 addon for Blender by chafouin uses for its bokeh effects - a physical obstruction in front of the camera to emulate the "failings" of a lens barrel in real life.
PHOTOGRAPHER 4 addon for Blender by chafouin
So, I employed the method in Daz Iray, and wouldn't you know it - IT WORKS.
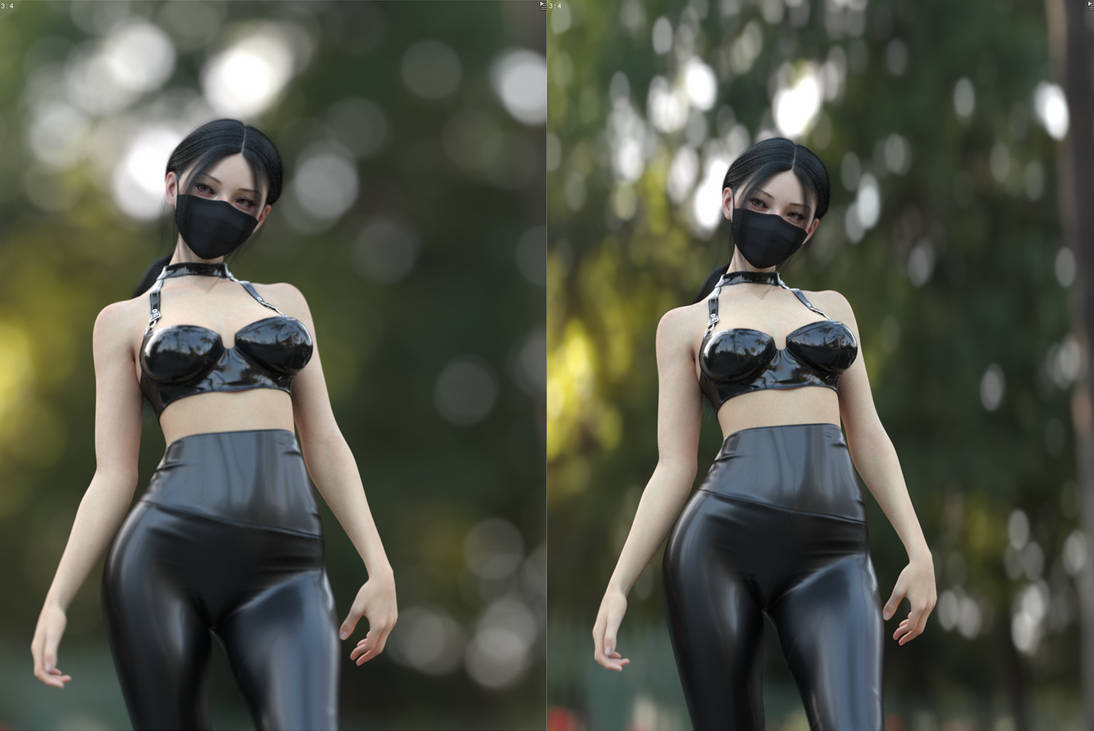
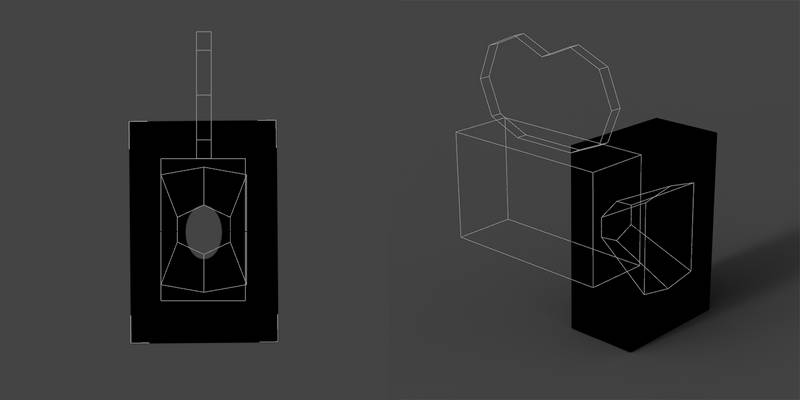
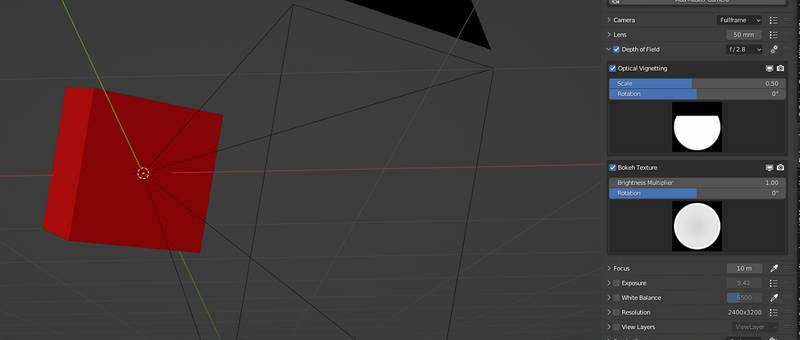
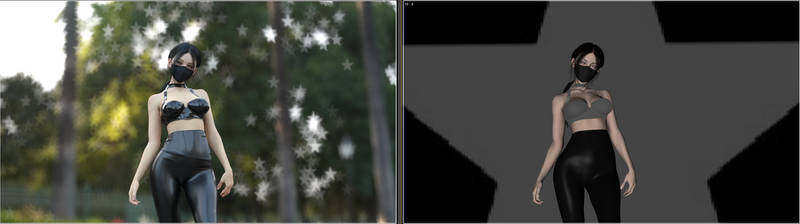
Basically, set up a completely black mesh that absorbs all light, cut an oval in the middle, put it in front of the camera as close as possible so that there's a black border in your camera view.
Then, you can either adjust the scale or translation of the mesh in relation to the camera, which will produce different looks and different strength of the Cat's Eye effect.
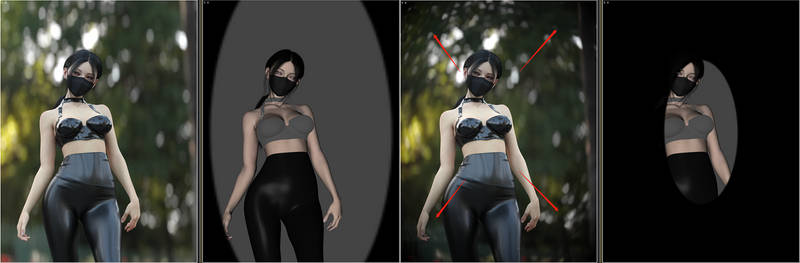
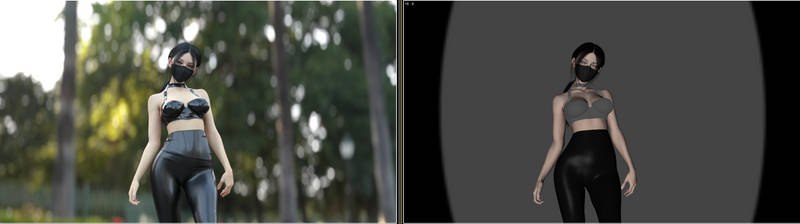
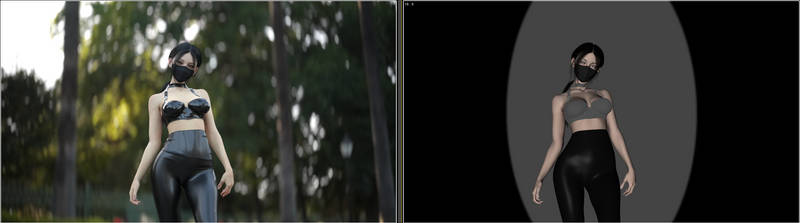
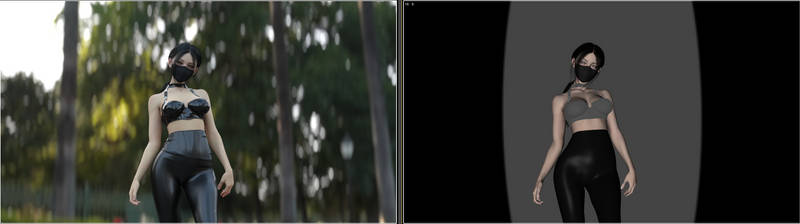
The more the camera is covered, the stronger the Cat's Eye effect. It also means less light is hitting the camera, but that can be easily compensated to taste in Render Settings > Tone Mapping > Exposure Value.
The bokeh will follow the shape of the cutout - more vertical cutout = more vertical bokeh. It also means:

I don't think I'll ever use this effect but it works - and actual bokeh effect instead of faking through meshed objects in the background I've seen tutorials & products for, which I find to be even less useful.
Barrel Distortion
Hobbs and Shaw (2019)
Cinematography by Jonathan Sela
Another important part of the "Anamorphic Look" is the Barrel Distortion, where the image gets distorted along the edges.
This too can be achieved in engine, by using the variety of Lens Distortion in Lens settings on the Camera.
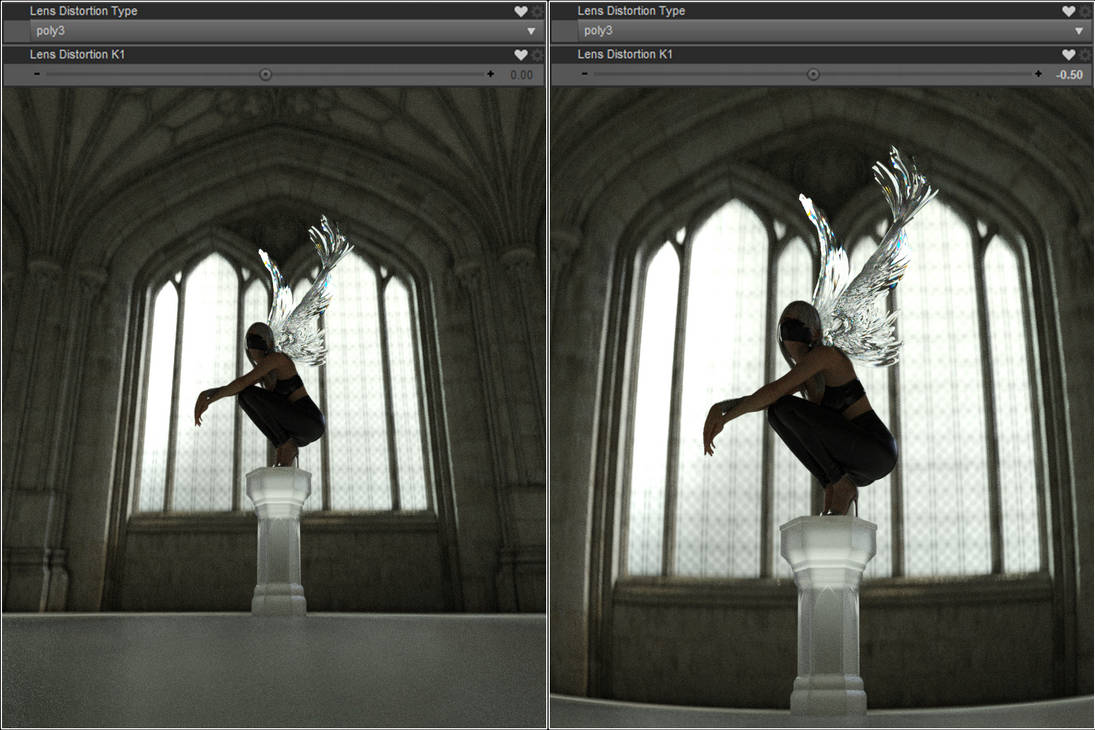
The various Distortion Types and Various Lens settings are poorly documented. You'd have to experiment with it yourself. But generally, I find adjusting in smaller increments of ± 0.1 to be more useful.
There are also different types of barrel distortion for Anamorphic which I won't go into here, but I believe they all can be achieved by using the inverted distortion or simply change to Positive/Negative Value.
Attached zip contains the mesh and textures I use for your convinence.
Usage:
- Import the OBJ (default settings should be fine).
- Plug in the desired texture into the Cutout Opacity of the OBJ.
- Make sure that the Glossy Layered Weight and Glossy Reflectivity is turned zero (so the mesh absorbs all light)
- Add a camera and zero it.
- Parent OBJ to the Camera.
- Adjust Translation + Scale for the vignette to taste.
- Camera F-stop (try 4, 8, 12) and focal length greatly influences the effect. If something doesn't seem to work or to your liking, try adjusting these first.
That's all. Hopefully this can prove helpful to any cinematographer nerds like me. Cheers~

Daz 3D is part of 
Connect
DAZ Productions, Inc.
224 S 200 W, Suite #250
Salt Lake City, UT 84101
Licensing Agreement | Terms of Service | Privacy Policy | EULA
© 2024 Daz Productions Inc. All Rights Reserved.
Comments
This is absolutely fascinating, thanks so much for this tutorial! Did you find any use for all the other distortion types? I tried them and apart from the "inv_poly3" they don't seem to do anything.
Also, is there a math-correct way to calculate how much of this distortion should be applied in relation to focal length (as in: to "accurately" emulate an anamorphic lens) ?
You're most welcome!
Here's a little demonstration of the different distortion types on K1 = 0.5
Poly3 & Poly5
Ptlens & Brown
Generally, you'd want to try K1 with increments of ±0.1, a few of these maxes out at ±1.0 where bigger values no longer has any effect. Other K values seems to have varied effects (doesn't seem to be multiplicatives of one another), exact relationships of which I'm uncertain of - nor do I have much motivation to figure out.
Spherical and Cylindrical warps the 360° space around the camera into a 2D image spherically/cylindrically, akin to 360° VR cameras. Distortion Kx parameter seems to have no effect on them.
Equiddistant I'm not entirely sure how it can be useful, but here's some examples of its effects:
Aside from Poly3 which I use for the barrel distortion, and Spherical/Cylindrical some people use for VR images, I don't see myself using any of the other distortions much.
As for "accurate" distortion of real life anamorphic lens, my short answer would be - I don't think so.
Each anamorphic lens - any lens for that matter - has different distortions, like fringing, cat's eye and other "artifact", factors of which is further differentiated by make, manufacturer, focal length and the sensor format it's sitting on - people go for particular lenses just for their unique distortions.
Best bet in my view would be taking a photographed chequered reference by a particular lens, and trying to match the distortion by eye, but I don't think there can be a one-fits-all equation for that.
All I do is "artistic estimation", and it's honestly close enough - for me anyway.
I used ThePhilosopher's Dynamic Lens Flare & Starburst package to good effect, by widening the starbursts.
This may be a stupid question(if it is, I apologise ahead of time) but...does it have to be "cut out" or can it be a tranmap to get the cut out?