Daz 3D is part of 
Connect
DAZ Productions, Inc.
224 S 200 W, Suite #250
Salt Lake City, UT 84101
Licensing Agreement | Terms of Service | Privacy Policy | EULA
© 2024 Daz Productions Inc. All Rights Reserved.Daz 3D is part of
Connect
DAZ Productions, Inc.
224 S 200 W, Suite #250
Salt Lake City, UT 84101
Licensing Agreement | Terms of Service | Privacy Policy | EULA
© 2024 Daz Productions Inc. All Rights Reserved.
Comments
Lol, bit more before I go to watch TV :)
great news FifthElement
Yep, did not participate once (unlike in Vue challanges, lol).
Too sleepy now, here is the quick render of what seems to be a spaceship corridor, will texture it tommorow :)
Another update: Ship section textured (will be replicated to the left and right).
Cheers
wip as you do
jkjhk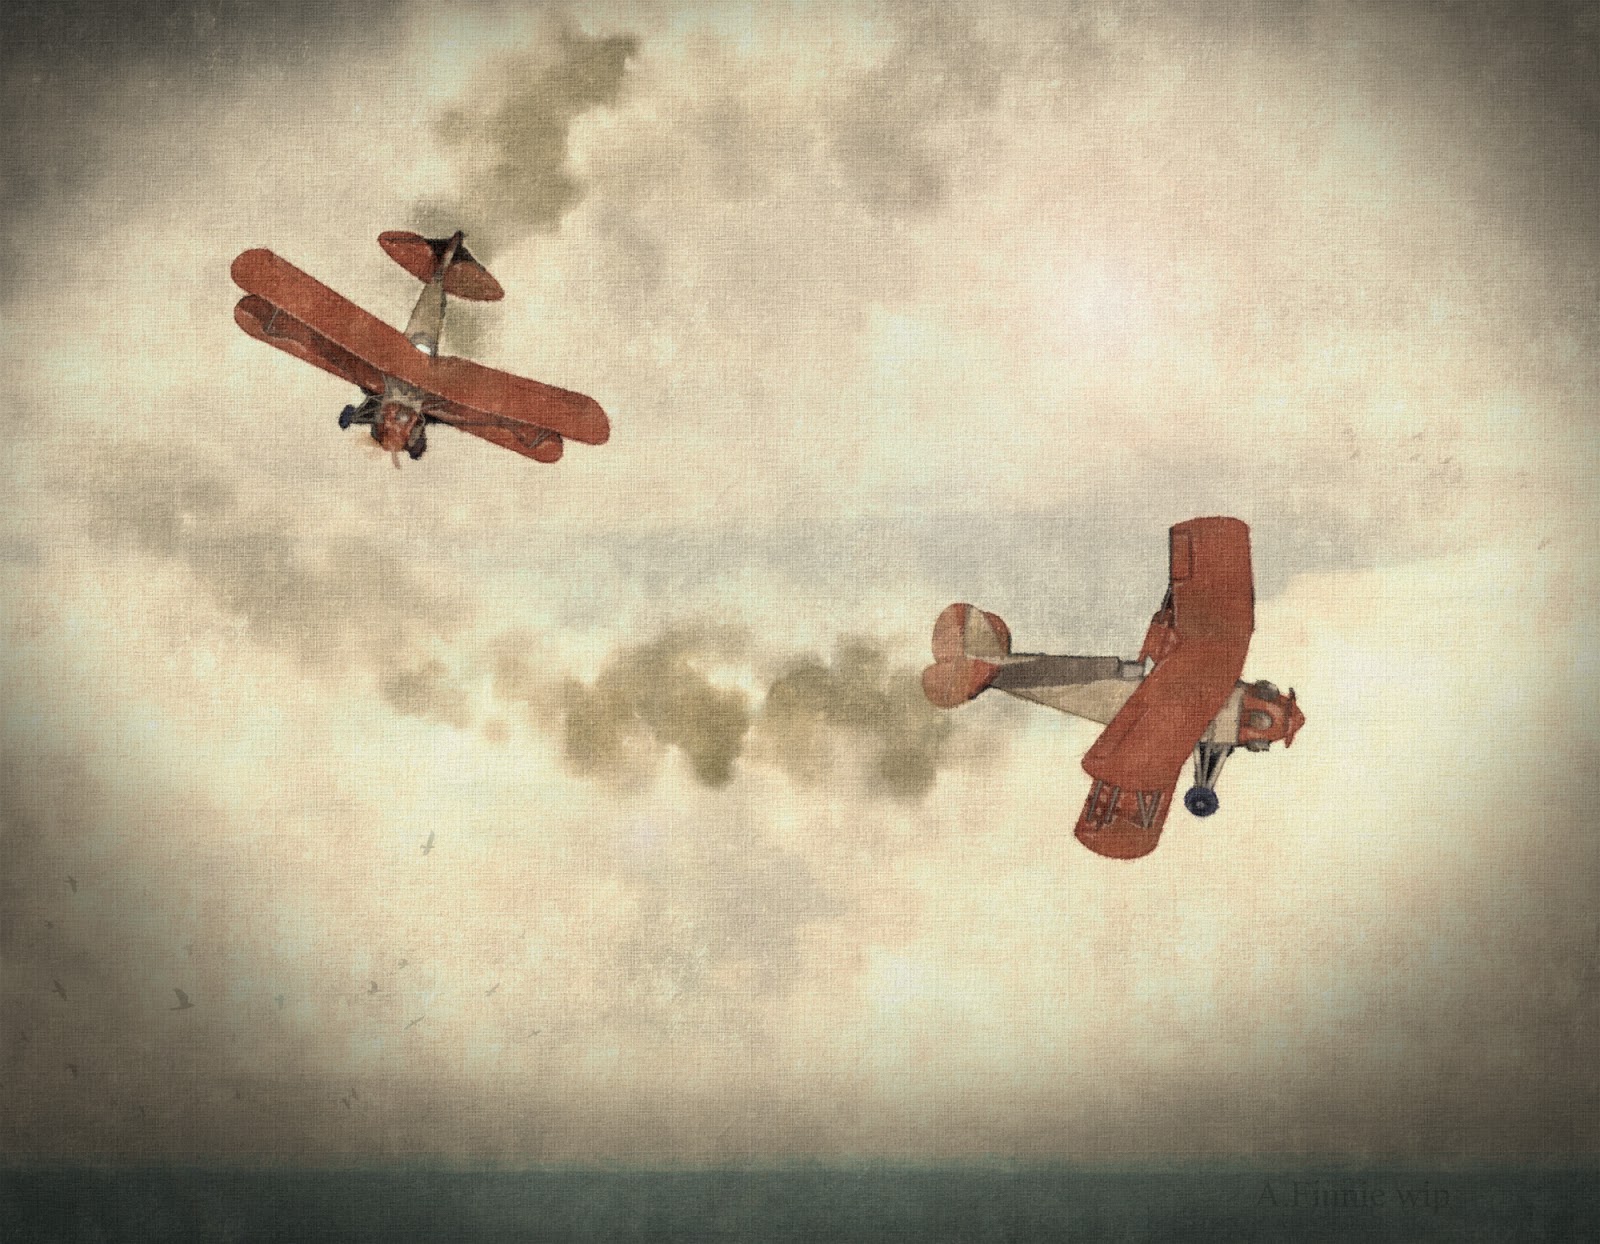
Will be using modified (by me) female from "Make Human" software
Starting to look like a racer...
Still a lot of detailing left to do. I'm also not to sure about the sketchy wing. Also have to attach a engine, of some sort.
The pilot will be Predatrons Lorenzo LowRez, but I have to make a flightsuit and helmet for him.
Would love to know more about your workflow on this.
Are you going to rigg her ? And if so, what program are you using.
I started adding a little detail to my buildings and am testing out some procedural textures on the larger buildings. Not sure if I like it or not - I UV mapped them too (that was a pain and I think I am going to try and unwrap the city base in Blender instead of Carrara) so I can always go back and paint the detail if I feel like it needs it.
I also worked on my clouds. I created a cloud texture in Photoshop by taking a blank 4000x4000 document, applying the clouds filter, blurring it and then painting over it at various transparencies with some clouds brushes I found online. I used this as the diffuse, bump and displacement on a simple plane primitive in Carrara, put a gradient in the Alpha so it fades out at the far end and then surface replicated 30 low density volumetric clouds across the plane with 360 degree rotation in the Z axis and 25% variation in size.
I think it's looking pretty cloudlike, but I'll probably tinker with it a bit more.
Hi.
Make Human software (it is free and so are the models) exports characters in multiple formats with skeletons attached (i'm using FBX).
She just needs to be posed and textured to my liking, I used one of the default textures and modified it till I was happy with it
Hope that's not against the rules, lol.
I think this one is more or less done. I may play with the composition a little bit but it's pretty much how I pictured it.
Now on to my second entry since I actually have time for a change!
Edited to add some other views of the finished cloud city (see attachments).
Fun ideas keep rolling in.
@Varsel - I always enjoy your models. Note, that link to the concept page dosn't seem to be working for me. Not sure about everyone else.
@FifthElement - I love the detail in the window set piece. And using and customizing MakeHuman is not only OK, it is highly encouraged. Any other tips on how your workflow are most welcome.
@Headwax - huge fan of the look of the biplane scene. Did you get the plane somewhere or did you model it?
@Mark - another great render came together. Congratulations.
EDIT: @MDO2010 - another great render came together. Congratulations.
LOL, @diomede - "@ + Mark" is apparently an actual forum name and they are probably wondering why they just got a mention from you in their notications. :)
RE: LOL, @diomede - "@ + Mark" is apparently an actual forum name and they are probably wondering why they just got a mention from you in their notications. :)
Oops. Sorry.
Some nice works in progress !
This topic made me think of this superb aerial trip realized by Mec4D: “The Land of the dragon”
You said “Bryce”… no it's all “Carrara” !
I have a concept but having problems getting the Nebula created.
Trying to follow a DS tut butit uses the Opacity Chanel
Need to find out which shader option in Carrara is doing the same function as the DS Opacity Channel.
Then I may get it.
If not I have an alternate image in mind.
I'd guess it's Alpha, Transparency or Translucency depending on what exactly your're going for - can you post a link to the tutorial? Could probably tell you exactly which channel to use if we can see how it is being used.
Here's my first test of my second idea. G2F with Ringomonfort's Gia 6 shader and some Carrara dynamic hair with a little bit of a force applied to move it like there is some wind blowing. The landscapes in the background are using textures from FilterForge. I'm not too sure about the clothes - I just threw some semi-random items from my library on the character and didn't do anything to the textures...she could have climbed that outcrop in that outfit while carrying that staff, right?
The pillar is was made by exporting a vertex cube from Carrara, importing it into Sculptris Alpha and roughing it up then exporting and re-importing to Carrara. The result is majorly high-poly but it's so close to the camera that I think it's worth it - with a stone texture from FilterForge added I think it came out nicely. This was my first attempt to use something modified in Sculptris in Carrara.
Still have to fix up and finalize my textures and lighting and play some more with the wind forces - I had one result where the hair was blowing almost straight out to the left that was seriously cool, except part of it was going through her head.
It is the SCI Fi Space Battles Master by Dreamlight so it is a video.
Creating a black and white image in photoshop using clouds filter then saving it as a JPEG and putting it in the opacity channel and using the color to make it look the color you want on a plane.
i will try it again tonight and see how itgoes.
i will follow the DAZ Studio version to make sure I get it there and if need be I can then Export.
I would put the clouds pattern in the Alpha channel. Then instead of using the Color channel to control the color, try putting a color in the Glow channel - I just tried it and I think it looks a little bit better. You can also get some neat effects by copying the cloud image from the Alpha channel and using it to control a color gradient in the Glow channel. :)
Have you considered volumetric clouds? You can change the color to whatever you like, they react to light, you can add multiple clouds, you can render them with alpha so they can be composited in a photo editor.
My favorite image that has clouds as a nebula also uses a Hubble image as the backdrop and helped me to set the color scheme of the clouds. I used several, but used a bit of forced perspective to avoid intersecting the cloud objects, which can increase render times.
I was going to say "evilproducer has used volumetric clouds to create a great version of this effect" and while I was off searching the forum for the image, the man himself comes along and posts it!
thanks @diomede :) sorry I was asleep, nah, I modelled a spit and a me109 a long time ago, but I dont have enough time to model things now . The biplane was free and is untextured, I cant remember where it's from but will hunt it down. You can see the planes (spit and me109) here if you like (45second mark) - https://youtu.be/wlcUcwb92rA?list=PL1A984D8F4DC89629 it's when I used to model everything I used - the olden days - before I moved over to the dark side heheheheh ..... heehheheheh
More progress, rendered background for my scene.
Earth (2 renders, day and night maps blended), Moon and distant shipyard are all different layers rendered in Carrara and composited in Fusion :)
Looks a bit like the Great Lakes biplane at ShareCG
http://www.sharecg.com/v/25978/browse/5/3D-Model/Great-Lakes-Biplane-Model
Great work by everyone !!!!!!!
I noticed EP's other post on the let it Rip and was starting to look at the volumetric clouds as I see they seam to look more realistic.
I did creat some shaders that were intresting by putting it in the alpha and playing with the other settings but I think the cluds will be better as the plane was looking really fake.
Now to learn about volumetric clouds, read the manual at lunch and watch Phils videos tonight.
bought some howie farkes in the sale.
using:
http://www.daz3d.com/classic-rolled-hair
and it's colors.
http://www.daz3d.com/lux-lucis
http://www.daz3d.com/interceptor-hover-bike
http://www.daz3d.com/helena-for-v4
for the eyes.
http://www.daz3d.com/victoria-4-skin-maps-high-res
http://www.daz3d.com/stoney-creek-sprucevale
i made the: beames, with veloute, the lights, with light spheres, where they hit the scene, and a light for the terminal in the bike.
three points of view:
I would suggest starting with some of the presets in the object browser and experimenting with them a bit.
Very nice job on the speeder bike and blaster beams.
Have you considered using a particle emitter for sparks where the beam looks like it is hitting the tree? The other possibility (and I'm going to sound repetetive) is a small volumetric cloud. With the right settings and the right lighting, it can look like an explosion, even if it is supposed to be a small burst.
Here's an example of a cloud used for a large explosion. The cloud is lit by two lights, set pretty bright (maybe 150%) and different colors. One a saturated yellow and the other a saturated orange skewing towards the red end a bit. The are also not quite at the same position. The lights are within the cloud and the opacity for the cloud was set fairly high along with the silver lining setting. I think I left it white and the lights color it.
More progress again, this time foreground with replicated sections, female, some kind of screen/monitor and little ship-bot on the left as tribute to my favorite scifi show "Farscape" ...
Several passes rendered in Carrara and then composited in Fusion