Above the Fog
 DarkRepast
Posts: 223
DarkRepast
Posts: 223
in The Commons
Hi there,
I picked up Above the Fog. Promos look great. I can't seem to get it to do anything. I'm not sure what to select to change the density for example and when I did a render, it just looked like smoke colored water with no wisps to speak of, making the scene look like there were big waves at sea.
I checked the documentation but I didn't find anything super helpful there.
Anyone else have some luck using this? Can you let me know what I should be selecting in order to apply adjustments?
Thank you!
Daz 3D is part of 
Connect
DAZ Productions, Inc.
224 S 200 W, Suite #250
Salt Lake City, UT 84101
Licensing Agreement | Terms of Service | Privacy Policy | EULA
© 2024 Daz Productions Inc. All Rights Reserved.
Comments
Are you using 3DL or Iray?
Mostly IRAY but I tried both and couldn't seem to get the fog to be affected by material changes.
In Iray, you aren't likely to get much beyond 'billowing fog.' Iray lacks any ability to get fine clumpy structures. 3DL SHOULD work, but I'm not as familiar.
A ha. I see what you mean. I really studied the different promo pictures.
Interesting.
Thank you!
I'm still not sure how to apply the Density Materials though...
Select the prop in the scene tab. Go to either smart content or content library. In smart content, under materials, you will see the icon for Above the Fog. Double-click to open and you'll see all the choices. Be sure to match material to render engine. So if rendering in 3DL, choose 3DL materials. To apply a new material, double-click to load. You will not see anything happen in the preview window. To see the effect, you have to render - either full or spot render or have the auxiliary viewport open and rendering.
I find the content library easier to use than smart content as the choices are organized in file folders: color, density, puff contrast, puff size.
Hope this helps.
I haven't had a cahnce to use this yet, but if it's like other 3Delight volume effects you need to make sure the camera is not inside the fog object.
You are correct. I did the attached render in Iray and accidentally had the camera inside the fog and had nothing but white on the render. A funny coincidence, my female's hair kept disappearing depending on camera angle through the fog. One minute she was bald and the next she wasn't. I found that I could get small clumps of fog when I lowered the entire prop so that just the top showed through the ground plane. I did have to go into Gimp and do some slight post work on the fog. I darkened it in spots and played with the translucency. Not too bad for a first effort.
I'm actually having trouble with the product in 3delight. It is really tough without seeing it in the main viewport.
Yeah, it is tough to see. I'll definitely play with it and see some results. Thank you all very much for the suggestions. I haven't played with any volume effects. I appreciate your time! :)
Hi everyone, Hi DarkRepast - the ReadMe is here and has some tips and tricks: http://docs.daz3d.com/doku.php/public/read_me/index/23201/start
The Commercial thread is here and has a bit more info: http://www.daz3d.com/forums/discussion/65141/above-the-fog-for-iray-and-3delight-now-available-commercial#latest
Thanks so much RGcincy- right on target there! Especially with using the content library instead of smart content.
Mainly what I see here is making sure that you use the right prop for the right engine (Iray or 3Delight). They use the same geometry but the materials are completely different, the effects are different. This difference is shown in the promos- look for Iray or 3Delight somewhere on the image. Also for both 3Delight and Iray you'll be able to see the prop if you switch to Draw Style: Wire Texture Shaded. Once you see it you'll know where to transition it, how high to raise or lower, and how to keep the camera out.
I'm working hard to keep my products as simple and fun as possible, my instructions clear. The ReadMe is accessible through the DIM (the blue "I" next to the product) and I'll always put a link and more info in the commercial thread.
I should get notices if there are any more posts here but that has been hit and miss. Please send a PM if I don't respond in a day or so.
I'm glad I came across this since I'm trying to figure it out also - thanks to all that have commented!!
DBB
I'm wondering if anyone that deals with DAZ's documentation pages could fix the missing images on the D-Form page? Can only hope they see this!
Great product, well done Marshian!
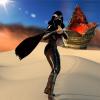
I posted an image in the gallery that used this in Iray.
http://www.daz3d.com/gallery/#images/92594
I had originally attempted to create my own fog - marginally successful. Once I bought this, I updated the image to use this product. The fog along the ground is the from this product. (Not the swirl in the portal - that's still custom stuff I did.)
This fog looks pretty good. This is the base material - I didn't apply any of the other materials as this was pretty close to what I was looking for.
I wish I could fix the broken links but I can fill in the blanks here using copy from the Anatomy of a D-Former page. The other two pages from that link D-Form Tab Options and The D-Form Spline Editor are not as useful.
The D-Former Base
The Base looks like a flat, circular disk. It loads into the scene directly beneath the D-Former Handle. The Base defines the baseline point from which mesh deformation occurs when you move the D-Former. Move the Base to where you want the center of the deformation to occur.
The D-Former Handle
The Handle looks just like a toy top with a long spindle. It rests on the Base when first loaded into a scene, and is listed as child to the Base in the Scene Tab.
The handle helps DAZ Studio determine how much deformation you want. The further from the Base that you move the Handle, the more deformation will occur.
To pull the mesh, pull the Handle away from the Base.
To shove the mesh off to one side or the other, move the translation sliders of the Handle off to one side.
To push the mesh, push the handle down through the base.
To twist the mesh, twist the handle along a rotational axis.
To squeeze or stretch mesh, use the scale sliders.
To restore the mesh to its original positions and sizes, set the handle’s translation and rotational settings to 0.00 on all three axes, and all scaling to 100%.
The D-Former Field
The Field appears as a wireframe sphere that surrounds the Base and Handle. The Field determines the size of the area that deforms when you manipulate the Handle. When you create the D-Former, the Field tries to encompass the entire node to which the D-Former is applied. You will likely have to position and shape the field to taste before you manipulate the D-Former.
The strength and amount of ’r;pull’ that a D-Former exerts within this field falls off from the center, with the weakest point being on the edges (by default.) For more information on how to edit this, please refer to the D-Form Spline Editor reference later on in this chapter.
TIP! If the vertex colors are hard to see, or if you want to display different colors to show the amount of strength, select the D-Former in the Scene Tab. Then open the Display group in the Parameters Tab. You will see options to change the minimum and maximum strength colors, and a slider to change the Point Size. Move the slider toward the right to increase the vertex size. You can also use the Display Weights button to turn off the vertex display.
I'm going back to the commercial thread and add a link to this post.
Let me know if you have any other questions. The D-Former is a really fun tool- try it out on some other props and figures. You can load a new one by selecting the object you want to D-Form in the scene tab and then clicking on:
Nice use of the prop- A very subtle way to create depth that brings out the front figure. Thanks for posting! It's great to see what other artists are doing with my products. That green cloak has a very interesting texture.
Thanks Allessandro! I'm looking forward to exploring and adding some fog to your environmental products.
Thank you. The green cloak is one of the "Medieval Cloaks for Genesis 2 Female(s)" and I applied a Jade Iray glass shader to it. Glass on clothes can produce some interesting effects.
Had a quick go - 3Delight version:
Marshian thank you for the info on D-Form. It will be so helpful to me!!
dbb
Thanks for the quickie SimonJM, there are some real tasty areas in that render. The mood translates very well.
You are welcome, there is a bit to review there but I feel you will pick it up quickly- Especially when using it on this prop as you really only need to adjust the scale of the field and then raise or lower the D-Former Handle. Note that if this is pushed too far the fog might work unexpectedly and/or you might see the straight edges of the mesh, in which case converting the prop to Sub-D will smooth it out. Sub-D should be considered a last resort to get the effect you are after as it can really slow things down.
I'm getting an error when I try to use the "Use Draw Style"
I double clicked it and got this error
*** Scene Cleared ***
File loaded in 0 min 0.4 sec.
Loaded file: Above the Fog.duf
*** Scene Cleared ***
*** Scene Cleared ***
File loaded in 0 min 0.4 sec.
Loaded file: Above the Fog.duf
R:/!!!!_AbovetheFogforIray_runtime/Props/Marshian/Above can someone help me?
dbbThe Fog/Iray/ATF Instructions.duf (1,1): Syntax error - expected '{' or '['
Error reading file, see log for more details.
I'm not sure how to activate this - can someone help?
dbb
dbb- Ouch- not sure what to do here as I've never seen an error from Draw Style, I cant duplicate the error. It should not be clearing the scene. I suppose it could be taxing to switch a DrawStyle if you have the Aux Viewport working on a render. If restarting D|S and trying again doesn't work you could post your error message here: http://www.daz3d.com/forums/categories/technical-help
OK - I closed and restarted
I loaded ATFog then doubles clicked the Draw Style icon the I realized that you mean to change the drawing view in the viewport and not to click the icon.
Does this make sense to you that I was trying to change the view by clicking your icon and not the view setting in the viewport?.
Basically it just me and not your product!
Thank you!!!
dbb
Oh yes I see. I wished it worked that way. I put instructions in multiple places to make sure they are seen- the drawstyle is one o fthe most important so thats why I made an instruction icon for it. I can see how that would be confusing. Another couple ways to see things easier: I toggle Window/Preview Lights off and on and use DrawStyle Smooth Shaded, this will also speed up camera movement as no texture maps need to be previewed. Smooth Shaded will not show the fog prop though.
Glad you are back on track!