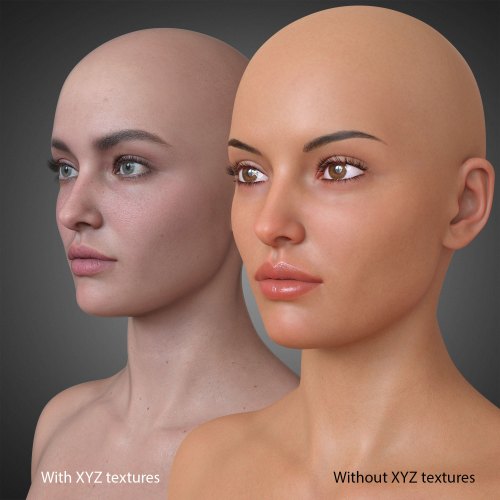
Ready for a Closeup: Texturing XYZ Makes Realistic Textures a Breeze

When we launched Genesis 8.1 with Victoria and Michael, we introduced and updated several unique features to the Daz 3D Character System. Some of the most prevalent include UV and shader improvements with additional support from Texturing.xyz. Their incredibly detailed skin textures and resources streamlined the process of creating photorealistic skin on Victoria, Michael, and many more 3D characters.
We’d like to give you a peek behind the curtain and see our artists’ processes with Texturing XYZ as they created the most lifelike characters we’ve ever offered. Hyeseon worked on Victoria 8.1, Kayeleyss worked on Michael 8.1, and Yannek aided in both characters’ development.
Victoria 8.1
Hyeseon, a Daz Senior 3D Character Artist since 2008, has created over 100 realistic human characters. Hyeseon said, “I only had a week to finish sculpting Victoria 8.1 head to toes. Even though I have worked on so many human characters, this was a challenge for me. Texturing XYZ helped me to enhance the photorealistic skin details and made my workflow easier and faster.”


Here Hyeseon describes the steps taken to bring the Victoria you all know and love to life.
1. Train Your Eyes: To sculpt a realistic figure in 3D space, you need to pay attention to accurately capture the figure’s proportions and anatomy. Studying anatomy and having good observational skills will be beneficial to you. While I attended art school, I focused on traditional art classes such as Figure Drawing, Ecorche, Human Anatomy, and Lifesize Sculpting, even though my major was computer arts.
Having a strong traditional art background really enhanced my artistic eyes and gave me a deep understanding and knowledge of human anatomy. It also gave me the ability to interpret and transfer what I see through my eyes to any media I want. If a person is unable to draw or sculpt a human in real life, you would not expect that she/he can sculpt a realistic human in 3D space.
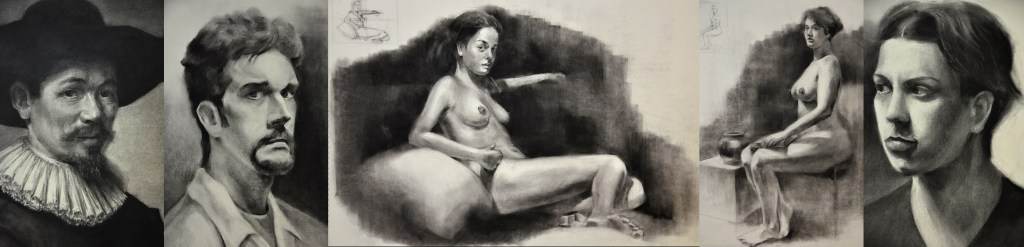

2. Sculpting: My task for Victoria 8.1 was to create a realistic and beautiful female in her early 20s. Personally, sculpting young and beautiful girls is more difficult than sculpting a muscular man since all the features are very soft and subtle. If I put too many details or enhance the anatomy too much, the face often ends up looking masculine and old.

I first gathered some photo references and videos that fit her concept. The more references you have, the more accurate details you can put into your sculpt. Video clips can give you the outline and volumes of the person from different angles while keeping the same camera setting. With photo images, make sure the focal length of the camera is the same on both the image and the viewport in Zbrush. I prefer to sculpt by looking at the references instead of sculpting from my imagination or anatomical knowledge. What I know in my head is often different from reality.
Also, If you keep working on your model for 16 hours straight, your eyes will adjust to what you are looking at and make you think you are doing a good job, but you most likely are not. Checking your sculpt from a distance, zooming in and out, and viewing it upside down are good ways to find out if there is anything wrong.
3. XYZ Displacement Map (Killer Workflow): Once I reached the point where I wanted to add skin details, I used Killer Workflow. I created a plane and projected the plane onto the face using Zwrap. Then, I baked multi-channel displacement, albedo, and utility maps using X Normal. Albedo and utility maps are to give texture. For the sculpting process, I only need multi-channel displacement maps.

I cleaned up some messy areas, such as the eyes and ears on the multi-channel displacement maps, and exported out RGB channels that are going to be used as secondary, tertiary, and micro maps.

This is how she looks with secondary, tertiary, and micro displacement maps applied. Then I added some more fine details.

For the leg details, I used ‘Female_leg_02’. For a fast, easy approach, I cut the map into small pieces and use them as alpha brushes in Zbrush. I used the same method on her elbows.

4. Wrapping Up: I typically work in a fast project turnover environment. It is difficult to spend a day or two just to place pores and wrinkles and reach the level of the details that scan data has. Texturing XYZ helps me to approach hyper-realistic skin details quickly. It makes my workflow very efficient and elevates the quality of my characters. Thank you to XYZ for giving me a chance to share my experience.

Michael 8.1
While Kayleyss worked on the sculpt for Michael 8.1, Yannek did the work with Texturing XYZ. Once he finished the projection process, he gave the files to Kayleyss to incorporate into his sculpt. Here are Kayleyss’s notes from the project.
- Copy the head to a new subtool and increase the poly resolution
- Apply the displacement map made by Yannek

- Cleanup the eyelids, mouth, and ears, plus add some extras details and cleanup

- Create a normal map of the details

- Go back to the original resolution and project the details onto the full mesh


- Use GoZ to Daz to bake the shape for a level 4 HD morph
- Here’s a comparison between the detailed and non-detailed sculpt


Commenting on the usefulness of XYZ in the process for Michael 8.1, Kayleyss said, “I like the variety of skins they have and the way it speeds up the process to get well-placed details like pores, wrinkles, etc. for the character.

Yannek added, “Texturing XYZ provides content that helps to achieve better accuracy in human and creature skins. I don’t need to worry about removing highlights from the iris photo reference or skin maps as they contain only necessary data like albedo, displacement, and bump or cavity maps. Micro maps can fill missing detail or help with skin continuity and scanned full body parts, like the legs or large patches of the skin, can add extra accuracy. Also, multi-channel faces contain three layers of detail that can be used separately or mixed to achieve desirable results without worrying about pores size or proportions.”
Texturing XYZ Is Daz Artist-Approved
3D artists have to pay close attention to the little details on their characters to make them as lifelike as possible. Even pore and wrinkle placement make a difference! However, these artists spend so much time perfecting every other part of their characters that they often don’t have much time left for those details.
As our Daz artists worked on Michael and Victoria 8.1, they set out to make the most realistic male and female characters the Daz platform has ever seen, and they succeeded, thanks to XYZ and their streamlined process and resources.
But it’s not just Daz artists that are impressed with the lifelike skin textures from XYZ! Blitter, the creator of viral photograph look-alikes, told us he was very excited about the implementation of these resources as it leveled up the quality of his own work.
If you’d like to learn more about creating the props for Victoria and Michael, check out this article, or browse more great info on our blog.
