the back of her head

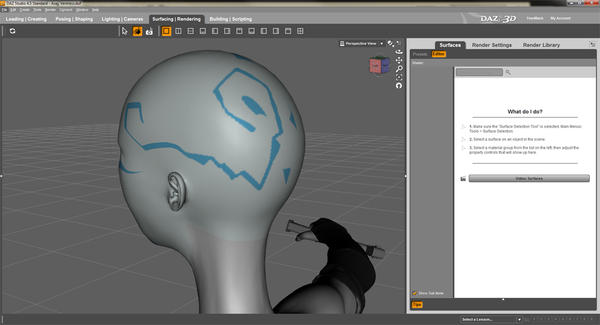
I'm playing around with a Genesis texture, and I'm I'm getting some serious pixelization of my texture on the back of her head.
The V4 textures are 2048x2048, and I've even cranked up the body texture to 4096x4096 in the hopes of smoothing things out, but it even renders like this.
Help!
help-1.jpg
960 x 520 - 158K
Daz 3D is part of 
Connect
DAZ Productions, Inc.
224 S 200 W, Suite #250
Salt Lake City, UT 84101
Licensing Agreement | Terms of Service | Privacy Policy | EULA
© 2024 Daz Productions Inc. All Rights Reserved.
Comments
What figure are you using? What texture are you trying to apply, and how?
Have you checked the Surfaces pane under UV Set as shown?
Genesis is mapped to V4, K4 and M4, as well as M5 and V5, you have to slect the correct UV set for what you are using.
Without seeing the texture, it's hard to say what's going on here. One thing to note however is that the workspace viewport uses reduced texture detail so you won't see the full quality until render in most cases. This is done to reduce the overhead so you have more memory to work with. If it's showing the same detail in the final render, then your texture is likely not detailed enough. Simply resizing an image won't add detail, it just makes that same detail take up more space in memory. Using a bicubic filter might help to smooth things out though.
In answer to the questions:
@ Jimmy_C
Figure is Genesis
Texture for both the face and back of head, is vector, built in Adobe Illustrator on top of the V4.2 template downloaded from Daz's own site & saved as jpg.
Have dbl checked the UV map setting & it is set for V4. (I also have the v5 maps, just in case).
@ HeraldOfFire
Body/back of head texture attached & reduced to 2000x2000. Help1 is full tex, Help 2 is just a detail shot.
As stated above, they're vector at this point, since I'm just trying to get the placement & shapes of the markings/tats correct.
I know about the low rez texture for workspace thang, but I ran a super slow render and it looked the same. Which drives me nuts because the face looks awesome, the shapes are all smooth, and the back of her head looks like... well... arse.
What you are running into is a mixture of the Distortion or Stretching of the UV map when your image is loaded onto the figure and the Auto resize of textures when loaded into the View port. If your render is so (Some distance) far from the camera a reduced texture is auto used to save on over head. Your Tattoo will need to be reshaped so it matches the UV streching and shrinking as the UV map shows. Also blending the tattoo to the under texture with anti aliasing will help the second part.
That is all I can think of that might help you. If it helps at all.
Hello baxart. Sorry you're having trouble. I think from what I have read so far that I may understand what the trouble may be. As some have mentioned, Genesis has the ability to use several existing texture maps of previously loved characters:
https://helpdaz.zendesk.com/entries/20699778-genesis-uv-map-texture-template
Each figure has their own set of texture maps. There are several different texture maps needed for various parts of the figure. One for the head, One for the limbs, etc...
Genesis can be changed to take textures for various characters and you will need to make sure you have the right set of textures and the right setting in order for them to show up properly.
For example, if you want to use V4's texture map, you may first want to download the templates for V4. They can be found in the Resource Files near the bottom of the product page here:
http://www.daz3d.com/victoria-4-2-base
You can use these templates to help you figure out exactly where and how you want your tattoo (or other texture) to show up.
Once you have your design figured out, you will then have to set the Genesis map to V4 in order to use them. You do that by first selecting Genesis in your Scene tab and then changing the UV Set to Victoria 4 in the Surfaces tab. (scroll down).
Hope this helps. :)
Okay. I seem to be getting a lot of the same info, so I must not be asking the right question.
I'm using the V4.2 texture templates from Daz, I've even tried the V5 templates (which have guides and are nicer!).
I know that the display plane is showing a low rez version. (see: help-3 for renders)
I think Jaderail nailed the problem with the distortion, and IMO the problem is that for what I want to do, the back of the head in the V4.2 texture template is: a) lumped in with the rest of the body skin texture, & b) just too dang small, and therefore my details are getting trashed as the texture is getting blown up and stretched.
I guess Daz didn't plan on bald figures, but somebody has had to try and make a bald Genesis figure before me, and run into this.
So, since genesis figure in Daz, allows me to select the back of the head in order to apply a texture, (see: "help-2") then this area must be UV mapped.
Where can I find a set of UV maps that isolate the back of the head as it's own map (rather than lumping it in with the rest of the body), just as the face/front of the head is isolated?
The map (template) that you need to use for the head is V4Face.JPG You are using a very large texture, which is mostly blank, and there is a tiny graphic in the corner. What template did you use?
If you have a look at any V4 face texture, you will see how it is done. There is a seam up the back of the head, and it is flattened out to allow 2D texturinig.
EDIT:
Sorry, that is not the template you need, it is V4Torso.JPG, and it is the top part of the template which is rather small. Of course, the back of the head will mostly be covered by hair, which is why it is not given a lot of space in the texture. You would probably need to remap it yourself to get what you are looking for.
Is this a tattoo that you are trying to apply to the back of the head and the face? Since the UV Map is split by a seam down the back of the head, and the face is a different map as well, the easiest way would be to use a program like Blacksmith or 3D Coat, both of which can paint over UV seams. It would be very difficult to do otherwise I think.
There is a fully working version of 3D Coat available for download for 30 days. Perhaps someone else can suggest a better way.
Okay, been playing around with your texture and I've noticed the same peculiar anomaly. Here's two renders I did changing ONLY the diffuse texture. You'll notice that the tattoo shows up in one of the images but not the other. The positioning of the image hasn't changed, and Daz shows the texture as being in the correct location for the figure in both instances. What's even more interesting is I modified the texture to add in a grid overlay across the entire texture to see if there was some misplacement occurring at render time, but the grid didn't even appear in the render either!
Very strange behavior indeed. There must be a setting in the material causing it to override the image somewhere. I'll keep playing with it and see if I can find you a solution.
Okay, curiously enough I found the problem though not at all where I expected it to be. If you click on the diffuse color icon it gives you a list of recent textures and lets you browse new textures. It also has a "Layered Image Editor" function, which you should open up. On the right where it says "Resource" change the color below it to white (255,255,255) and exit out. The texture should now display correctly in the render. I am, of course, confused as to why this is the case but suffice to say it seems to work fine.
As for detail, it shows up perfectly fine in the final render, as expected of a high resolution texture.
I'm beginning to think half the problem doesn't actually exist...
If you are relying on the OpenGL render, then it looks like AntiAliasing is either off or at a very low setting. Under Edit > Preferences >Interface, make sure hardware AA is on and that Texture Resources is on the "Quality" side of the slider (doesn't have to be full on, just past the middle). OpenGL renders are about half way between 'rough sketch' and 'finished painting'.
The Spot Render tool would be more useful for judging the end results than an OpenGL render.
@ Jimmy_C - Yes, I'm asking about the back of her head.
I have the V4.2 body texture template.
My character is bald & will have no hair, this is a tattoo that goes from her face texture, around to the back of her head.
I have solved the cross-over from one texture to another, my issue is quality.
I agree I may have to remap the back of her head... but... uh... that's a little beyond my skill.
@ HeraldOfFire - Yes, I too am only dealing with the diffuse texture.
It looks like it's coming out better quality in your render than it is in mine! (rats!)
In help-4 you will see that I have the diffuse color set to white (255,255,255) and I do not have the "layered image editor" function.
@mjc1016 - I'm trying both 3Delight & OpenGL, but 3Delight makes my textures vanish.
In help-5 you'll see that I did have AA 'on', and now I've cranked up texture resources (per your advice) & a couple of the other settings too. You'll also see that she's not... very... happy... *gag* *choke* *gasp*
and in help-6 the latest render. Better... and I might be able to live with it.
What I can also say is that via the layered image editor changing the value from black to white for the layer allowed it to appear in the final render as expected. Why is, again, a total mystery.
As for why you don't have the layered image editor, I have no idea. Perhaps it has something to do with the Photoshop bridge I have installed alongside CS5. I would assume that might be a factor. Again though, altering the LAYER colour in the image editor seemed to fix the issue though.
For the overlay, in the LIE, the image MUST be a png or tif, with an active alpha channel...otherwise, you'll get weird things going on. Also, make sure you are using Alpha Channel Blend.
And...if that jpg that you posted is the actual image you are using, it looks like something the cat had used to practice disembowelling mice on...it's got more jags than the average WV road. So what did you use to go from SVG to jpg? 'Cause whatever it was, something's not right...
Hi...
The Problem with your texture map not showing in the 3Delight render is your .jpg texture map... there is some embedded information in the .jpg and TDLmake is throwing an error trying to process it and just quits, and doesn't pass the texture map to 3Delight...
I just opened the .jpg in Gimp, re-exported the .jpg and then applied it to Genesis and rendered in 3Delight... TDLmake processed the new texture map with no errors and passed it on...
As a side note... the reason you didn't see the Layered Image Editor in the texture map options that HeroldOfFire mentioned is that it appears that you are using DS 4.5 Standard, based on your screen shot in the first post... The L.I.E. is only activated in Pro...
You should have a Serial Number for the free DS4Pro or DS4.5Pro in your account... Just enter it to activate the Pro features...
Hope this helps... :)
image below is re-saved .jpg texture map rendered in 3Delight
Hmm... weird then that I could recreate the same issue even after saving out my own custom texture based off his (ie, same image with a grid overlay) with Photoshop. Also strange is that the layered image editor allowed me to make it visible in render, which shouldn't make a difference if the texture file itself was to blame.
I'd like to say case closed on this, but I can't help feeling there's more to it than just a faulty file. I'll try import/exporting a few times until it renders in from the word go and post the results as I find them. Come on Scooby and Shaggy, there's a mystery to be solved!
Hi...
For my first test I just loaded the image file as was posted into the diffuse channel, and hit render... the render came up blank...
Then I did as you had and opened the LIE and only changed the color to white... hit render and it worked... now I'm no expert on how the LIE works, but it seems that it does change the map if you adjust any settings, and that in itself seemed to be enough to correct what ever error was in the original .jpg... though I believe it did list some sort of error in the log, but processed the texture anyway...
My next test was to just open and then resave the .jpg in Gimp... again that seemed to correct the error...
After each of these tests I checked the log file... in the first, with the original .jpg, TDLmake just error-ed out citing unreadable attributes of the .jpg... with the resaved .jpg, TDLmake converted it without a problem, no error...
I don't have Photoshop to look into it, but maybe when you saved your texture based on his, it saved the same attributes that TDLmake can't process...
nicci... :)
ETA: I noticed that the OP said that this was created in Illustrator using vectors, could Illustrator have saved out any of the vector information into the .jpg?
I also noticed that the original textures file size is 631kb compared to only 84kb for the one that I re-saved using the highest quality settings... that sort of seems to me that there is some sort of additional information being written into the file...
I feel strange, because if I made PNG tatoo, with alpha value,
and apply it as diffuse texture map directly on genesis buck skin surface,
it seems not work. not tatoo area just turn color black.
so daz diffuse texture value ignore the transparency in 3deligt lender?
but when I apply the same PNG as layer with other material texture,
by ILE it work well.
(but find, when I use the PNG as Ambient color texture,, it more fun for me ^^;)
First off I'd really like to thank -> HeraldOfFire, & mjc1016 who certainly earn 'most tenacious & most informative' kudos.
Now the replies:
Mjc1016 - will try both png & tif
jpg started life in Adobe Illustrator CS4 and exported to jpg from there. The textures posted were reduced in size using Photoshop CS4 to post here.
niccipb - have plugged in my serial & have gone Pro. Thanks.
kitakoredaz - Holy Crap! Transparent png w/ambient?!?!?! That's Baddazz! I have to try that!!!
will run tests and re-post
yes, on my case, direct stick PNG (or Tif may ok) .
but of course you need keep the pic with alpha value f (I know you well ^^;)
then thank you ,, I download your texture ^^;
so if you made good body all texture which can fit to V4 map, tell me please ^^;
I remember the good game character "megami tensei" devil boy,, by your image
then I think,, you may better first set texture (even tough you need not many color)
and layer the tatoo image as PNG or Tif , it may work as diffuse textture too,)
Ah... so much more better.
Serious thanks to kitakoredaz for the transparent png idea, so cool!!!
Here's the new back of head, and face.