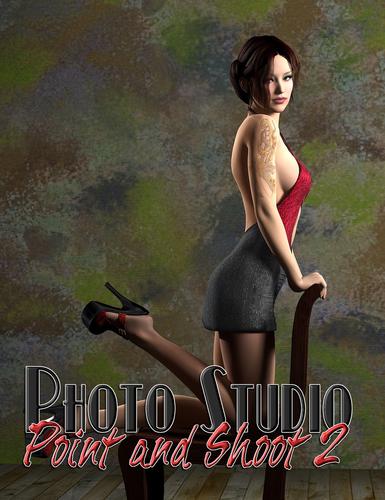
Photo Studio - Point and Shoot 2 [Commercial]
 InaneGlory
Posts: 294
InaneGlory
Posts: 294
While testing and making promos for Point and Shoot I realize two things: 1st I loved the results I was getting with the new light models and 2nd I missed the ability to quickly move or adjust the lights like you could do with one of the original Photo Studio lights. So I decided to see if I could change that. Plus, with years of customer experience/suggestions and my own person experiences using the original Photo Studio lights, if I had it to do all over again there were lots of little things I would do differently to make things easier to use and understand. Point and Shoot 1 was designed around the idea of making a set of area/mesh lights that worked more like a standard set of DS Lights. Point and Shoot 2 takes those same HQ light models and blends them into an all new movable/poseable/modifiable Photo Studio light set.
Daz 3D is part of 
Connect
DAZ Productions, Inc.
224 S 200 W, Suite #250
Salt Lake City, UT 84101
Licensing Agreement | Terms of Service | Privacy Policy | EULA
© 2024 Daz Productions Inc. All Rights Reserved.
Comments
Wonderful set of lights so easy to use, the name says it all.
A couple more.
These are really lovely lights.
Beautiful renders Scorpio!
As said, a versatile set once more.,,,
Loads of extras available to help setup a lighting, if so desired.
Used on of the light setups and played a bit around with the intensity, shadow and quality settings.
(Also added a very low intensity UE2 light, just for that little extra ambient lighting....)
The backdrop uses one of the many textures available in the set (and most of the included textures are great to use on other props as well......)
Yes, most of the backdrop textures are seamless, so you could use them on other things if you want to set it up in the surfaces tab. But hold on to that thought glaseye. ;-)
Thank you both for the kind words and thanks for posting the excellent pictures. Scorpio - I really love the painted wall with painted person render. It is very cool and a little different than your usual style.
Thank you both.
I also used the Painted texture from the backdrop on the models bikini.
This is using one of my favourite backdrop textures.
Aw, thanks. The black and white one is one of my favorites too. It almost got cut out of the final pakage because I thought it might have been too busy or hard to use.
You nailed it though. The zebra texture on the model is flippin' outstanding. The lighting looks good too. :cheese:
Really good lights set, especially when combined with Advanced Ambient Lights.
Below is the DS 4.6 Pro render of Stephanie 6 using paper roll and light setup from the Photo Studio
together with three Advanced Ambient Lights.
Rendering Time: 3 minutes 30 seconds
Thanks for posting Artini. That looks really good. Super quick rendering time too is always awesome.
Yeah, we tested out multiple Photo Studio light sets with AoA's advanced ambient to find out how well they work together. The two are very complementary. Congratulations on choosing another paper roll texture that almost got cut from the final set because I thought it was sort of weird, lol. Strange, I know since I'm the one who makes all the textures, but sometimes the things that come out of my computer surprise even me. I'll take this as a hint that I need to do more of the graphic styles that I myself am drawn to as well.
Is it wrong I'm now waiting for the strange/weird pack to be released?
Thank you for the comments, DestinysGarden.
What I like most about yours and InaneGlory light sets, is that they come with very nice lights,
but also that, they include backgroud props with interesting materials/textures, as well.
Sooner or later I use many of them in my renders.
Thanks for making another great set.
Aww, thanks again Artini.
LOL @ Ippotamas.
I have thought for quite a while on doing a background expansion set for the PS props. Let me check the production schedule. As always, I've got 5 things on the go at the moment.
Thanks so much to all of you for your support.
*No postwork in the attached image*
This series has been my go to lights for quite some time now.
This might be the best one yet.
With the ability to look through the lights and the addition of the "arms" for controlled/tracked movement?
I spent an hour just playing. Not because I had to, but because it was just so much fun.
Kind of like the youtube video on the store page.
For this picture I ended up rotating the entire light set on the x and y axis.
I love rotating the key light and having the fill light move in a corresponding way.
:)
I used a setting of 36 for the quality and put a 5% intensity on Light 2 for the dramatic effect.
I have bought a lot of lights this sale, and a hundred more in my years. It is my one true weakness. It seems everybody has something they must have.
From all these light? The Photo Studio/Shoot series is #1 for me.
It isn't even close.
Thanks so much for them.
Does this light set show up in the Smart content like Photo Studio - Point and Shot?
I'm not getting it to show up.
Here are a couple of portraits of Victoria 6 HD. The first one is with 3pt Rim Right setup (with her fingers going through sleeve). The second one is the same pose (except for the fingers) and 3pt Tight Right.
These were both rendered at Gamma 2.2. Are the intensities of the light sets meant for Gamma 2.2 or Gamma 1.0?
A big part of the whole idea behind the Photo Studio line has always been lights AND textures. Not lights with some textures or textures and a few lights. It's always been about both parts of the product and I'd like to think that both parts of the product have continued to grow improve with each new release. All that being said there has never been a thought that people must use both parts of our products at the same time (but it is nice to see sometimes). Use what you want when you need it :coolsmile:
She'd have an easier time doing a texture expansion if I didn't keep stealing stuff to go with a new light set.
Beautiful render Ippotamus!
Glad your liking the changes. Looking back at it now, naming the bones what I did in PS1-3 wasn't the best idea I've ever had and it was one of the 1st things I changed while re-designing things. I'm also hoping that making the bones visible in the preview window helps people 'see' the light rig easier. I'm glad you like the light helpers. I've been very leary of adding them because of what can happen if you accidentally use the camera controls instead of the movement sliders on the parameters tab. If you do you end up moving just the helper and not the light itself and that can really confuse things.
Glad your liking the new set :coolgrin:
Smart Content isn't something I've very familiar with or use myself. DAZ QA usually sets up the metadata when they do the product testing but maybe with the flood of new products for MM it got overlooked. Best thing you can do is open a support ticket and they will see that it gets added and updated in short order. Thank you for for pointing this out and taking the time to tell us about it.
Really like both renders. The Rim light is definitely more dramatic (but then it's supposed to be) while the tight right is a cleaner portrait. Not sure which one I like better.
While testing I usually go with the program defaults as that is what I think most people are going to use. For DS that would be Gamma 1.0 while in LuxRender it's Gamma 2.2 In general, bumping up the Gamma to 2.2 is going to lighten your overall scene but it isn't going to have a great deal of effect on the size/strength of the highlights in your scene and that's the main thing you need to adjust your light intensity for. Hope your having fun with them. :-)
I respectfully disagree that rendering at Gamma 2.2 just lightens your scene. I have attached comparisons of the two light setups rendered at gamma 1.0 and 2.2. The default light intensities are too high at gamma 1.0. I think the skin is blowing out too much. That is probably mostly because this skin texture is very bright at 75% SSS strength.
When using ray traced lights like those in this set that do not include special effects like ambient occlusion and global lighting, you need gamma 2.2 to give more natural looking results. A lot (not all) of the "more real" looking renders in unbiased engines like LuxRender come from using gamma 2.2.
I think using something like the advanced ambient light at low levels with these light sets might make the results a little more realistic at gamma 1.0, but I think gamma 2.2 renders in 3Delight are more realistic looking when using lights that behave similar to real lights.
I also respectfully disagree with you. The Gama setting in Lux and in Studio Advanced Render settings have different functions. Gama in Lux panel is about how display your render, not about which Gamma is used by the render engine. It renders using a linear 1.0 Gamma. There are no reason to change the 1.0 Gamma setting in Studio. Using a 2.2 Gamma setting in Studio will apply a gamma correction twice, washing all textures in the scene. Almost every texture was created with a 2.2 gamma correction, so applying a gamma correction in the render settings you apply a new curve correction over the textures.
This use to be true in DAZ Studio, but recent versions (maybe starting with 4.6) have a gamma correction option that will correct the texture gamma for the gamma being used to render. I always use the gamma correction option when using gamma 2.2 in DAZ Studio. This does not completely fix everything. Some things still need adjustments to the surface settings, but it works pretty well.
Still enjoying these lights
You are absolutely right. My apologies, my mistake. In fact, I not have been rendering in 3DLight for long time. Since Reality was released I have been using Lux for my renders and just recently after the release of the Advanced Lights and the Subsurface Shader by Age of Armour I had my interest returned to render in Studio.
As I never liked how Reality saves the materials presets, I bought Inane Glory's light sets to trying it with Luxus. I confess that I have failed miserably to get any good render using Luxus, but this is another story.
Anyway, thank you so much to bring this settings to my attention. I made some quick test renders I get some pleasant results using Gama 2.2 and setting the Gamma Correction to On. Below is an example: Victoria 6 rendered with SSS at 25% and using Point and Shoot 2 light rig. It is not perfect, but is on the way.
how much did photo studio cost when it first got listed on MM earlier this week?
It was 40% off the first 2 days, and 50% off if you bought two MM You could also get another 10% off if you owned the viking village or the Stephanie 6 pro bundle. I own both of those. Looking at the invoice, I think I paid around $10.35 after all those discounts.
I respectfully disagree that rendering at Gamma 2.2 just lightens your scene. I have attached comparisons of the two light setups rendered at gamma 1.0 and 2.2. The default light intensities are too high at gamma 1.0. I think the skin is blowing out too much. That is probably mostly because this skin texture is very bright at 75% SSS strength.
When using ray traced lights like those in this set that do not include special effects like ambient occlusion and global lighting, you need gamma 2.2 to give more natural looking results. A lot (not all) of the "more real" looking renders in unbiased engines like LuxRender come from using gamma 2.2.
I think using something like the advanced ambient light at low levels with these light sets might make the results a little more realistic at gamma 1.0, but I think gamma 2.2 renders in 3Delight are more realistic looking when using lights that behave similar to real lights.
Forgive me, I wrote my response quickly and poorly worded what I was trying to say and then I never got any reply notices (I'm knee deep in an other project and not paying much attention). What I was trying to say was that in switching from gamma 1.0 to 2.2 your white point and black point aren't changing but your mid-tones are (generally) lightening giving you a generally lighter picture (going from from 1.0 to 2.2)
All that being said that isn't the issue you are having here. What you are seeing is the interaction between the Area lights and the shader (or more properly, the setting of that shader) your using. Unfortunately I'm not much of an expert with AoA Subsurface shader so I can't tell you what you can change there but dropping down the SSS strength will help some. On the light side dropping the light intensity of your main light (or all the lights) by 5% from their default will help some, plus switching to gamma 2.2 as you have already will help.
Beautiful render Ippotamus!
Glad your liking the changes. Looking back at it now, naming the bones what I did in PS1-3 wasn't the best idea I've ever had and it was one of the 1st things I changed while re-designing things. I'm also hoping that making the bones visible in the preview window helps people 'see' the light rig easier. I'm glad you like the light helpers. I've been very leary of adding them because of what can happen if you accidentally use the camera controls instead of the movement sliders on the parameters tab. If you do you end up moving just the helper and not the light itself and that can really confuse things.
Glad your liking the new set :coolgrin:
I have mixed feelings about this new package. I am addicted in shaders and lights. I have every product that you published at DAZ and can see the concept evolution after each release.
To not reading the Point and Shoot 2 user guide made me think to use the set as I used the Point and Shoot 1. Products share the name and the concept but the helpers work in a completely different way. In PaS1 (Point and Shoot 1) you can position the light directly in the view port using the widget, however in PaS2 you never should touch the widget and should use only the Parameters pane to positioning the light. I can live with this, but the previously method is very intuitive. I think the change was made to accommodate the new figure and the visible bones. Basically, I see the same product as PaS1 with a different approach.
I have bought these light rigs to use them with Luxus plug-in, but as I mentioned in another post, I am giving up Luxus. I was unable to get a decent render with it. PaS1 anyway can be used with Reality plug-in, just adding Reality Light before the light’s name. It works like a charm and to my knowledge is the only one which can be used with Reality.
The product’s metadata is very messed with wrong categorizations and compatibilities. The product’s name should have InaneGlory’s prefix appended to keep the product besides your other products in the Smart Content pane and in the Product Library section of the Content Library pane. I reported those metadata errors to DAZ support.
At last, I will be waiting your next release. Keep going!
Intuitive is in the eye of the beholder
After the release of PaS1 I had several people tell me, in no uncertain terms, that I did the helpers the wrong way. They should have been under the lights in the hierarchy instead of above it. Others thought messed things up by using lights as helpers instead of cameras. I would have loved to have been able to keep the continuity between how the helpers worked between PaS1 and 2 but it just wasn't possible with the change from individual lights to lights as part of a figure.
People used to use that same trick to get the original Photo Studio lights into Reality so it should work with these (oops, did I say that out loud?) but your completely on your own there as I don't support Reality.
I'm not sure what issues your having with Luxus but I'm baffled that your can get good results with one but not the other. You could PM me if you are willing to try again.
Sorry about the metadata. Hopefully they will get it fixed up. In their defense, I do make weird and wacky stuff that doesn't quite work like anything else does. While I can't prove it I think several people in QA think I'm total nuts and the one who gets stuck testing my products was the one left holding the shortest straw. :P