FPE Scars Ecosystem for G9 [Commercial] | Face Pack 2 Coming Soon!
 FenixPhoenix
Posts: 3,032
FenixPhoenix
Posts: 3,032
@Esid and I finally started working on our first "Face Scar Pack for Genesis 9", essentially kickstarting our Scars Ecosystem. We'll also be doing an Ecosystem for Wounds (which will match and follow the Scars) and another one for Bruises (allowing for various stages, like with our HD Bite Bruises Add-on). Rather than do a thread for each Scar Pack, I thought it wiser to this thread for the General Ecosystem we're building and talk about how each product will fit and feed into it.
So, what's changed?
Like how we built our Soft Skin Transitions, we're developing our FPE Scar Ecosystem to ensure seamless cross-compatibility and consistency between products. In a way, each new pack will open new options to previous packs as we keep building and finding new ways to do things.
Here are some key components that we'd like to highlight:
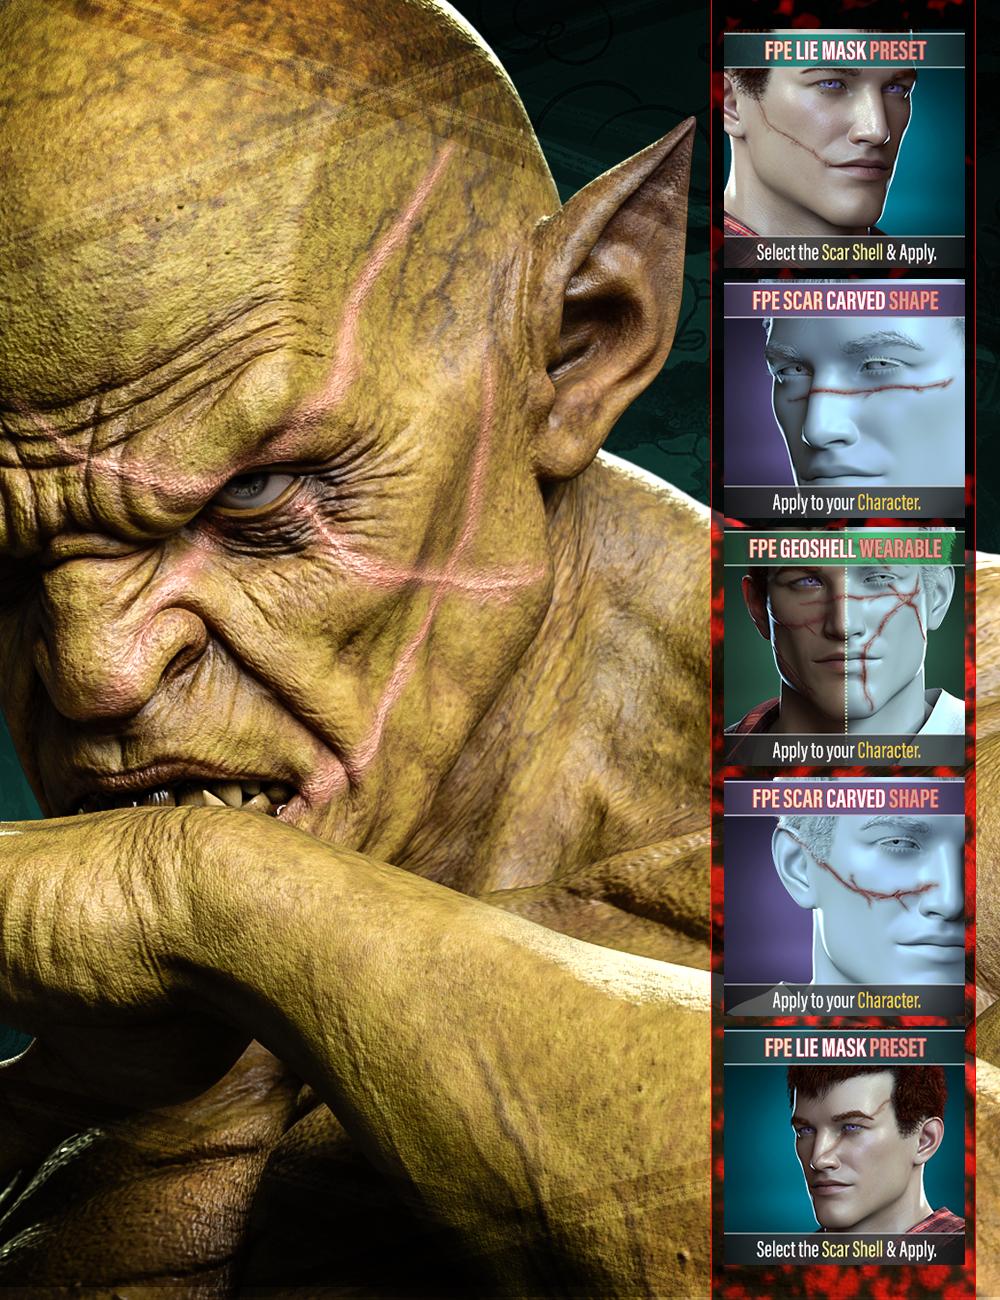
★ Geoshell Application ★
The issue with how we used the Layered Image Editor (LIE) in our Genesis 3 & 8 Scar Packs was that if certain maps weren't in specific channels (and not all PAs use the same structure when building skins, myself included), the scars would look off.
- The result was long sessions of troubleshooting wherein sometimes users lacked the knowledge, patience, and/or inclination to explain the issue or manually make the changes required for the product to work as intended with their more unique characters.
- The fact that we now have characters using PBRSkin Shader also played a huge role in our decision to move away from building the scars directly onto the skin maps (as that would further complicate things).
- Other known issues with LIE were longer loading and application times.
- Not to mention that tweaking the look and even deleting the scars was also an issue for users unfamiliar with the Layered Image Editor.
So with this new generation, we wanted to make it as easy and painless as possible for users to apply scars and have them look how we showed in the promos regardless of the character used.
 |
|
This is where applying via a Geoshell comes in. Think of the Shell as a new layer applied atop your character's skin. You don't want the layer, you simply peel it off by deleting the Shell from the scene! |
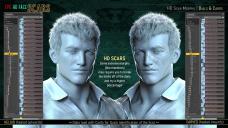
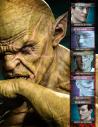
★ HD Scar Morphs in two Styles: Keloid & Carved ★
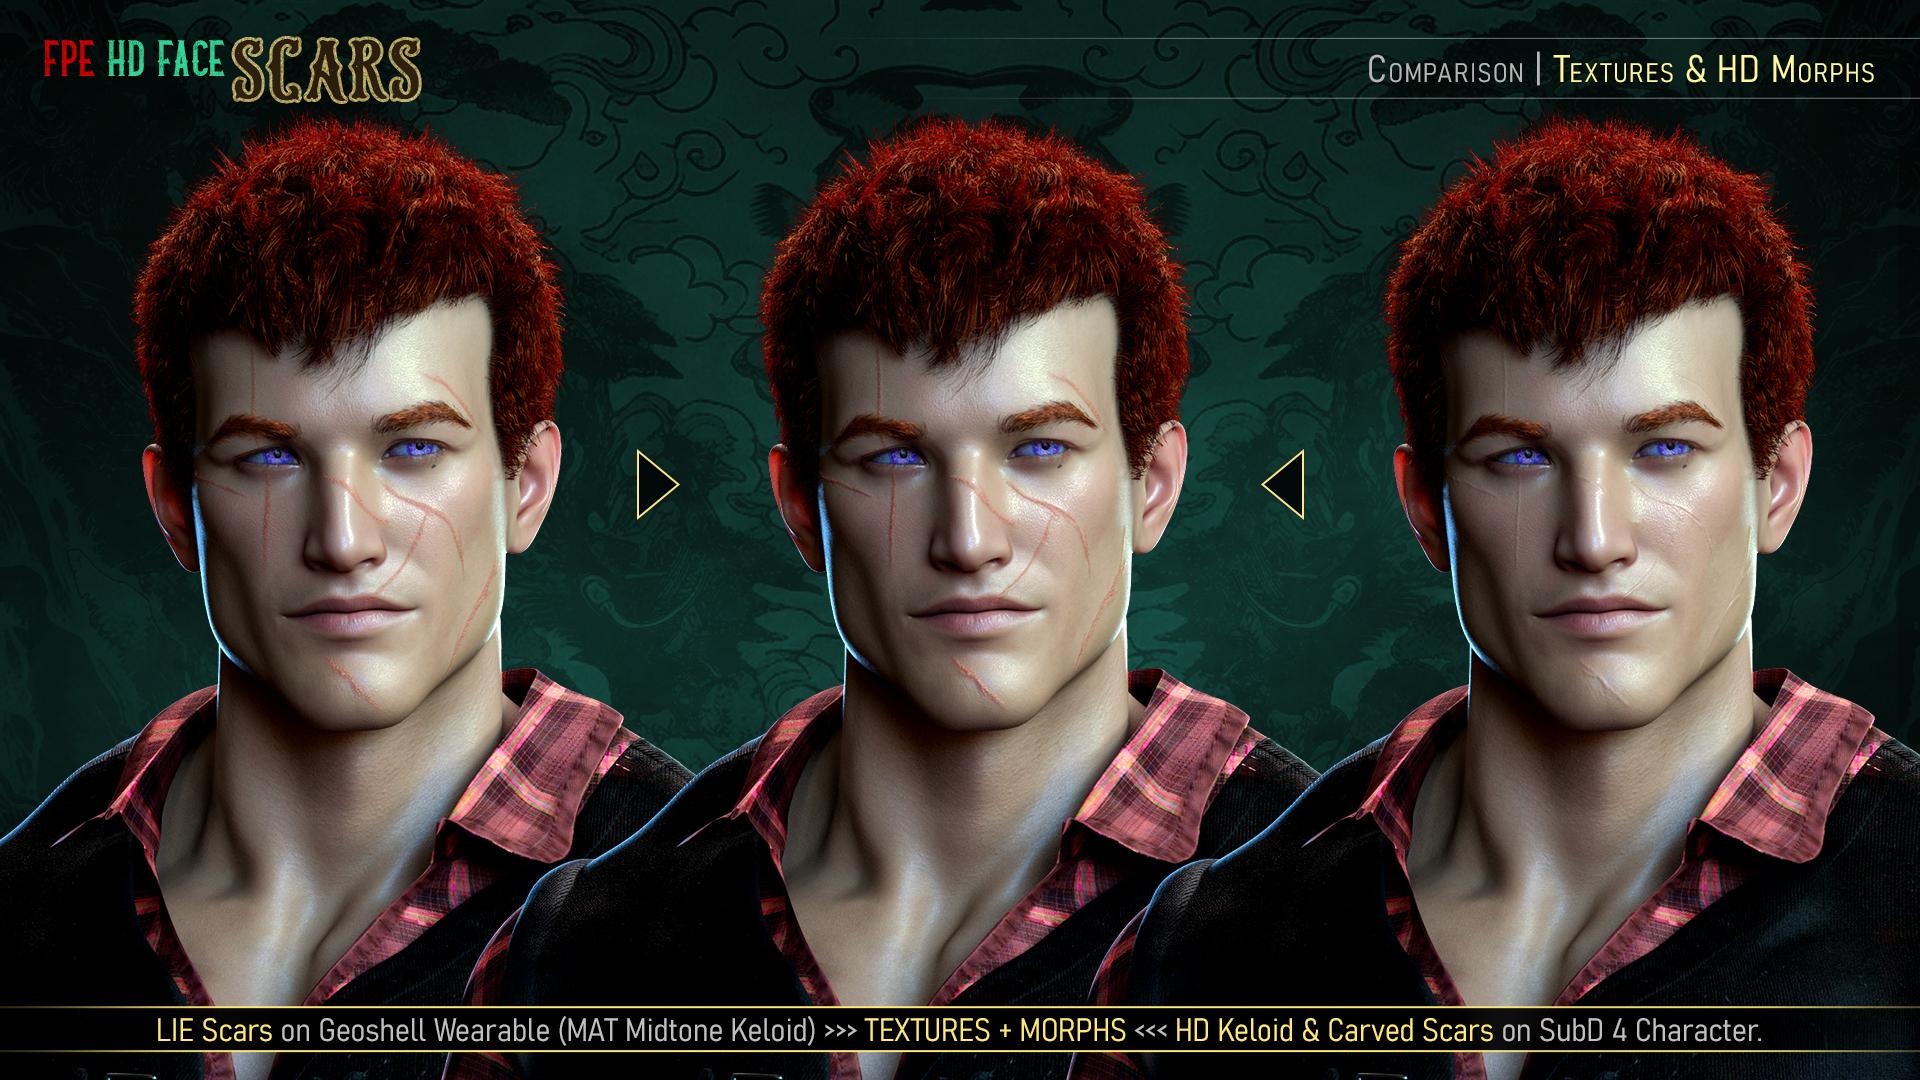
Rather than duplicate all the presets or create them only in one style using extra maps, the scars in our new packs will come with two styles of HD Morphs.
 |
| [The picture above is from our first pack]. |
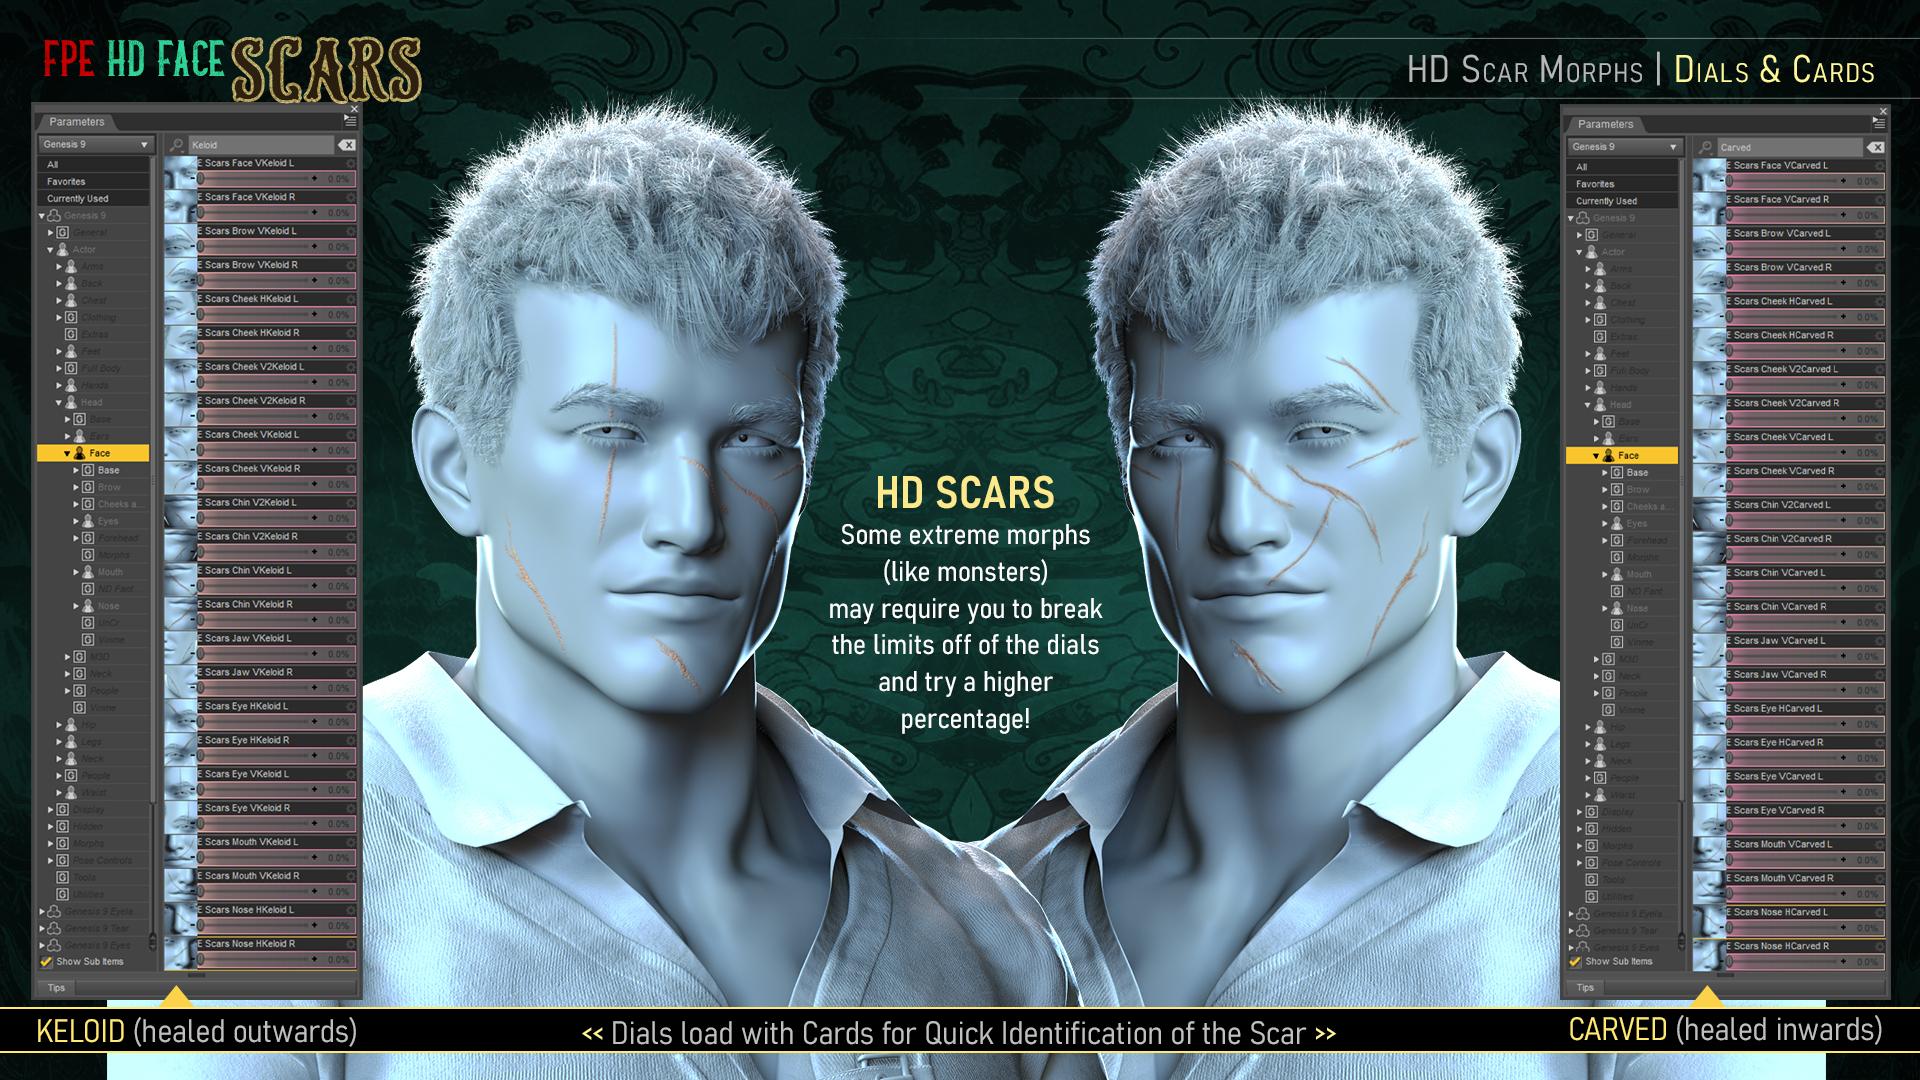
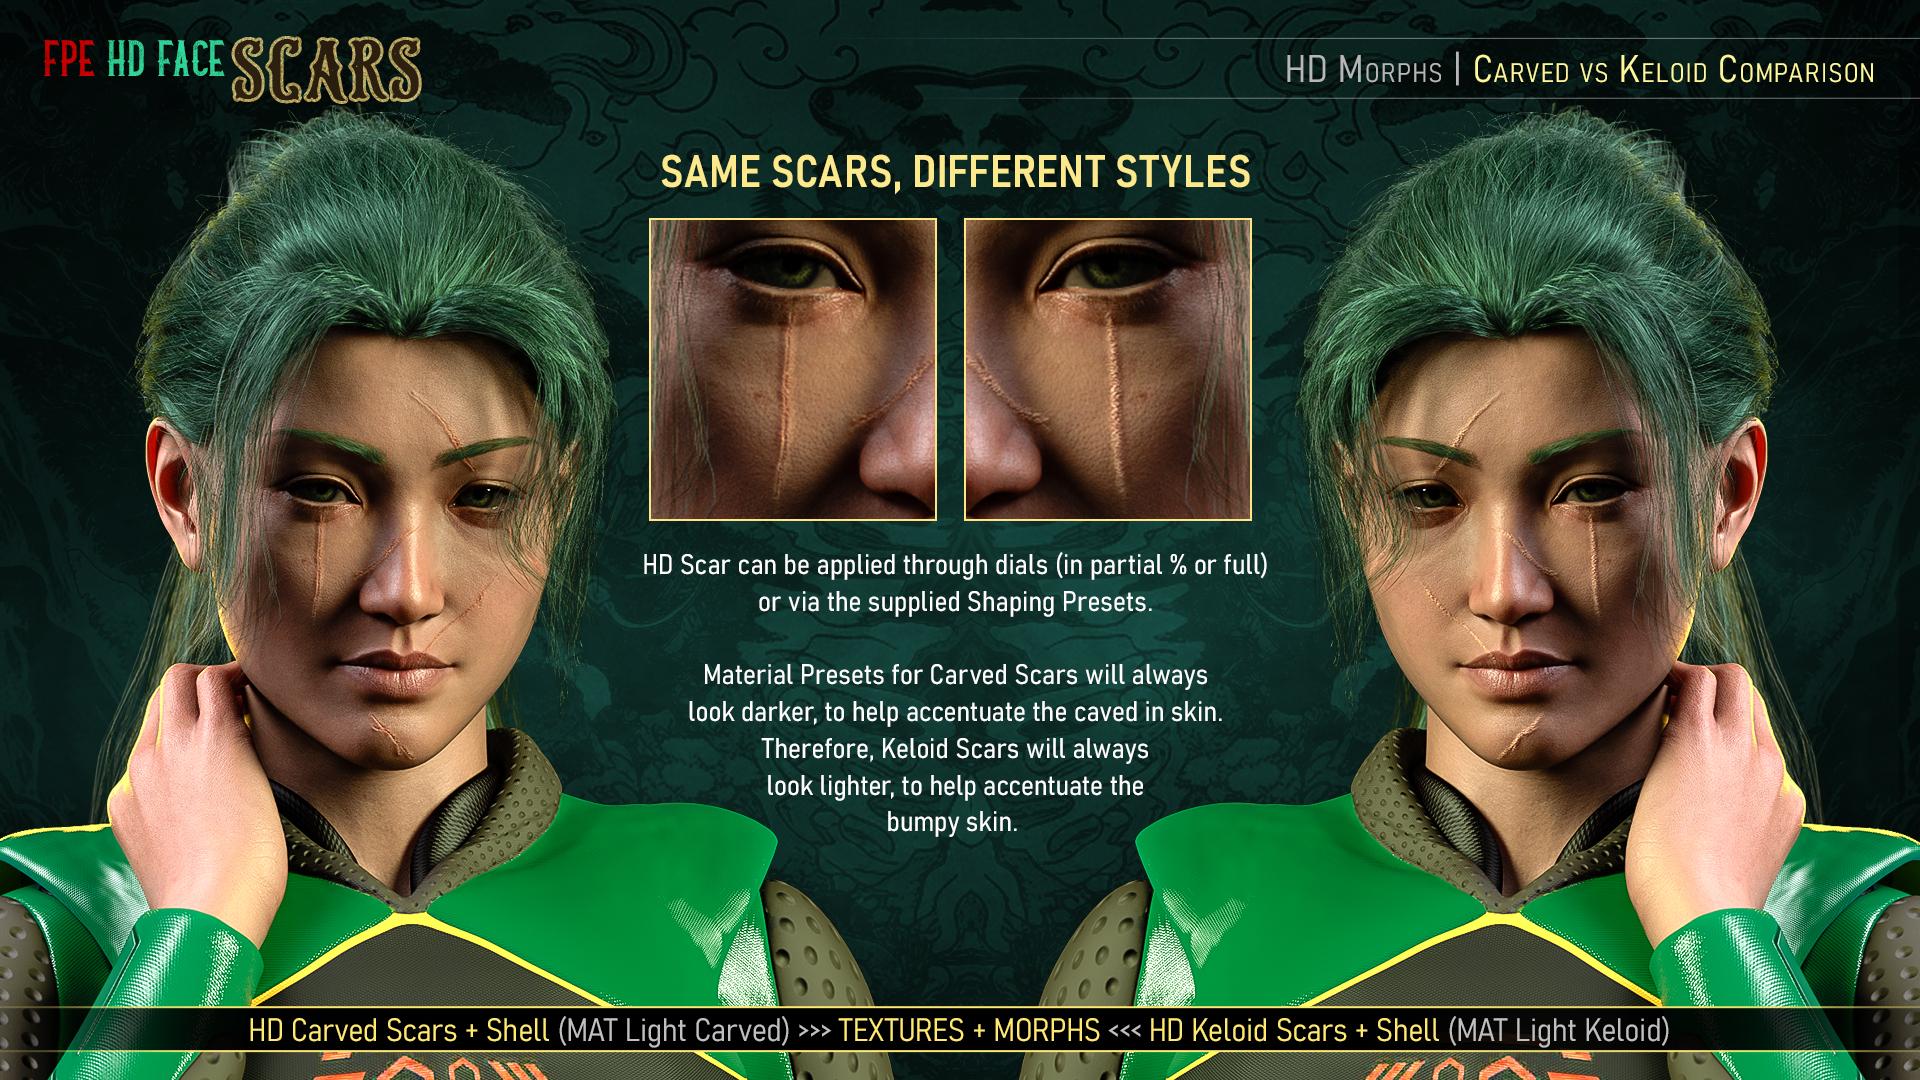
- Carved morphs will apply scars that have healed inwards, creating a caved-in feel to the skin.
- Keloid morphs will apply scars that have healed outwards, creating a bumpy feel across the skin.
- By using morphs rather than displacement, there should be no issue with clothing poke-through, and dialing some of them back will ensure a more subtle look.
- Likewise, characters with more extreme morphs will benefit from breaking the limits of the dial to give the scar more punch (150% dial, for example).
- Since these morphs are HD, characters will need to be set to Render SubDivision of 3 or 4 for them to show. Scripts to help you change the SubD Render Level will be included with each pack!
 |
| Example Pack 1 of breaking the limits to dial in more of the morph. |
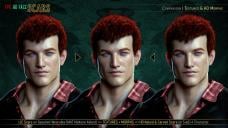
★ General Scar Texture ★
As with the rest of our recent products, a general and uniform scar texture will be pre-applied on the "FPE Scar Geoshell" (the backbone of the ecosystem, if you will).
Not only do we ensure the final look of the scar regardless of whether your character uses Iray Uber or PBRShader skin, but we also create a non-destructive way of applying them. The versatility of Geoshell allows you to quickly and efficiently build, change, tweak, and/or delete the scars without affecting or altering your character's underlying skin. In fact, you can simply toggle them on and off at will from the comfort of DAZ Studio.
This also means that the Material Presets included in all of our FPE Scar Products for Genesis 9 should work on each other.
 |
| The first pack, for example, will provide 12 Material Presets that should cover a wide variety of skin colors. |
Whether you'll want the scar to blend in or stand out would be a matter of choosing a Material Preset and then further tweaking via the Translucency and Intensity Partial Material (Utility) Presets.
★ LIE Component for Mask Building ★
The scars will appear once you've applied one of the Layered Image Editor (LIE) Presets onto the Geoshell. But don't worry about delays! Each LIE applies a single mask on the cutout opacity channel, which makes for a fast and painless application.
 |
 |
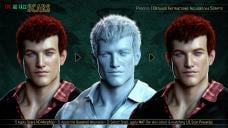
★ Customizing the Scars ★
Each pack will provide some general Geoshell Material Presets to help you match your character's skin color as much as possible.
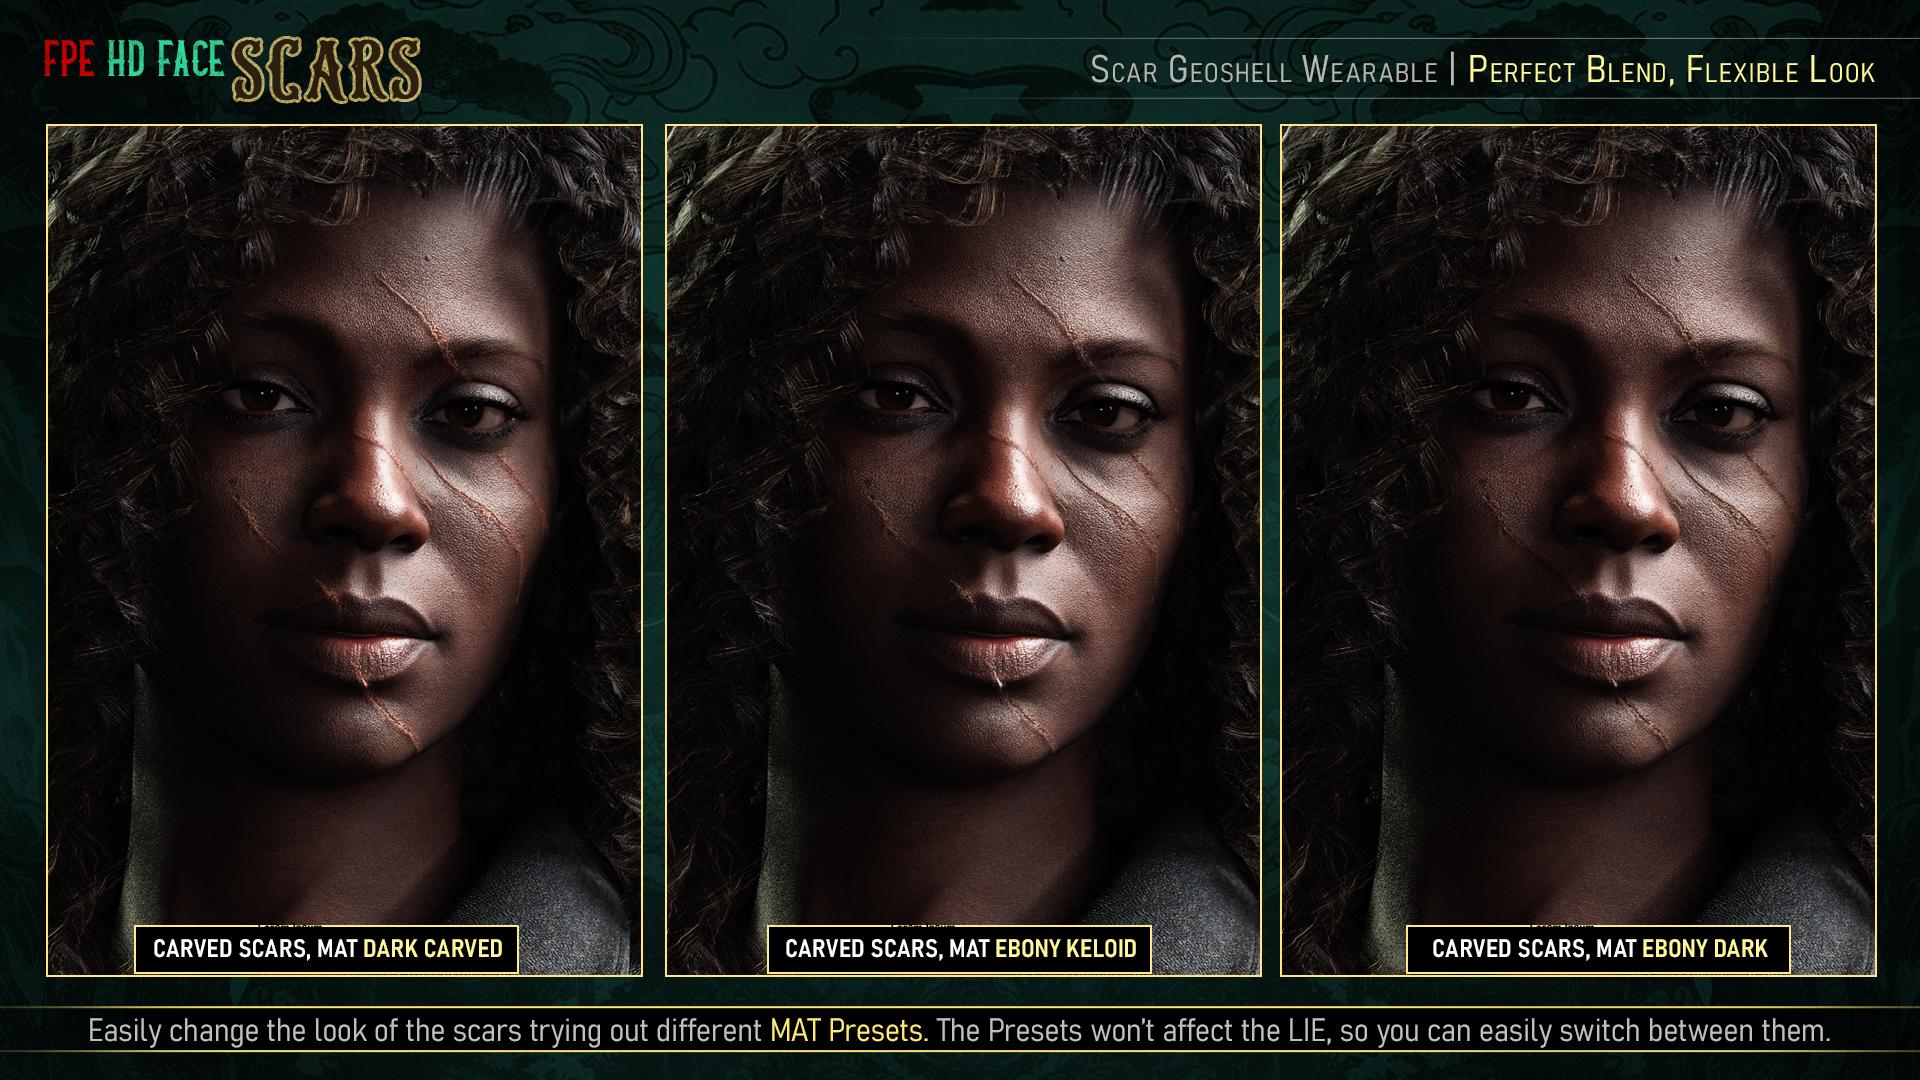 |
| Experiment with the different skin color presets to change the look of the scars! |
♥ Of course, you can always apply different colors to different skins for even more variation!
♥ Even better, since we're using Geoshells, you can even manually change the color to something that better fits your particular character.
♥ Here's where the ecosystem will kick in, since each pack may bring in new presets to tweak and customize the scars, possibly even giving older scars, new looks!
Some other factors to highlight:
- Each Skin Color Material will come in Keloid & Carved Variations. Keloid MATs will always be lighter in color than Carved MATs.
- Partial Material and Property Presets (Utility Presets) will be provided to help you refine the look.
- Instructions via scripts detailing the application process, troubleshooting, and some tips on how to use these extra presets will always be included.
⚠ Troubleshooting ⚠
This is where I'll be adding general issues and how to solve them as they crop up. I'll start off with some common issues which came up with our Soft Skin Series that might be relevant here. If you have an issue that's not covered here, please reach out!
The only thing you should apply to your character is the FPE Scar Shell (Geoshell Wearable). We'll be using the same Geoshell for all products!
✔ Every other preset (Materials, Property & LIE Presets) should always be applied to the Geoshell unless otherwise specified in the icon.
✔ Please refer to the application instructions included in each pack when in doubt.
⚠ Disappearing Character:
If part of your character disappears, then you've probably applied a LIE Preset to your character rather than the Geoshell.
✔ Undo (if possible) or select the skin surface (windows > Tab > Surface) of your character that disappeared and take off the map created in the cutout opacity.
✔ Now, apply the FPE Scar Geoshell, select that, and then apply MAT & LIE presets to the wearable Shell. Refer to the Correct Application point.
That means you have applied a MAT Preset to your character rather than the Geoshell.
✔ The process is the same as above.
⚠ Scars Textures Missing in Render:
If you have more than one Geoshell applied and they have the same offset, that will invalidate one or all of them.
✔ Use our Offset Property Presets to give each Geoshell a different offset.
✔ If the issue persists, you can check manually change the Offset by selecting the Geoshell, then in the Parameters Tab (Windows > Pane > Parameters), check under General > Offset. Ensure the numbers are different.
✔ If one of the shells has displacement, you may need to give the shell stacked atop more offset. The higher the Offset value, the farther it will be from the Character.
This means the shell is colliding with something. That could be your own character's skin (if the skin is set up with displacement) or it might be colliding with clothes or hair.
✔ To fix this, use the Offset Property Presets provided to move the Shell father away.
✔ You can also change the collision of the clothing/hair to the FPE Scar Geoshell in the parameter tab.
✔ If the problem persists, you'll need to manually alter the offset so it doesn't happen (refer to the previous point).
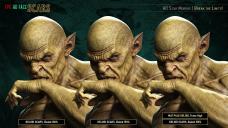
⚠ White Geografts:
If you're using a character that been set up with a geograft (horns, tail, genitalia, extra anatomy, etc.) then, when you apply the Geoshell the surface covered by that geograft will look white.
✔ To fix it, select the shell then go to the parameters tab > Visibility > Surfaces and toggle the surface to "OFF".
Since these morphs are HD, characters will need to be set to Render SubDivision of 3 or 4 for them to show.
✔ Scripts to help you change the SubD Render Level will be included with each pack! Otherwise, you can also check in the parameters tab, under Mesh Resolution, to manually check the SubDivision.
Also, keep in mind that Render SubDivision doesn't affect the viewport SubDivision. So while the Morphs will render as they should, you may not actually see them in the scene.
✔ To see them on scene, you'll have to manually increase the Viewport SubDivision to at least 3 (but that may cause delays and slow down your viewport).
★☆★ INDEX ★☆★ |
|---|
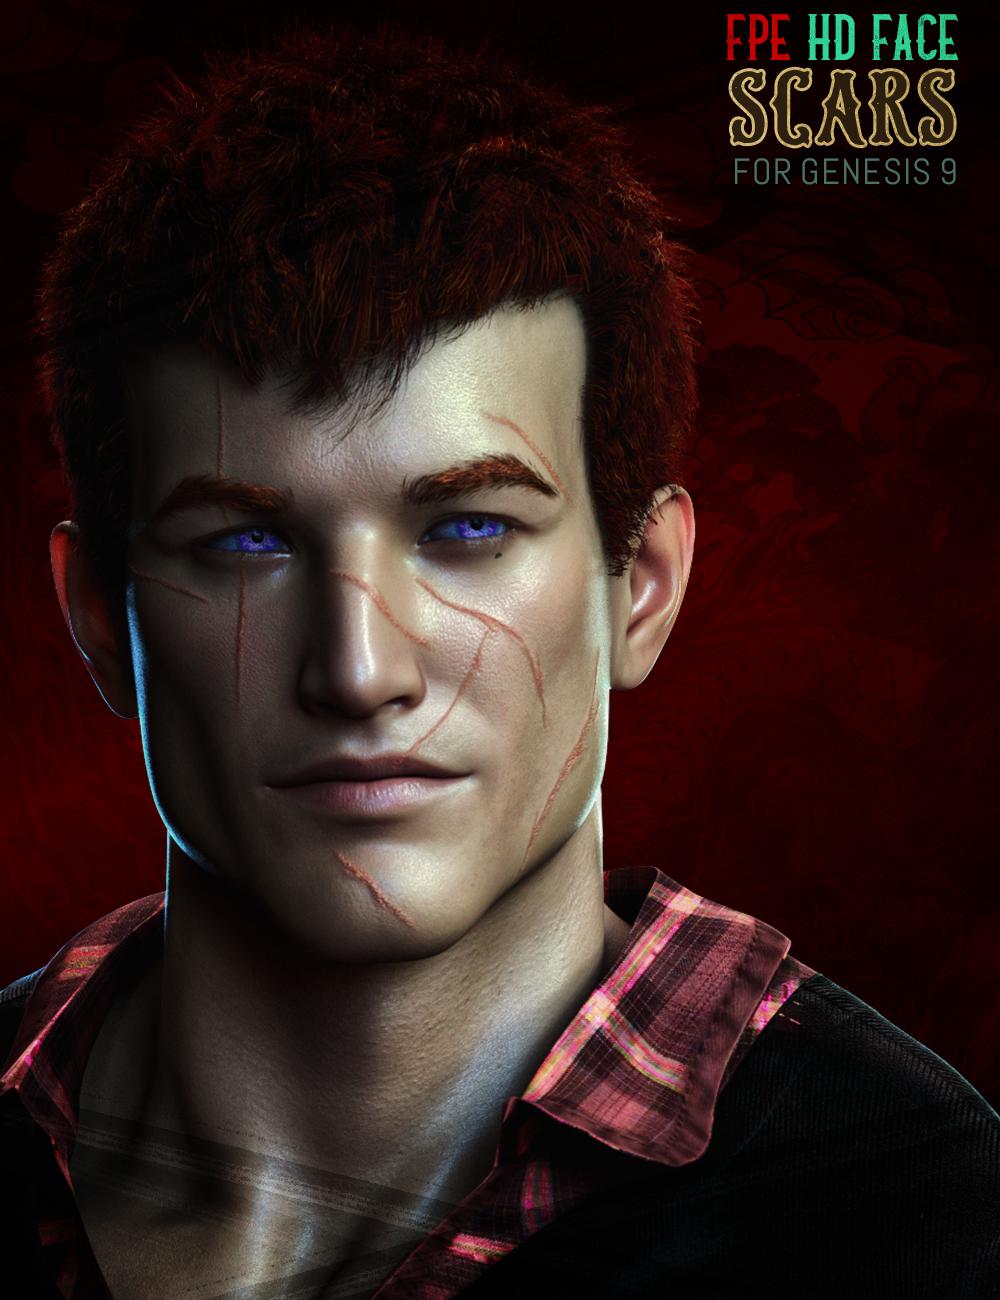
| FPE Face Scars for Genesis 9 | Released! |
 |
 |
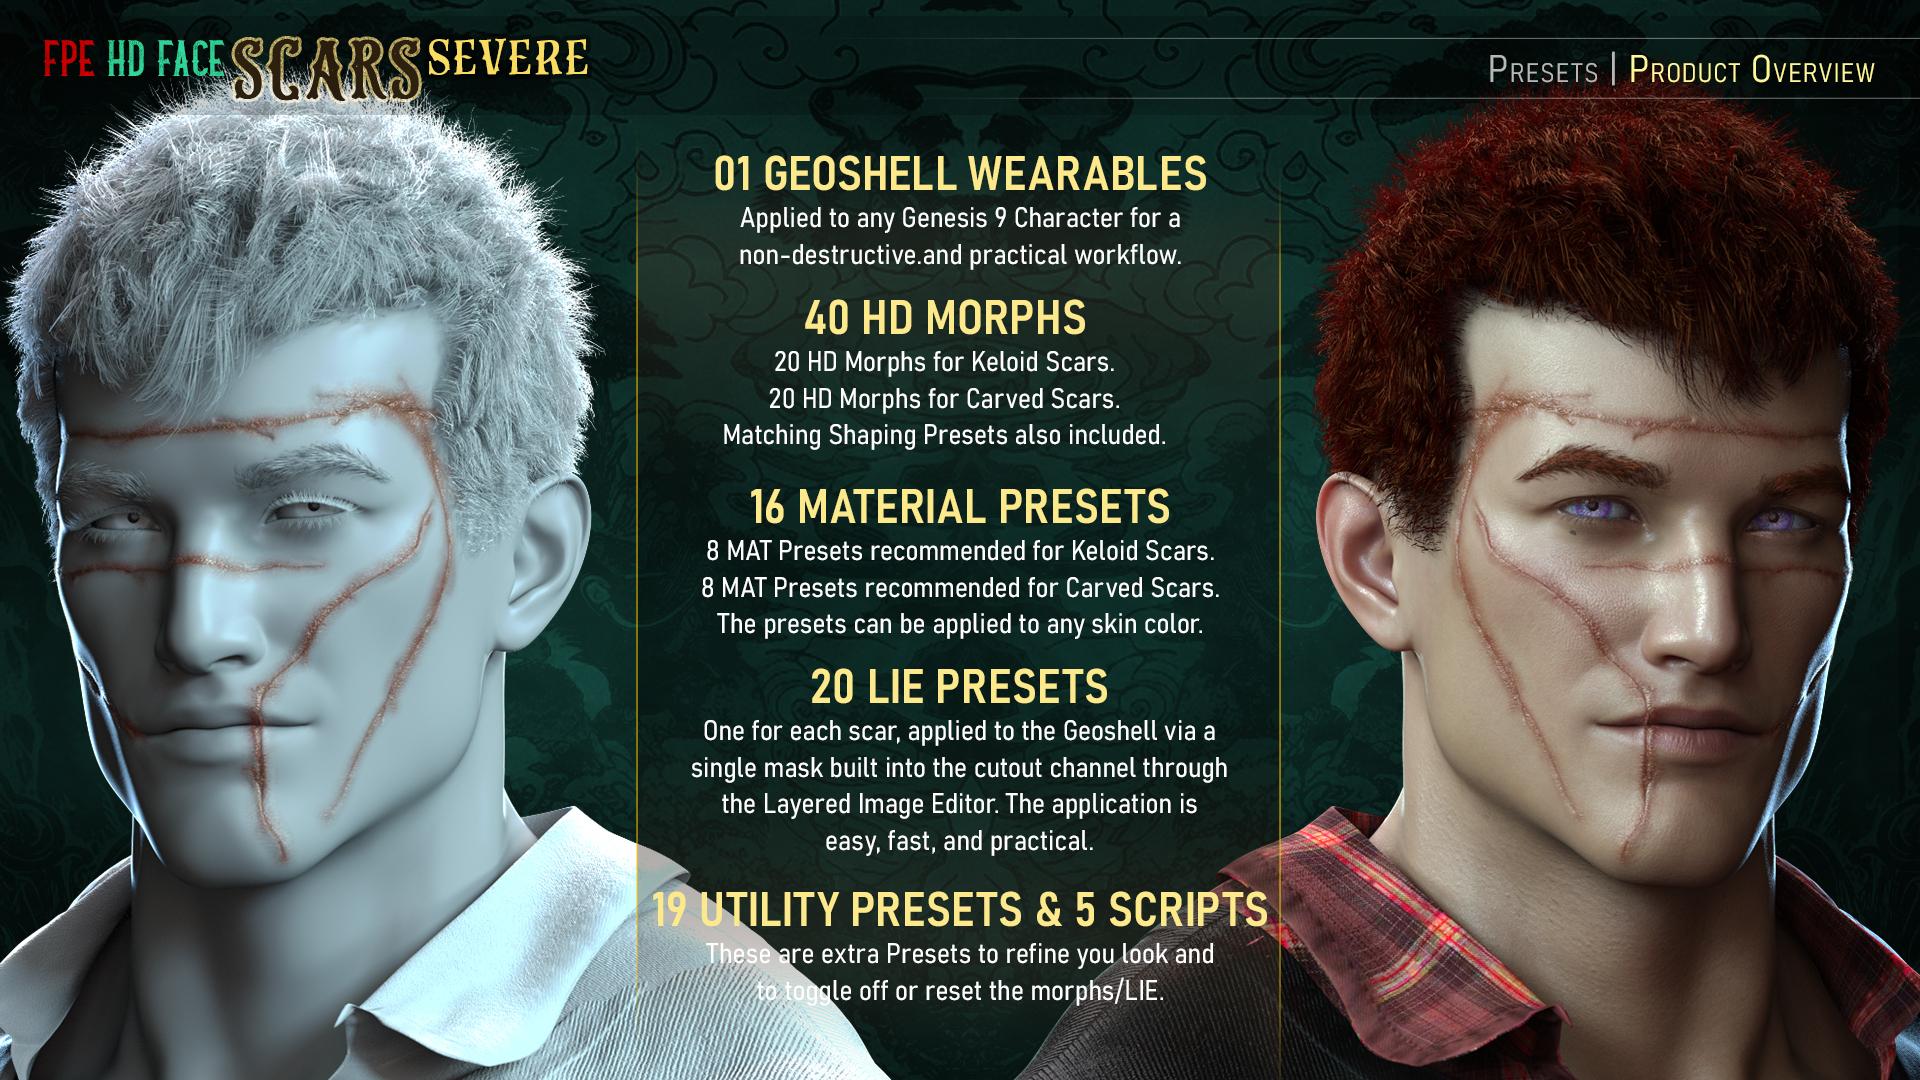
| FPE Face Scars Severe for Genesis 9 | Coming Soon |
 |
 |


Daz 3D is part of 
Connect
DAZ Productions, Inc.
224 S 200 W, Suite #250
Salt Lake City, UT 84101
Licensing Agreement | Terms of Service | Privacy Policy | EULA
© 2024 Daz Productions Inc. All Rights Reserved.
Comments
Thank you for a comprehensive solution and explanation. I'm also glad to see my most necessary scar (strike above/below right eye) included. Now if I can just find the time to get accustomed to Genesis 9, I'll be set.
My wallet is in a state of cat-like readiness...
Thanks for the support, Will!
If anyone has suggestions on what types of scars you look for, let us know as well and we can see if they can be included in future packs!
The first FPE HD Face Scars for Genesis 9 is released!
Aaaand yoink
Thank you, I have been waiting for these
Thank you. @Oso3D and @Zicon for your interest and support! I've added the cover for our second pack which is coming very soon!
Here are some teasers for that shared via the Gallery just now: