Carrara progress, questions re materials, camera creation, merging scenes, BONUS crappy render!!!!!
 ModernWizard
Posts: 850
ModernWizard
Posts: 850
I finally spent some substantive time in Carrara 8.5 this weekend.
I loaded up an instance of my preferred base model, G2F, morphed my character, then applied custom materials. After that I went into the Texture room and consolidated duplicate shaders. A spot check revealed that all maps correctly imported into Carrara, though values might not be perfect.
QUESTION: How/Where do I save the customized material preset [shader?] once I have it adjusted for Carrara?
Then my model got dressed. After an extended excursus into second skin clothing to avoid pokethrough, I finally went with the3dwizard’s G2F Ultra Bodysuit as a solution. I fit the suit to my character, then hid it. Then I fit all visible clothing to the suit, using some of the many morphs available in the suit to keep the clothes from intersecting with the character. Success!
I had a frustrating time figuring out cameras. Then I realized that Carrara’s Director’s Camera = Daz Studio’s Perspective View, except you can’t render from the Director’s Camera. In fact, Carrara’s camera controls work similarly enough to Daz Studio’s that, once I realized the similarity, I felt much more comfortable with basic movements.
QUESTION: Does Carrara have an equivalent to Daz Studio’s Create Camera feature? With that feature in Daz Studio, I can scoot around the Perspective View — or any camera really — until I find a good angle, then Create Camera, then designate the new camera to Use Active Viewport Transforms. It will then position itself at the good angle I found. Can Carrara do the same?
As for lighting, well, let’s just say that’s a work in progress. I have always had a huge fight with lighting in my actual photography, as well as Daz Studio and now Carrara. In my photography, I have finally resorted to two umbrella lights for a diffuse, ambient light with soft shadows. In Daz Studio, which doesn’t have ambient light options [hissssssss!], I have most recently been experimenting in the creation of an “ambient cheat sphere” [radius 2000m], encompassing my entire scene with a bunch of distant lights, all pointing toward the center.
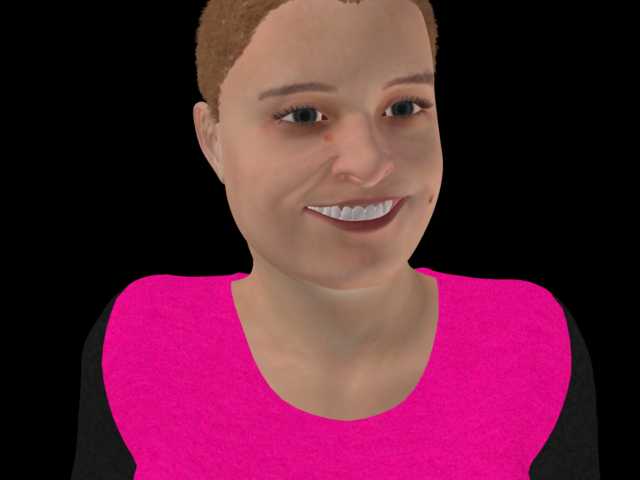
In other words, my lighting goal at this point is a clear ambient light that lights everything realistically, provides very soft shadows, gives everything a slightly toony look, and renders speedily. I have not delved much into lighting, only experimented a bit with HDR and general ambient only, as shown in the attached render. The attached render actually gives a pretty good representation of the kind of light I’m going for, though I’d like slightly stronger shadows, warmer colors, and better detail on the clothing texture.
QUESTION: I put Carrara default standard glass shaders on the cornea and eye moisture or whatever. Obviously I’m not picking up any catch lights, though. Is that because the only light source is ambient? I currently have iris and pupil specularity at 0%, but I’m thinking I need to turn it on. What’s the Carrara name for specularity again?
One character down, two to go. Then they’ll be ready to frolic in HowieFarkesLand and TangoAlphaLand!
QUESTION: If I have a character saved in a separate file, how do I add them to a scene? In Daz Studio, you do this with the Merge Scene command. I poked around, but did not see this command in Carrara.
Thank you, everyone, for your help, encouragement, and answers so far. Your excitement and absolute faith in the awesomeness of Carrara motivate me in my explorations.
--MW
Daz 3D is part of 
Connect
DAZ Productions, Inc.
7533 S Center View Ct #4664
West Jordan, UT 84084
Licensing Agreement | Terms of Service | Privacy Policy | EULA
© 2024 Daz Productions Inc. All Rights Reserved.
Comments
Try to answer these in order
RE: QUESTION: How/Where do I save the customized material preset [shader?] once I have it adjusted for Carrara?
The attached pic shows how to drag a shader from the shader browser to the globe. You want to do the opposite. If you create an optimized set of shaders for a character, then once you are fnished, just click and drag from the globe to the bottom shader browser area.
RE: QUESTION: Does Carrara have an equivalent to Daz Studio’s Create Camera feature? With that feature in Daz Studio, I can scoot around the Perspective View — or any camera really — until I find a good angle, then Create Camera, then designate the new camera to Use Active Viewport Transforms. It will then position itself at the good angle I found. Can Carrara do the same?
You asked several camera questions. This pic shows where the camera menu is within the assemble room. You can use this to switch camera views for cameras in the scene. You can also save a camera angle for later use from this camera menu. In addition, you need to know that you can insert a new camera from the top menu, using INSERT : (...) where the (...) represents either conical, isometric, or spherical.
RE: setting the camera to use for the render
Go to the render room and look under the output tab.
RE: QUESTION: I put Carrara default standard glass shaders on the cornea and eye moisture or whatever. Obviously I’m not picking up any catch lights, though. Is that because the only light source is ambient? I currently have iris and pupil specularity at 0%, but I’m thinking I need to turn it on. What’s the Carrara name for specularity again?
In general I defer to others on shaders because my tastes run to toony and comic stuff. However, my thread for "no on asked me" does have some basic informaiton on shaders related to elements of the eyes.
Couple of posts before and after this one.
http://www.daz3d.com/forums/discussion/comment/1704081/#Comment_1704081
Note - I really recommend that you refer to others on this topic.
RE:QUESTION: If I have a character saved in a separate file, how do I add them to a scene? In Daz Studio, you do this with the Merge Scene command. I poked around, but did not see this command in Carrara
Similar to the shader example above,click and save a figure (or prop or similar) to th OBJECT tab in thebrowser tray. Then, when you want to add it to another scene, just click and drag out of the browser tray to the new scene. Note, you can use EDIT : GROUP to collect a bunch a stuff together before adding to the object folders.
Hi diomede. Thanks for your quick responses to my many questions, particularly about saving to the My Objects and Shaders menu. I was getting confused about My Objects because, in general parlance, an object is a single thing, like one naked figure or one T-shirt mesh. Carrara's My Objects menu, by contrast, seems to be a place where people can save bits and pieces for inclusion in future scenes. Daz Studio has a similar function, Save As Scene Subset, whereby you can save just part of a scene and then drop it into another scene.
Thanks for your information on camera creation, naming, and identifying for rendering. If I have a nice angle and view set up on the Director's Camera or even an existing camera, is there a way in Carrara to copy that angle and view to a new camera?
I will look into your "No one asked me" thread for more info on eyes when I have some time. :D
--MW
If you right-click on the active camera legend at the top left (it doesn't look like a menu, but it is...), you'll see "Set Position to...". This'll move your active camera, including the director's camera to whichever camera position you choose. You can't reorient the orthagonal cameras (left, right, top, bottom, front, back). There is a caveat though: it only has space in the menu for 10 cameras, so your 11th and subsequent cameras will be out of luck (I' a terror for having lots of cameras in my sets - I have lots of nooks and crannies and I like you to be able to see all of them. Well, most of them anyway, it's nice to have one or two gems left to find!) I think that if you reorder the cameras in the Instances browser, that might also reorder them in the menu, but I'm mid render right now, so can't check.
you can set your camera to directors camera too as well as memorise camera positions, one camera can have a heap of saved positions in that menu, a feature missing in D|S I find excruciatingly frustrating.
That's true, I forgot about saved positions -- v. useful!
one of the s/w transition things - was getting used to the production frame
Regarding your question about the specularity, Carrara's shader system breaks it down into two channels. The first one is Highlight. This sets the strength or brightness of the highlight. The second channel is Shininess. This sets the spread or diffuse look of the highlight. As an example, if you place a 1-100 slider in the Shininess channel and set it to 100% the edge of the highlights will be very sharp and well defined. If you set the Shininess slider to 0% the highlight will have very diffuse edges.
If you have a texture set with specular maps, load the map in the Highlight Channel. I like to place a 1-100 value slider in the Shininess channel and if it isn't wet skin, I set the slider to around 4%.
Eyes can be tricky, however Carrara's lights can be flexible. For the bright reflection on a cornea for instance, I usually bump up the Highlight by inserting a 1-10000 slider and sticking it at about 200%. I then put a 1-100 slider in the Shininess channel and set it to around 25% to 30%.
If I am still having problems getting that gleam in the eyes, then it is most likely light placement. I sometimes force the gleam by placing a shape light behind my camera and slightly offset to the left or right. If I want a round shape, I set it to that. I usually use this light as a fill light, so maybe around 40% brightness. I reduce the size of the shape light from the default (in medium scene) 20ft x 20ft, to 1 foot or 2 feet. I usually can get a good gleam in the eye using the above method. There are other ways to cheat it as well.
Another tip to get the eyes to pop, is to use a color in the Highlight channel. You want the color in the Highlight channel to be similar to the color of the iris. If the iris is a dark color, like brown, make the Highlight color lighter, like amber. After that is done, add a 1-100 slider to the Shininess channel and set it to around 2% or 3% to start with.
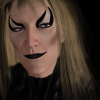
The model in the kitchen uses the shape light to force highlights in the eyes. The bald barbarian woman is to demonstrate the power of Carrara's shader system.
For the bald woman, I used 99% Procedural shaders. No image maps to define color, bump, or specularity. I used two black and white image maps to define and soften the edges of shading domains- the nipples and torso, and the lips and face. They add no color, highlights or bump. Their sole purpose is to slightly feather the edges of those domains
The hair on woman in the kitchen is Carrara's dynamic hair. The eyebrows and eyelashes on the bald model are also Carrara's dynamic hair.
Regarding ambient light, Carrara's ambient light under the scene effects doesn't do shadows. It kills them. It lights everything uniformly, including in the mouth, inside buildings, etc. I use it very sparingly because it tends to make the image look flat and dull with reduced contrast.
What you describe with dome and replicated lights is a common practice among some people (myself included.) Most Carrara people use it to fake GI. I used that method in most of my images I posted with the exception of the Bikini Car wash and the pool picture. The Bikini Car wash used the skylight for the atmospheric light, and the pool picture used a combination of specially placed spot lights to simulate reflected light and some caustic effects, as well as using actual caustics.
That said, it actually works pretty good in conjunction with Ambient Occlusion
One area I haven't really played with as much as I should have. I tend to shy away from GI, and since that is under GI, I tend to ignore it. I shouldn't, but I do.
why is there 2 different checkboxes for light through transparency? ?? hd'scr'ch
One is for the standard renderer and one is for the GI part of it. You need both enabled if you are doing GI renders with alpha channels enabled in the shaders or transparencies in them.
Don't see why, it is not the same thing (despite beeing in the same area in render settings), it is much faster, it's like poor's man GI, lol, I use it in animations a lot
it's closer to Water than Glass,. try changing the Index of Refraction in the "eye surface" shader. to water
set the Reflection to a Value (1-100%) of around 20%
Your figure is standing in a large black empty space,. with nothing to reflect in the eyes,. add something like a large white sphere, in front of the figure, but also out of camera shot. and you should see it reflected in the eyes,.
TIP: Change the camera to "telephoto" for portrait shots.
You could also try adding a sky /realistic sky,. or use a background image,. which will also add to any reflections.
Carrara can do something quite interesting with the Scene Background,. ..it can use the Gradient or Colour / image Map, or HDR image, to light the scene,. which gives an all round lighting,.
You need to set the Global illumination options in the render panel, to enable "Sky Light"
then Carrara will use whatever Gradient / colour / image Map / or HDRI in the background,. to light the scene.
Normally, since the light is coming from every direction,. this doesn't produce very distinct directional shadows,.
use the default Light (distant light) or add a Sunlight,. to add directional shadows.
hope it helps :)