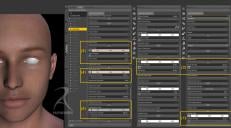
Sub Surface Scattering settings in ds4
 RawArt
Posts: 5,955
I have been doing alot of work with SSS lately, and thought I would share some settings that give a really natural look in ds4
(the tutorial can also be found here...with a larger picture: http://rawart3d.deviantart.com/art/Sub-Surface-Scattering-in-DS-306744678 )
1) Apply your diffuse colour (skin texture), but set it's strength to 70%.
"70% ....but that means I will loose all my cool details"
Don't worry.....we will add those details back later...trust me.
2) Your specular and bump (or displacment) settings are set like normal.
3) Turn on the velvet node, and set it's colour to a light pink.
This will soften the light on your skin in the same way small body hairs would.
4) In the subsurface colour section you will attach your original skin mat again (bringing back some of the details you lost previously). But set the base colour of this to a very light pink, this will bring in the pinkish tones that lay below our skin, caused by all the blood in our body.
You will also have to add a SSS strength map to this, as some parts of the skin will be more affected by SSS than others.
5) Turn on the transslucency, and apply the same skin texture to the colour channel, but in this one, turn the base colour to a light grey tone. It helps keep the effect from getting oversaturated.
This will also require that you apply your SSS strength map to control which areas recieve the effect more than others.
Hope this helps
Rawn


Comments
Going to give this a try right now. :)
I have a character that doesn't come by default with SSS maps. What can I do to the default texture in Photoshop to create an SSS map for it?
Yeah...that is where it gets a little tough.
The sss map does not really relate to the base texture or even bump or spec maps. It has its own unique purpose of highlighting the areas on the skin that are more or less prone to show the effects of SSS.
You might be able to borrow the sss maps from another character (that uses the same UV's), depending on how customized they made them. Like some of the ones I used on my creatures have the deep wrinkles and such applied on them, so they would bring some odd effects.
But if you do have a character that is basically human looking the maps can be closely interchangeable without too much oddness.
Though Ideally the sss maps should be made specifically for the character.
Rawn
RawArt,
I cannot thank you enough for taking the time to share these results. I have been experimenting with SSS for months and have gotten results that I thought were looking natural using vastly different settings, however your settings are absolutely superior and have caused me to rethink my approach. I've had to adjust specular depending on the character/textures I used (all the way down to 8% in one case, usually ~20%-50% looked good though). I'm still tweaking but your post has inspired me and for that I am grateful.
To those inquiring about the SSS maps, I can make two recommendations. First, I've purchased Mamita V4 by MEC4D http://www.daz3d.com/shop/mamita-v4 and Interjection - Surface Injections for DAZ Studio by DimensionTheory http://www.daz3d.com/shop/interjection-surface-injections-for-daz-studio . Both are fantastic products by fantastic artists and more to the point, each includes SSS maps. Mamita includes SSS made for V4 and Interjection includes SSS maps for V4 V5 & M4. I own both products and am extremely pleased with both purchases. Hope this helps!
Make art my friends!
Regards,
Rich
There are many ways to approach sss settings.
Afterall all we are really doing is trying to fake a natural effect, and it's all how you approach going about faking it.
I went into this one knowing i didnt want to use ambients (which is a common faking tool), and that I didnt want to lose detail and have it looking waxy. So with that goal in mind is how I approached these settings.
Rawn
OMG! Thank you! I was looking for this kind of advise couple of days ago! Woo! :)
That's what I'm trying to learn how to do. I get the light dodging on the map to get the effect (and I understand what SSS is supposed to achieve), but take M5DavidTorsoSSS and M5PhilipTorsoSSS for instance. The base gray tone of Dave's SSS map is much lighter than Philip's. Is there a way to know what the base gray for a skin tone should be for an SSS map?
I doubt it's as simple as picking a gray tone out of a hat, but hey you never know.
Actually in a way you can pick what kind of base grey you want to use, you will just have to tweek your settings to compensate for the differences. The % I use here should just be a general guide.
Rawn
Question!
I have some lifeless objects (namely Dreamhome surfaces). Will I get any benefit from using uber-surface settings (such as SSS) on them? Or should I use just DAZ default? Will uber-surfaces make them truly "pop"?
I dont know "Dreamhome surfaces"...but what I showed here is really only good for skin. It really would not work for general objects.
Dream Home is the modular house project in the Platinum Club, prsumably some of the materials in that (not all of which, as I recall, came with DS settings) are going to get tweaked.
Okeydoke, that kind of answers that.
Do you know what kind of different settings would be great -- assuming one used Ubersurface and other bells and whistles -- for things like grass, stone paneling, wood paneling, tapestry and such? Or should I ask someone else instead? :)
It does have both Poser and DS settings available, AFAIK, for all the rooms. I'm mostly curious, because I want to know what kind of cutting-edge stuff I could put into my Nightmare Home project.
Actually in a way you can pick what kind of base grey you want to use, you will just have to tweek your settings to compensate for the differences. The % I use here should just be a general guide.
Rawn
Aha! Thanks! :cheese:
I've been playing around with this over the past several days messing around with the surface tab,
Are there any free universal SSS strength maps for Genesis or V4 or M4?
Sincerely thank you for the ideas RawArt they have helped me a lot, I mixed your lesson with what I knew and came up with this.
Hey Type 0 Negative this is nice looking SSS! But what kind of shader do you use? Dousnt look like Ubersurface.
Hey Type 0 Negative this is nice looking SSS! But what kind of shader do you use? Dousnt look like Ubersurface.
I'm using pwSurface 2
http://www.daz3d.com/pwsurface-2/
Great tutorial! Thanks a lot!!
I dont see how to access this screen
Which screen? The Surfaces pane? Window>Panes(Tabs)>Surfaces.