Cannot load a particular material to a helmet
 murph101
Posts: 68
murph101
Posts: 68
Downloaded, installed, and put onto a genesis character the Mars Explorers for Genesis 2 Male(s). I'm able to pose it all, and it works great.
One of the first steps I went through was to apply the orange materials that came with it to the suit, gloves, boots, and helmet. Every material is tailored for each component with maps. It all works great EXCEPT for the HELMET.
I follow the product tree down to the subfolder in question, where it has the MATS for each component. I choose the helmet mats. Three color choices show up. I click and drag it to the Helmet>Actor. It shows right beneath that. In attempt to troubleshoot, I dragged all three color choices to the Actor, and all three show up. However, when I choose the Actor, then texure brush icon on the tools, the material choices show up for the face glass, trim, rubber, etc. AND the helmet. I doubleclick the texture for helmet in the shading domains. It has a choice for helmet, I pick that, but it only makes the helmet black. Even if I've put all three mat colors onto the Actor, it still only shows one helmet shader. I can change the shader to a basic color (say Orange), but it has none of the highlights the rest of the outfit has.
I've inspected the folder in Windows Explorer, found the Helmet>Mats subfolder. It shows the three icon files, and three .DSON files (or DUF).
Any ideas?
Daz 3D is part of 
Connect
DAZ Productions, Inc.
7533 S Center View Ct #4664
West Jordan, UT 84084
Licensing Agreement | Terms of Service | Privacy Policy | EULA
© 2024 Daz Productions Inc. All Rights Reserved.
Comments
Also, I've created a new project where all I add is the helmet. Still can't figure it out.
Right. Daz Studio Material applying files are set up for Daz Studio, not for Carrara.
Quite often, the product will look okay (not spectacular) when we first load it in, but if we try and load a material set, all goes wrong. Not always, but sometimes.
The reason why is that all 3d render applications have a different render engine/shader setup. So when a vendor uses special parts of the material setup in Daz Studio that has no real translation to Carrara, it doesn't come across correctly.
I'm working on some nice articles to help us all sort this stuff out, but here's some quick help in the meantime:
1 - Use DIM to know where the texture files are located. We always need to access our texture maps! ;) The default for Genesis and their support products is Public Documents > My Daz3d Library > Runtime > Textures (and then each artist is broken down into folders within) DIM rocks for this! Just find the product in question, right-click > Show Installed Files - in the window, scroll down to the Textures folder and see what that next folder is. In this case, it's "Midnight Stories"
2 - Select Actor, and the go to the Texture Room
Color - Most often a Texture Map.
Alpha - This is often used for making parts of the model invisible or see-through - Content often uses texture maps for this
Highlight - This is often incorrect for our needs. For a simple color shader, just make this black, or set to None. I usually use this channel, but that's more advanced than this simple discussion
Shininess - If we set Highlight to Black or None, this has no effect. Basically, higher numbers make smaller, more precise shines on the surface.
Bump - Most often is a Texture Map, or nothing
For now, lets leave it right there. In most cases the rest of the channels will be None.
So to change the color of a model, go to the color channel and change the Texture Map to a different one from the same folder. You'll have to find that folder, as I've explained above, but once you get into this, you'll get really good at it.
Sometimes, the different color options also have different bump maps. This is rare, but it happens. So I always like to open the texture folder in question and have a look around.
Some parts of a model might be intended to look like a light, and illuminated button or dial, etc., Sometimes there's a special map for this, you'll often see a image that's all black except for those screens, buttons, or whatever. In this case, put that Texture Map in the Glow channel for the appropriate object.
Let me know how this goes. Eventually I'll get my articles online which really gets into all of this - in an easy way, and then in much more advanced methods as well.
That did the trick! Thank you Dartenbeck!
My pleasure, Murph101!
Been there! ;)
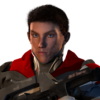
So are you liking the Mars Explorers? Here is a strange test, messing around with my new HyperSuit by the same author. But I swapped materials (inner parts were supposed to be what is now the outer parts, etc.,) and then used the maps that came with the suit (Lots of them!!!) and eventually inverted the image and multiplied in some color and put that in the glow channel... it was fun... I'm not going to keep it like this, I don't think, but it was fun.
..and this is just the base Genesis shape. I'm planning to make many versions using different shapes. I have every part of Genesis turned invisible and gave all of its parts the same shader (invisible) except for the irises of the eyes, which I have glowing ;)
Oh... seeing the picture again, I realize that I've turned the glow down (made it darker) for the default (shown above). They can really glow though... which shows nicely through those dark, glass lenses! :)
I should add that the suit has a much nicer 'armor' look to it before swapping the materials like I did - so I'm not keeping it this way. Just saying ;)
You are the master! I cannot even imagine being able to do that.
You'll see... it's really fun once you get into it!