RAMWolff's SuperSuit creation thread.....
 RAMWolff
Posts: 10,220
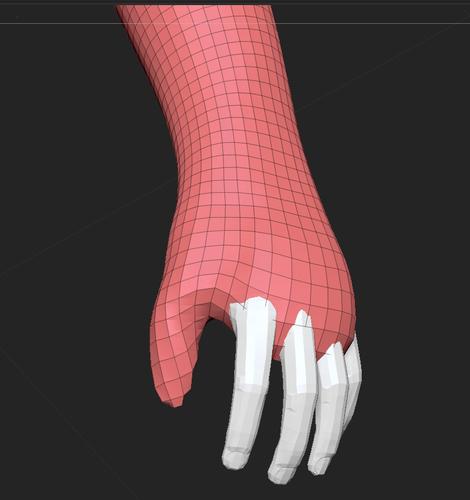
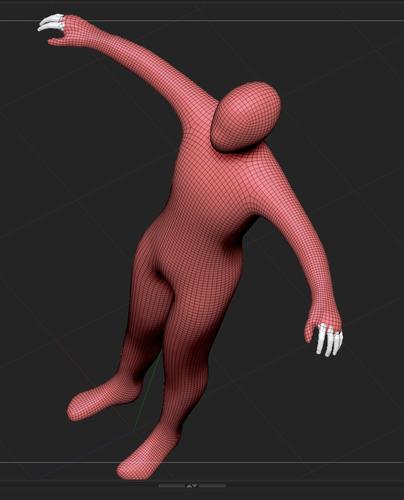
Read up on some tutorials. Not enough info though to finish up the fingers. Anyone know how to make fingers in ZBrush using the Dynamesh? I got the rest done. Kinda fun... except for the thumbs. Cussed my way through that part. But the other fingers are just too skinny so there is not way that pulling out the mesh and remeshing it is going to be good enough. I tried and it was a mess...
HELP????

Hand_To_Go_Still.jpg
829 x 882 - 176K

RAMS-DynaMask-04.jpg
756 x 747 - 189K

RAMS-DynaMask-01.jpg
927 x 746 - 215K

RAMS-DynameshBodysuit02.jpg
769 x 952 - 230K

RAMS-DynameshBodysuit.jpg
1327 x 858 - 246K
Post edited by RAMWolff on


Comments
Make the fingers out of cylinder primitives. That's what I did to make the fingers on my Battle glove.
I found that when using the QRemesher, while I wanted to pull my hair out of my head at times, it did what it was supposed to.
I found that by masking previously done fingers kept them from being overly smoothed which tends to pull the mesh in tighter and of course that makes more work each time because you have to go and pull it all back out. When I masked it was by mistake.... sort of.....
I had masked previous larger body parts and for some reason it seemed to create some weird bits throughout the mesh. So my plan was to mask the previously completed fingers while I was pulling the mesh up to cover another finger (This is all done with symmetry on so the other side was getting the same treatment) and when I was finished clear the mask. I forgot and didn't remember until I clicked the QRemesher button.
I let it run anyways and well.... I got a much tighter mesh. Good for the fingers but probably to heavy to really make use of in DAZ Studio. I'll have to check it out.
If it is I'll see if using the ZBrush Decimator will have the desired result I need. I know that DAZ has it's too but with the density of the suit I'm afraid it will crash DS. This happened a while back when I was playing around with a dense mesh and wanted to test out the DS plugin and well... it crashed internally and wouldn't recover.
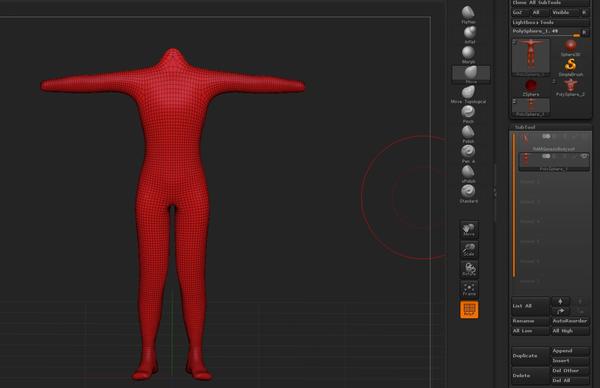
OK... got the suit completed. Next step is to UV Map it and get really handy with the zone creation in ZB..... here's a quick render from DAZ Studio. It's 2.5 Mb's total. So LARGER in size than Genesis, much more so. Hmmm
WOOT... figured it out. Decimator was a mess. Triangulated and then when I merged Triangles it looked horrid. So I tried experimenting with masks and blurring masks (hands only) and QRemesher set to exactly Half and it gave me a lovely lower rez suit at 1.32 Mb's! YAY! Hands are still Hi Rez so enough poly's to keep the gloves looking great.
Screen grab from the Viewport in DAZ Studio
Well then. Did a quick transfer rigging and found it responds very well to Genesis. No poke throughs at all and looks great.
New thing to learn. UV Mapping. According to some help on ZBrush Central when using the QRemesher it creates a spiral polygon layout so that when trying to create UV Mapped zones you can't get them. From any angle is APPEARS that the poly's are laid out perfectly but they are indeed not. So not sure how to proceed with this. There is a way to fix it by some weird rebuilding of the mesh but I'm not at all familiar with the process. :gulp:
Well after spending most of the day watching tutorials getting to know ZSpheres was the best way to go. Once I got the basic body form laid out (as you can see with all the zones the finished armature created) I used another tool in ZBrush called "Project All" and had my original bodysuit under it (with the messed up polygon layout that was giving me hell when trying to make clean zones) and wallah. I then had to "Inflate" at 1 and used the Standard brush to pull out the remainder of the mesh along with the Smoothing brush to get everything cleaned up. Allot less headache. Again though, getting the fingers created using smaller ZSphere's was a royal PITA but worth it in the long run. Had allot of clean up to do before projecting though. My first few tries at it revealed that I needed to do some clean up and smoothing around many of the finger joints and the crotch area before attempting another projection. Verts were flying all over the place and it was obvious what needed to be done after all the reading and watching of video's on the subject. Now I can make other zones and hopefully not run into any more issues.
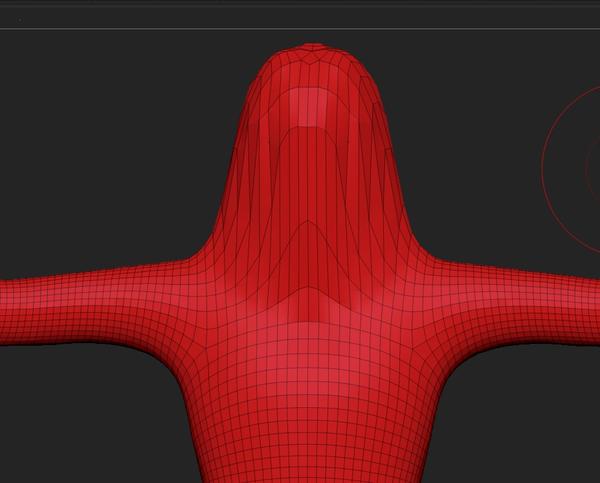
Well, I think I have as many zones as I dare attempt on my first go at all this. I know the mask looks funky but with the poly's being as mid range as they are there really isn't a whole lot more I can add to it without looking like lego blocks. :gulp:
Ended up adding some more zones around the collar thing and some areas down the middle so when combined you can make a vest sort of look with it. Should come in handy for possibly making Cosmic Boy's costumes. I then did a flat mapping via the UV Master in ZBrush. Next step it to take this into UV Mapper Pro and create a neater UV layout that I like more, this looks messy.
Well, got it done. Now I have a basic suit to build clothing and what not out of. The fit is not super tight but it's useable as it is for the most part. I will probably take it into ZBrush and get it fitted better but glad I got the UV's done and sorted out. Poses just fine too! :-)
Well done, you've done a good job on that.
Any chance you'll share it?
Thanks Wendy. I'm still thinking about things about sharing this one. It's hardly flawless. I still need to work on learning to create circular zones for the mask since it's got NO eye holes because of my limited knowledge. I'm a stickler for perfection so until I get all this figured out I might hold off releasing it to the wild.
When and if I release it I will include a ReadMe file to make sure folks use only to make personal use or freebies with. I know your a great freebie clothing maker so your cool, I know..... :-)
If I want to make circular holes, I usually start by deleting one or four polygons. When you subdivide the squares become round.
Hmmm, well the suit is already heavy as it is. So subdividing it as it stands now wouldn't be so good I think.
I suppose taking it into ZBrush and deleting the rest of the suit except for the mask and cowl area and building a full bit with that would be better at this point. Not sure what the procedure in ZBrush would be to get more poly's added to the mask itself without making an ugly seam where the lesser poly's meet and connect with the denser poly's area...
Here is the results of dividing up one level. I don't like how things look spliced together around the cowl seam.
What happens if you remove 4 polygons for each eye and then let Daz's smoothing iterations work on it? Does that make them round?
Nope. Here is the suit Sub-D'd and as you can see the corners are still very sharp!
OK... playing around with masking and then using the Deformation area to "Polish by Groups" and then dragging out the shape to one I like seems to be OK. I still don't like those stitched seams but I guess that's what it is until I learn differently. Going to do this for the ear holes too.
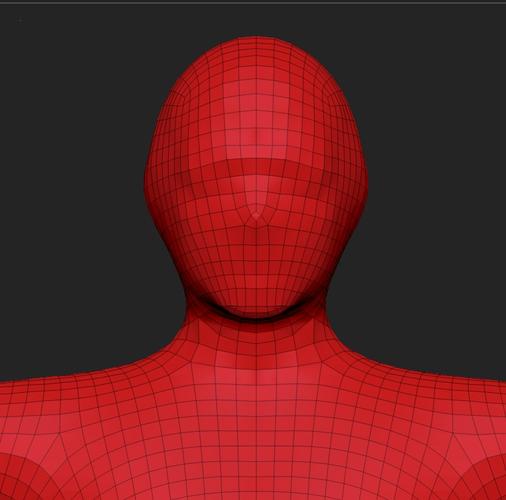
I also shaped the entire mask to the Genesis face as best as I could without making it look like it's wrapped with cellophane. I want the mouth to have a bit of a stretched look from where the tip of the nose and the chin points are so that's good.
YAY... looking more how I envisioned it!
OK... redid things. I think this is pretty much done for now. The UV's are all inclusive so no worries about finding what connects to what. Just studied things a bit more and found this to be the best solution.
I do have to comment too on "Ultimate Unwrap3D Pro" it's by far better than UVMapper Pro in so many ways. More intuitive, easier navigation, easy to rotate and select things with. You can rename those pesky coded Group Names that ZBrush spits out to something you can actually work with. Made it infinitely easier to go down the list and get the Material Names done too. Also a way to save a working file that you can come back to rather than overwriting your obj file if your unable to finish your project. Lots of other stuff too. You can see the interface up there somewhere a few posts up. Right clicking is very helpful with lots and lots of menu options. So I think my $65.00 was well spent.
I added a few more material zones to the suit to give a "Tank Top" option, topper for the thigh boots material zone, got the eye holes, ear holes and created a "Colossal Boy mask shape for the main mask area. Learned to work with Edge Loops and Crease Edges a bit more. Still need to study up on those more but got the job done very well I think.
OK.... did a little render and some Photoshop. Off to bed. Long day tomorrow. Fun day. Learned allot! :-)
Improved the mesh, esp the fingers and feet so that things flow nicely and are more form fitted to Genesis. Trunks UV Mesh is moved down so all 3 zones look like various Trunk lengths rather than having things skirting up on the sides, which really annoyed me. Now going to see if the Ultimate Unwrap 3D Pro is capable to transferring the materials and groups to the updated mesh since those haven't changed. If not then I'll just have another hour to go getting those done and then rig in DS and should be finished finally. I hope.....
Edgeloops are another way of getting round eye holes. Mask a couple of polygons where you want the eyes, edgeloop them, and then smooth, move, or deformations/polish them round.
Yea, that's what I discovered a little while back. Group Loops was the way to go unless you like another loop Joe?
Do need your expertise here Joe. I'm having an interesting issue.
The bodysuit is somewhat finished but in DAZ Studio when I save it out into a rigged asset it looses it's groups so when I take it into ZBrush and click the Polygroups there are none. Don't know what to think of that. Is it because I have the groups and the material groups named the same? I did that to keep my head straight about what got named what. There are 30 groups total. So I'm wondering what it's going to take to get my groups back so that as I do more things with it via GoZ I can turn off parts I don't want on when working.
Hope you see this. If not I'll PM ya!
Thanks! :-)
Also I've found that the fingers are breaking where the grooves are. Perhaps making such a high poly finger groups was not such a great idea but now how do I fix this part??
To fix the part where you lose the grouping after it leaves Daz Studio...
One of two things can fix this. First, did you try the polygroups subpanel, click Autogroup with UV? That should restore your groups. If not, hopefully you saved out an .obj of the suit before taking it into Daz Studio. If so, you can import the UV's from your saved .obj file (so long as you did not add or subtract any polygons since then.) Using ZBrush tools on the mesh won't hurt the UV's, so long as you don't divide or delete polys or anything.
Hmmm, interesting. I didn't change anything in the main suit. So your saying there is a way to restore the polygroups then? How do I go about this? Would I bring in the rigged suit from DAZ Studio using the GoZ plugin? Then import the main OBJ suit with the intact polygroups? Or ........ ?
I did try Autogroup with UV. Didn't seem to do anything. That's the one thing that's apparently missing from ZBrush, a way to view the group names and material names. I've looked hi and low for a tool or something that has that functionality in ZB.
Did your model actually have UV's already? I remember reading that it was something you were going to get to at some point. If you did not make UV's yet, try this to get the groups back....
1. Load your "groupless" model into ZBrush.
2. As long as it hasn't been modified by dividing or deleting anything, import the "polygrouped" tool you saved out before. It will replace the ungrouped mesh with the grouped mesh and will still transfer to Daz Studio via GoZ.
3. I recommend, before you send it back to Daz Studio, that you use the UVMaster plugin in ZBrush to create some rudimentary UV's so that this will not happen again. It's not important that they are exactly the way you like at this point. Make sure you select the Polygroups option in UVMaster. This will separate all of your polygroups in the UV map it generates.
4. Import to Daz Studio via GoZ or whatever way you are using.
5. Export from Daz Studio. I always put this export on my desktop while I work so it's easy to find. Export with settings: Daz Studio scale 100%, collect maps.
6. Open in UVMapper (free program, totally awesome). Now you can select each group that was created by hitting Ctrl-G (select by group) then assign to a material. Save the updated object.
7. Import the new object into Daz Studio. Now, whenever you send it back and forth to ZBrush, it already has UVs and ZBrush will be able to restore your polygroups via Autogroup with UV's.
Hope I explained this well. I don't have any of these programs open right now and was going by memory. Good luck! You can PM me anytime if you need specific help with any of this. I've been using ZBrush since version 1.23 about 11 years ago. I am "Slosh" on ZBrushCentral as well.
Hiya,
Thanks for the response Slosh. I've been so busy learning ZBrush techniques and working my job (Hairdresser) and lost my forum notifications to this thread that it just now occurred to me. I've been posting allot over at Cath's forums as she's helping me too and her notifications don't peeter out! lol
I've been a busy busy boy though. I kinda gave up on the whole trying to keep my groups. I figure as long as I have Material groups that show up in DAZ Studio and the UV Map itself isn't a bunch of islands making it impossible to texture things so they flow nicely I'm good with the outcome.
SO created what I'm calling the "Simple Suit" which is no feet, hands or face. A separate Mask with zones to turn on/off. 3 sets of gloves, one simple set of gloves, 4 sets of boots with sock, flat or heeled options. Been playing around with the Panel Loops and having a blast.
UV mapped and rigged with a quick shader I threw together. Turned out pretty good. Fun learning and even funner seeing it all come together.