how do I create map/tex for item in Corel
Hi all,
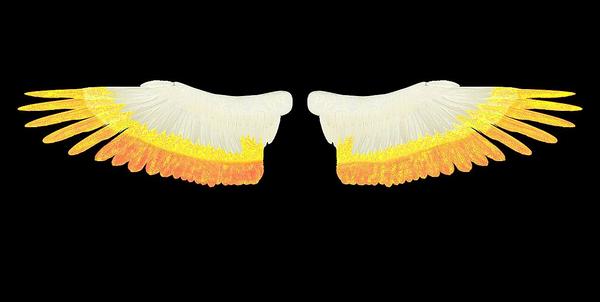
I'm stumped. I can't figure how to take a item from daz example of epic wings, put the image in corel paintshop pro 4, paint it then apply the texture that I just made back into daz on the item.
Please help!!
Thanks,
Isodoria


raphaelwings.jpg
1216 x 613 - 78K


Comments
Okay, what it is you need is the texture template. I'm assuming you do not know what that is, so I will explain it.
The model is made up of polygons. Those polygons are flattened out to a 2D map for reference so that, when you paint an image designed for them, they wrap that images colour around the 3D model to give it colour and texture. This is called a UV Map. (why UV, God only knows why geeks gave made U=X and V=Y... I certainly do not, but I digress).
So, here's what you need to do. export your model from DAZ STudio to Waveront OBJ. Load your model in UVMapper: http://www.uvmapper.com it is free.
SAVE the Texture Map (actually, it's a texture template) and that texture template is what you paint on.
Once you are done, you load your model into DAZ Studio, make sure it is selected in the Scene Tab, go to the surfaces tab, and under Diffuse Colour, apply your texture.
Convoluted? Yes... but then, everything 3D is...
HOWEVER, if this is already painted onto a Texture Template (and that very well may be by the look of it) all you need to do is apply it to the diffuse colour in your surfaces tab, and voyolay... instant colour :) JPG, PNG are good formats to use...
Thank You, That helps a great deal, now I just how to make heads or tails of the UV.
If that is Epic Wings for Genesis, here : http://www.daz3d.com/epic-wings
Then go to that link, and then to the Resource Files tab, and download the textures/13038/texture1/13038_1_tx_EpicWings_1.exe or the ZIP one if you are using Mac, it is just a straight download, no need to go thrrough the Store.
That will give you the template files, and you can colour them in whatever way you want. The EXE creates a folder called Templates, and there are 3 JPEG files of the UV Layout that you can use.
You need to hide the materials that overlap before you export the UV map from UV Mapper - look at the wings in DS to see which have the map for Diffuse colour, those should all be visible on the same template. You can select the other materials through the Edit menu, then there's a shortcut key (] possibly, but check the Help menu for a list of hot keys) that will hide selected. Repeat fro each group of materials that uses the same map.
OKAY, how do you make head or tail of this. Here's how.
EDIT:select:by material
There are two select options in the Edit menu, use the LOWER one.
So, you want to now clean up the template so you can see stuff, select all the materials EXCEPT the one you want to make a texture temlate for.
resize those down into the corner, and SAVE TEXTURE MAP.
Be Careful NOT to Save the model!!!!!!!!!!
ONce you've done this, RELOAD the model and do the same thing for the next Material you want to make a template for.
As I said, UV mapper does have options to hide selected (or unselected) polygons, which won't then show in an exported template. Then simply unhide them and go on to the next group.
That doesn't work. Just tried it, and UVMapper (classic) exports the BMP file with all showing, hidden or not.
UV viewer can be your saviour http://d3d.sesseler.de/index.php?software=other
I use it very often to make my own UV maps, as it is a simple click to turn parts off and turn them on again
In UVMapper Classic: load model; (Optional) Edit, Color, by Material; Edit, Select, by Material, in pop-up pick materials that share a texture (pretty easy to figure out in Studio's Surface tab); Press Esc key then ' key to hide non-selected facets; File, Save Texture Map, in pop-up set size and check Exclude Hidden Facets; Press ] key to un-hide all facets; rinse and repeat til all materials are done.
Ah, I had forgotten the need to exclude hidden faces on export. Thanks.
Thank you all for your wonderful help! I will hopeful post the resulting picture that I was intending this picture for sometime next week.:)
Anything like UV Mapper available for Macs? I've been using Hexagon, but the maps it generates are very low rez.