FX without applying FX - on purpose :)
 Dartanbeck
Posts: 21,624
Dartanbeck
Posts: 21,624
Wow!
Okay, I'm going to put together a tutorial video on how this was done...
I'm typing this as I await the finished render, which looks like it'll be a total of just over eight seconds.
My son was explaining how he thinks that I should approach certain footage in my movie - the overall action topic, for the most part, which inspired how I'll be filming the action. So I grabbed a basic background map - using preset from Woodlands, right... (has little to do with the discovery) and I dragged in an object preset and psushed it and dug on it until I liked where it was and duplicated it and repeated that... right... nothing major here - but I was really happy with how it looked - so I shot a render. Cool. Want some fog. Turned on the ground fog, which is one, very cool top to a volumetric cloud. Render. Cool. You know... I want to highlight the objects (Trees, plants, deadwood, etc.,) that I added using the rig that I included for highlighting individual articles of interest, right? Oh... Man!
The added volume of light pressure is the best way I can think to describe it.
Overloading and over saturating the atmosphere, not with brightness of light, but shear volumes of it - all distant lights - Dome of AGI, Global distant directional accent light and an ambient highlights rig. That's just the basic workings that's there to use - and is on by default... looks great.
Focus Group
I made this group and made a very simple highlight light rig set only to affect this group. Nothing special. But I use the idea that a strong backlight is an excellent highlighter for important elements... like the main characters. Everybody else c an just blend in, right?
I selected each of those lights in turn and changed from "Only" to effect the group to "Effect Everything But" that group.
When I first saw what was happening with a stark, non-soft backlight, I aborted to the assembly room and changed that, quickly - just to polish the effect - Behold - Light glare and rays simply caused through the use of heavy, highlighting-specific lights against an already light-filled Carrara volumetric caught at the proper angle. I can't wait to see how the action sequence looks within it!
When I can - I'll show you what the scene looked like before this occurred. Or you'll see it when I video tut what I did. But the background woodlands was clearly focused... tough to explain - you'll see.
Daz 3D is part of 
Connect
DAZ Productions, Inc.
7533 S Center View Ct #4664
West Jordan, UT 84084
Licensing Agreement | Terms of Service | Privacy Policy | EULA
© 2024 Daz Productions Inc. All Rights Reserved.
Comments
HMMMMMMMMM veddy IN-terrest- INK!
This is better. I blew the soft shadows distance too huge on that first post:
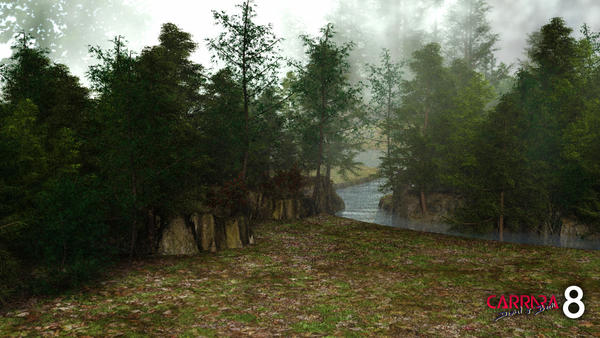
1 - No Clouds - just background and foreground environs
2 - Clouds, but the "Focus Point" lighting isn't affecting anything
3 - Focus Point lighting effecting everything - but with better soft shadow settings. I think that an even lower number (this one is set at 25 feet) would sharpen the naturally occurring rays and glares even better. It was really prominent with no soft shadows at all, but some branches made a very sharp shadow effect on the grass! lol
Now imagine how much further this can go while "trying" to add an effect or two!!!
great discovery Dart, thanks for sharing!
Want some more fun with this? Go into the realistic Sky settings and in the editor where it says 1 Mile in the scene corresponds to 1 Mile, change it to something like 1 Mile Corresponds to 5, 10 or 20 miles. You can also play with the haze altitude and percent settings to exaggerate the effect.
Want some more fun with this? Go into the realistic Sky settings and in the editor where it says 1 Mile in the scene corresponds to 1 Mile, change it to something like 1 Mile Corresponds to 5, 10 or 20 miles. You can also play with the haze altitude and percent settings to exaggerate the effect.Dude... No RSE!!!
This is a simple terrain plus a few more terrains with trees, etc., and a background map!
Standard artificial GI with a directional accent - but even that, in all images shown, is down to 35 brightness.
After making v-cloud ground fog visible, you get image two of the three image series above. Just by changing the focus group light rig lights (four distant lights) from affecting Only the focus group, to affecting Everything But the focus group is where we get the third image. The only atmosphere in here is in the v-cloud!
That's why I'm so stoked!
The only difference between the first image in the first post, and the last image above, is the soft shadow distance of radius. Top post radius = 1250 ft, while the last image above uses 25 feet. Change that to 5 to 10 and I think it will improve the rays and the flares alike.
Keep in mind that, aside from shadows and a subtle color in some, there are no effects settings applied to any of the lights.
I didn't post this in the WIP thread, because this can occur in scenes that have nothing to do with that kit. It's Carrara, man... Carrara!!!
LOL :lol:
See what I mean? The longer I stay awake, the dizzier I become. Then posts like this happen! lol
At least I'm a happy mental guy!
Be that as it may, using haze and forcing the atmosphere scale can also render interesting results, which is why I said to do it if you want more fun! It's Carrara man! Carrara! :lol: