"How To" for Head Wax - Iron Lung Challengers

Retro LadRetro Lad Posts: 471
edited August 2018 in Carrara Discussion

Here are some "How To" questions that would be helpful for me.

The first is a basic "How To" question. What is the best way to get "Sveva" style great skin and lighting renders for V4 fem models in Carrara. I have Poser 9 and I find that "Sveva's" lighting and skin settings are the best for what I am looking for in Poser. Not super photorealistic, and not Toonish, but some somewhere in-between. So how do I replicate those kind of settings in Carrara? I have made some tests, and got some good results but there are details like getting the facial features to look as good in Carrara as they do in Poser.

Then there is getting the slight body distortions fixed. There are the Perfect Body series add-ons for Poser that fix arm, leg, etc. distortions but is there anything like that for Carrara? The "read me" file in Perfect Body says that it will not work in Carrara.

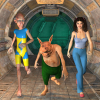
The second "How to" is, how do I use the voice plugin correctly which is called Mimic I think. I attached a snap from an old horror film that begins with a talking head floating about inside a crystal ball on a tabletop. Maybe you could use something like that to demonstrate and explain how I can get a human character to speak.

Thanks

float2.jpg
640 x 480 - 48K
Post edited by Retro Lad on

Comments

  • DiomedeDiomede Posts: 15,125

    Disclaimer - in general, I do not pursue photo-realism and therefore am not a particularly good source for information on shader settings.


    With that said, I have a discussion of adapting genesis figure skin maps for use in Carrara.  Start at the following comment and then scroll down for about a half dozen posts.
    https://www.daz3d.com/forums/discussion/comment/1701046/#Comment_1701046

  • HeadwaxHeadwax Posts: 9,964

    Ha ha thanks for those suggestions.

    I know a lot about nothing and even less about everything.

    On your questions .... I  have no idea maybe someone else could help. :)

    For faces I'd keep in mind the value of post work. Specifically use a colour paramter in a layer and add redness to cheeks and tip of the nose - 

    greeny blue to the jaw for men.

    For question 1) I'd suggest looking at somone like Vyusur or Evil's renders. You should be able to apply what they know to any figure. 

    For question 2)  BooksbyDavid was the pro https://www.daz3d.com/forums/discussion/6337/experiments-with-the-perfect-fixes-for-v4

    and also https://www.daz3d.com/forums/discussion/7619/xandm-perfect-victoria-complete-morphs-and-glute-morphs-fenric-s-script-tool


    Question 3) Sci Fi Funk is the man. https://www.daz3d.com/forums/discussion/36928/how-to-use-mimic-pro-for-carrara-effectively-tutorials


    hope this helps - I have other How To's planned - by necessity they are short and sweet  and simple :)  Mainly aimed at common tasks that new people might find difficult.

  • HeadwaxHeadwax Posts: 9,964

    thanks Bunyip02 :)

  • HeadwaxHeadwax Posts: 9,964
    Diomede said:

    Disclaimer - in general, I do not pursue photo-realism and therefore am not a particularly good source for information on shader settings.


    With that said, I have a discussion of adapting genesis figure skin maps for use in Carrara.  Start at the following comment and then scroll down for about a half dozen posts.
    https://www.daz3d.com/forums/discussion/comment/1701046/#Comment_1701046

    Thanks Ted, sorry just saw your post!!


  • DiomedeDiomede Posts: 15,125

    Thanks, Bunyip and Headwax.  

    Jonstark also gave some advice for skin shaders.  I don't have the link but I do have some saved excerpts.

    Sorry, there was more but this is all I have saved.  It is missing the discussion of diffuse, highlight, specular, and bump for skin.  The following is from Jonstark

    Subsurface scattering I do use, but will slow render time with calculations too much in an animation with any kind of indirect lighting calculation (so if you’re using skylight or full GI then subsurface scattering might be too much of a render slower to be worthwhile, on the other hand if you’re using direct lighting and the ambient light in the scene tab to fake indirect lighting you may still want to use SSS). Finding good SSS settings is very very tough, lots of people I respect very much for their Carrara skills use lots of different methods. Looking at mine, I realized I’m using the same ones PhilW recommends in his Realism Rendering tutorial series, so I can’t in good conscience give them out in a public forum or else I’d feel like I was giving away part of his product. Let me jump back to a prior SSS setting I used to use, that I still think it’s pretty decent and give that instead.

    diffuse: 99
    translucency: 10
    Intensity: 10
    Refraction: 30
    Fresnel: 10

    pair it with a light pink color to simulate blood beneath the skin (if I’m remembering right; I didn’t write down my color settings at the time, so play with it and see what pops for your eyes).

    Now lips are similar to skin with a few differences, I try to make lips for girls a bit more shiny to simulate lipstick, can do this by raising the highlight intensity and the shininess percentage to make it a bit more glossy, and the lips look a bit better with a slight amount of reflection (imo).

    Eyes are very important (imo)

    Eyesurface: Can be very useful as an all over the eye cover to give reflections, but my current setup I don’t use it and have it set to transparency 100% with the top channel ‘no light interactions when fully transparent’ checked.

    Lacrimal: This is the skin in the corners of the eye, and I use skin settings with higher highlight and shininess settings to make it look a little more ‘wet’.

    Sclera: The whites of the eyes, I use the eye texture for the character here, again like the lacrimals I add some highlight and shininess amped up a bit to give a wetter look.

    Pupil: The dark hole in the center of the eye. Can leave it fully black in the color channel and nothing else, or can also just throw the eye texture from the character here (it will map to the black part at the center of the eye texture anyway). No reflections here, which may seem counterintuitive, but seriously can look weird if you put reflections in.

    Iris: this is the colored center of the eye. It might seem counterintuitive but currently this is nothing more than the color channel with the texture map of the eye, no other reflections, highlights nothing (well it doesn’t hurt at all to throw a little bumpmap in if you have it).

    Cornea: This is the eye lens that sits over the iris, and this is where all the magic happens to make the eye ‘pop’. Even though it’s transparent, this is possibly the most important part of the eye texture. Refraction here is very important, I actually have my refraction set to the ‘ethyl alchohol’ dropdown, my highlight is way up at 400%, my shininess is at 21%, my transparency is set to 100% and my alpha is set to 49% and the color is set to black. I don’t have reflections set here, but for closeups I would use reflections in this channel (for longer shots the highlight should work just fine, especially if you have a low intensity light pointed at your character’s face, that gives good highlights to make the eyes pop but no real cost in rendertime). You also may very well want to change the eye shape in the assembly room parameters to make it so the cornea is nicely convex while the iris is actually flat below it (it only should appear the iris is convex because of the refraction from the cornea).

    I’m actually looking back at my settings and thinking this may be an older texture setup, not my most current, as I play with refining skin textures all the freakin time (it’s one of my long term hobbies with Carrara actually).

    There is a lot more that can go into trying to get super realistic skin, and many other methods, but I thought that might be a quick and easy way to get you used to the various shader components and comfortable playing around in the texture room.


  • HeadwaxHeadwax Posts: 9,964

    thanks again Diomede :) Pity JonStark has faded waway

  • Retro LadRetro Lad Posts: 471
    edited August 2018

    Diomede and head wax

    Thanks for the help.

    I have been sick from the humidity out here, wandering about my house like an animated vegetable and barely able to think and concentrate on anything. Weird weather for this dry area that has swamp coolers on rooftops.

    What ever happened to Jon Stark? He was planning to add a large series of free dynamic hair models based on his discoveries. So where are they? Did he move on to Lightwave, or 3DMax and abandon us to the "machinations" of Daz3d and their Iron Lungs.

    Post edited by Retro Lad on
  • HeadwaxHeadwax Posts: 9,964

    Jon is just being quite. The forum was a battlfield a few years ago and we lost a few brilliant users

  • DiomedeDiomede Posts: 15,125

    It is not frequent, but Jonstark has popped in from time to time.  His dynamic hair tutorials are excellent.

  • Retro LadRetro Lad Posts: 471

    head wax "The forum was a battlfield a few years ago and we lost a few brilliant users"

    A battlfield? Was it a "flame-war"with people tearing each other to pieces, or just a polite squabble over difference of opinion concerning Carrara's merits?

  • HeadwaxHeadwax Posts: 9,964

    Oh no, there are many people in the world, all of them different ...

    We were the most moderated forum on Daz for a while :)

    Ah best to leave it at that

Sign In or Register to comment.