New Holiday Freebie!!
 evilproducer
Posts: 9,050
evilproducer
Posts: 9,050
Merry Quanzanukahmas! Or as I prefer, just Happy Holidays!
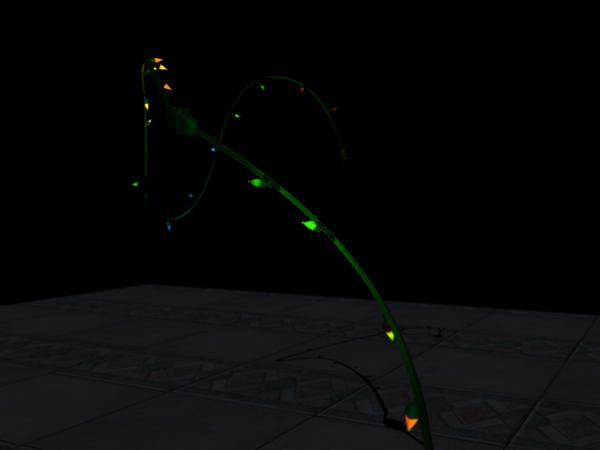
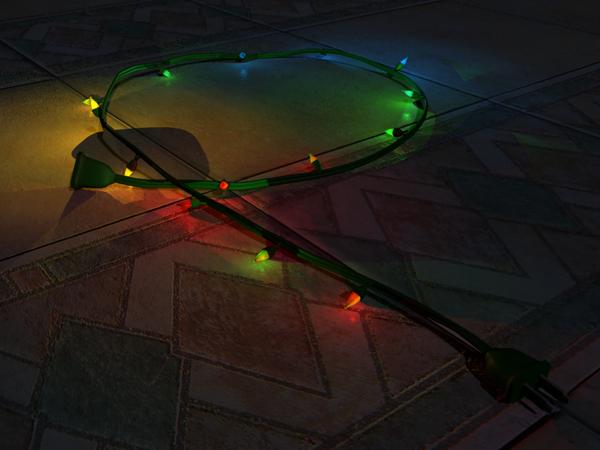
I had the idea for these holiday lights for a scene I wanted to do. The ones I made for the scene kind of sucked, but on the plus side, the experience of making and rigging them gave me other ideas and I used those ideas to make this vastly improved set of holiday lights.
There are two sets, each with a different style rig. Look at the included instructions for a more detailed explanation.
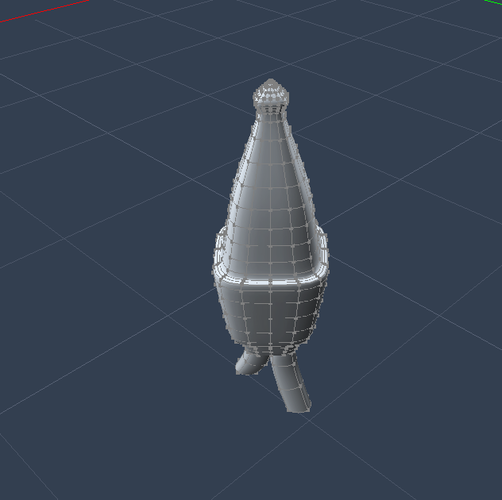
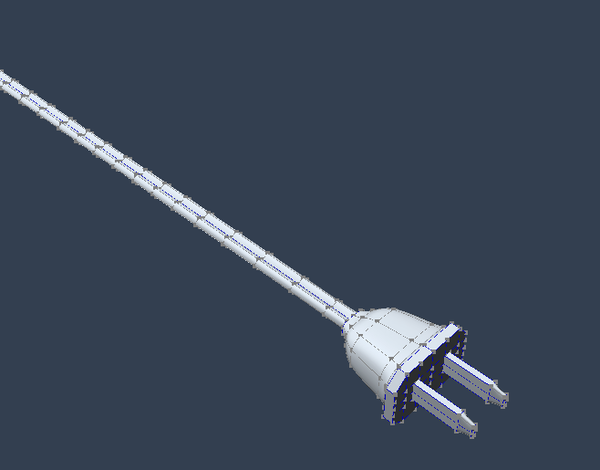
These lights use no glow channels, but real Carrara light bulbs. The lights and light socket models are replicated along the cord with a surface replicator. The reasons for this are also detailed in the included instructions.
You can get them here (.zip file is located at the bottom of the post below the images):
http://carraracafe.com/forum-3/?cid=25&show=751
Or here:
http://www.sharecg.com/v/73481/view/5/3D-Model/Carrara-rigged-Holiday-Light-String
Daz 3D is part of 
Connect
DAZ Productions, Inc.
7533 S Center View Ct #4664
West Jordan, UT 84084
Licensing Agreement | Terms of Service | Privacy Policy | EULA
© 2025 Daz Productions Inc. All Rights Reserved.
Comments
cool :long:
Hey, thanks for these super-cool lights! For those new to downloading freebies from ep, know now that the included manual that comes with his stuff is worth the download, in itself! Again, Thank You and,
Merry Quanzanukahmas!
I'm working on a holiday freebie as well... I sure hope I can get it done in time ;)
Hey, thanks for these super-cool lights! For those new to downloading freebies from ep, know now that the included manual that comes with his stuff is worth the download, in itself! Again, Thank You and,
Merry Quanzanukahmas!
This instruction manual is super simple. If I took the time I did for my free Fantasy Village Terrain manual, it would be ready for the 2014 holiday season- Maybe!
Great stuff!
I don't think EP needs much manual work on this one. Thanks for the freebie! One day you (and I too for that matter) need to get a product for sale with DAZ.
I'm taking baby steps!
thanks evilproducer - that's very kind and generous :) !
Yes, EP, thank you very much. And thank you for showing the mesh and explaining how it works. It gives me some ideas.
I'm taking baby steps!
I hear that - me too! Teetering, unbalanced baby steps...
I hear that - me too! Teetering, unbalanced baby steps...
Teetering, drunken lumberjack, wearing stillettos, down by the pinery- uh, baby steps. That's the ticket! ;-)
Thank you very much.
ncamp
Thanks everybody. I do hope it comes in handy. If you have any questions, please feel free to ask.
That's only on Fridays! :cheese:
lol- I just pictured a drunken, lumbering lumberjack in stilettos- thanks for the snicker.
Thank you, too, for the freebie! I can't wait to DL it and play, and I had forgotten about the village that I wanted to snag- thanks for the reminder.
I'm hoping to get into modeling more than chalices and glasses soon- I need about 48 hours in a day. Oi.
Time is usually against us. I hope you do find some modeling experiments to practice on. Speaking from experience, it does get better and easier the more you do it.
I sometimes think of something that I've seen and then try to model it from memory (or sometimes photo reference). More often than not, I throw it away and it is never seen by anyone else. But each time I do this, I tend to learn something new about modeling and its techniques.
Lord knows I have loads of tuts for modeling; Carrara, Blender, Zbrush, Max, Silo (now), even Bryce. I have Carrara and have used it to attempt to make many things (almost everyone one of them tossed), the chalices (which are part of my Freebies on Rendo and ShareCG), and failed in many others. Bryce's modeling, for me, was confusing- even with the tutorials. I can't figure out the hot keys in Blender, nor do I have the time to try to struggle through that at the moment, Max and Zbrush I don't have (lol- came with the 3DArtist mags), but I just got my grubbies on Silo.
I'm hoping between Silo and Carrara I may actually get a grip on the idea of modeling. :) And making unique morphs for certain figures. And clothing. 0.o The opportunities for fun/frustration/cursing are endless!
Here's a fun experiment to try, since you can model in the assembly room in Carrara 8+
Load in any figure and either apply a sitting in a chair pose, or create the pose yourself.
Now insert a vertex object and then immediately close the window in the modeling room.
Now return to the assembly room.
The vertex object should still be selected. Go to the upper left and enter into "edit" mode.
Construct > 3d > Cube, start with any dimensions you like - but keep it an exact cube
Turn Symmetry on, and set the axis according to the direction you wish to extrude, and what you want automated from symmetry.
Okay, that was too wordy. Just know that you can switch the plane of symmetry when yo wish to
Now just play around with dynamic extrusion. Here's two tips that really help:
Holding Ctrl (Cmd on MAC) while extruding keeps the dimensions of the selected polygon(s)
Holding Shift while extruding keeps the extrusion along the same plane as the selected
Link Polygons will keep all selected polygons welded together as you extrude
Play around a build a chair or anything else that you might want your character to sit on.
WARNING: Modeling in the assembly room, like this, can get immensely addictive. It's just too freaking fun!!!
It's my clumsy reference to the famous Lumberjack song by Monty Python.
If you have any questions about the lights or village terrain, feel free to ask!
You can in C7.2 Pro as well. Seems pretty full functioned.
Awesome! I was thinking that assembly room modeling was added in 8. My bad, DAZ 3D's good! ;)
Okay, I know that I've been making a big deal about modeling in the A-Room, but only because I've always neglected to do so until recently. I always stayed within the model room before. It's so cool - being able to model directly into and around things in the scene... I freaking love it! Modeling clothes in this way is super awesome!
They did do some updates to it in C8, from what I read, though I don't recall what exactly was updated... C7.x Pro was the first version you could model in the Assembly room.
Showing the flexibility of the... ummm... mesh. :red:
Actually I used three strings in this picture. One looping around on the ground, and two wrapping around the figure.
Thanks for the freebie. I'm working through lots Bryce tutorials on youtube at the moment. But can't wait to open this one up and study that repilicator ideal.
Come to think of it this may be a cool ideal to try in Bryce with instancing.
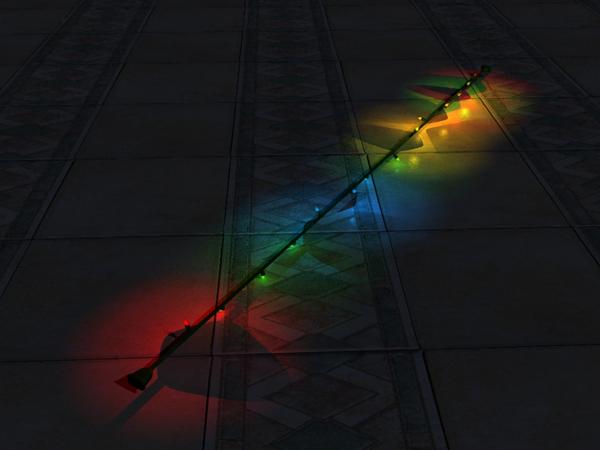
Absolutely love the Sweetheart string up lights in your picture.
Just a little tip for making sure the light sockets aren't colliding with your other scene elements: select the surface replicator in the light's hierarchy, and in the General tab, choose either show bounding boxes, or show mesh.
Personally, for broad manipulations of the lights, the bounding boxes work well. For finer manipulations, I prefer the mesh. There aren't that many replicated lights and the geometry is light enough, that it doesn't take much in system overhead to use them with the mesh displayed.
I love replicators, both surface and stand-alone. The stand alone replicators are great for asteroid fields, fluffy little cumulus clouds and other fun uses.
Your freebie made me go learn something new.I couldn't wait to open the file, as Bryce is in the middle of a two day render anyhow. That's incredible how you created a shader domain to replicate the obects along. I would not have figured that out in a thousand years with out having your file to tear apart and look at. This gives me so many new ideals, wish there was more free time in a day to play.
little thumbnail of what you taught me, Can't wait to really experiment with this!
That is awesome! I'm glad you were able to learn something from it! I also look at stuff and pick it apart in Carrara to see how it was done, and what nifty little tricks I can learn.
One other thing to consider, is that you can use multiple surface replicators on the same surface. Comes in handy for numerous things. Have a terrain where you want to define grass and shrubs, but don't wan them mixed together? Use one replicator for the shrubs and one for the grass. Use a distribution map to drive the placement.
If you haven't found this already, try downloading my Fantasy Village terrain set and pick it apart. Probably best to wait until the Bryce render is done. ;-) I use multiple replicators on multiple surfaces, including a replicated light system to simulate GI. I also include a detailed .pdf with explanations and links to other freebies that I used to make the promo images. You can get it from Share CG or Dropbox:
https://dl.dropboxusercontent.com/u/7370483/Fantasy-terrain1.7.zip
http://www.sharecg.com/v/69697/view/5/3D-Model/Fantasy-Village-terrain
None of the images use GI and the only postwork that I did was to paint out a poke-through issue on the gray Knight in the jousting picture. No color or levels adjustments were done.
I forgot to add that the hotpoint of the replicated object defines how the object is placed. So in the case of your spheres, the hot point is centered, so they appear half sunk into the surface. You can change that by moving the hot point. To do it visually, press the Caps Lock key and select your object. Move the manipulator and you'll see only the hot-point move. Disengage the Caps Lock key to return to normal.
You can also adjust the hot point numerically in the object's Motion Tab. Uncheck the Lock Hotpoint box and enter your values in the X,Y or Z fields.
You can also hide the original object you're using for the replicated object, and still have it show up in the renders, by un-checking its visibility. Make sure you don't hide the replicator. This came in handy for the lights as I didn't want any unwanted light sources.
Thanks for the lights--they look really cool!