Texturing issue with Cararra 8.5 on Mac 10.8
 Realtime
Posts: 95
Realtime
Posts: 95
After I load M5 and try to load texture map such as bumps - it blacks out the model. Is there something that I am doing wrong?
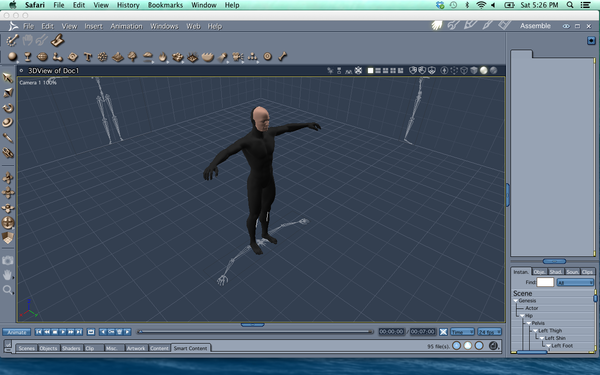
Screen_Shot_2013-12-07_at_5.26_.30_PM_.png
1280 x 800 - 307K
Daz 3D is part of 
Connect
DAZ Productions, Inc.
7533 S Center View Ct #4664
West Jordan, UT 84084
Licensing Agreement | Terms of Service | Privacy Policy | EULA
© 2025 Daz Productions Inc. All Rights Reserved.
Comments
Is it black if your render or spot render it?
Yes it is. I've seen the same behavior when I try to add texture to the face also.
No one else see this?
I don't have C8.5 and Genesis, so I can't do much to test I'm afraid.
I've read that there is something screwy where an image map is multiplied with a black color, so perhaps that is the issue?
Thank you for the information. I can take a look in the shader tree and see what is going on.
Sorry for the late response. The Mac OS thing throws me, since I know nothing - zip - zero about Mac OS, since they won't let me put their OS on machines I build, myself. But enough of that...
Carrara 8.5 purchase comes with some Carrara-optimized shaders for M5 and V5 that can be an excellent starter set of shaders to begin with, and then tweak out which texture maps they use from there. I must apologize for not trying out the applying of textures from the DS library yet - so I don't know if that works or not. So let's start with some stuff I do know - but I've been busily away from Genesis for a bit - so please, bear with me:
The shaders that come with the Carrara 8.5 purchase are located in the Carrara 8.5 Native Content pack.
One thing I'd like to mention straight off is that, in Carrara, you cannot swap UV mapping like you (or so I've heard) can in DS - so you need to load in the correct "Character" of Genesis which already has the correct UV Mapping applied, which is as follows:
Basic Male = M4
Basic Female = V4
M5 = M5
V5 = V5
and so on. I'm not positive how the others translate, but I know I have the info on that somewhere around here, should you need it - just ask ;) Once the correct character (according to which texture you wish to use) is loaded in, you may then feel free to change the shapes all you like. It's just that these UV Map allocations were made specifically for use with the shapes they go with for better fit - less stretching, etc.,
Okay,
in the first image below, you'll see that the M5 and V5 Master Shaders (from the 8.5 Native Content Pack) are located in the Browser's Shaders Tab under Skin > Genesis.
The master shaders are a collection of all of the shaders for the figure. To apply them, simply select "Actor" from the list on the right and enter the Texture Room. Then pick one of the master shader files and drag it from the browser to the multi-colored ball in the upper right as shown in that first image below.
Now go back to the Assembly Room and, as in the second image down, go Edit > Remove Unused Masters > Consolidate Duplicate Shaders. It's also a good idea, in most cases, to go ahead and go Edit > Remove Unused Masters > Remove Unused Shaders (and again with objects). This will make for less edits in the texture room, since these figures use the same shader for several shader domains - but when we load in a master shader, each zone gets it's own shader, even though they may be identical. This awesome feature consolidates everything nice and neat for us. I often take this time to rename the shaders that are left to something more useful, like Torso, Face, Limbs, etc.,
Now you may easily add any maps you like to the optimized shaders! Have a look at image three below:
A, B, and C are map locations, where you may substitute any maps you might have in your collection that are compatible with the UV mapping of the figure. A is the color map, B is the specular map, multiplied by a value, and C is the bump map. * is the Shininess channel. This value controls how the highlights of the specular map behaves. Lower values spread the light more evenly, while higher values up to, say, 30 will tighten the angle of highlight, making for a more wet look. 30 might even be too high to notice much. If I want wet looking skin, I'll usually start around 16 or 18 and work from there.
For your Torso, Face, and Limbs (all skin shaders), you'll want to match your shininess values as well as any multipliers and bump strength.
Okay, that should do it for now. Ask if you have any further questions ;)
A couple of points:
First of all, if you're going to Edit > Remove Unused Masters > Remove Unused Objects, like I mentioned above, it's best to do that before Edit > Remove Unused Masters > Remove Unused Shaders because unused objects have shaders applied to them. I worded it the way I did above for brevity - since the scene I'm working in has no unused objects, but a whole pile of unused shaders. So in this example, getting rid of those extra shaders takes precedence ;)
Secondly, I didn't mention (but I think you already know) that, if you're going to switch maps for the torso shader, you'll likely need to repeat those steps for the face and limbs shaders as well, including anything else that you want to use from the other texture set. Silly, I know... but I wanted to be complete :)