Gooch'd Aiko
 JonnyRay
Posts: 1,744
JonnyRay
Posts: 1,744
Been having some fun relearning the Shader Builder (call it my programming background, but it appeals to me more than the Shader Mixer does). I managed to recreate the Gooch shader from the Renderman Companion book / website.
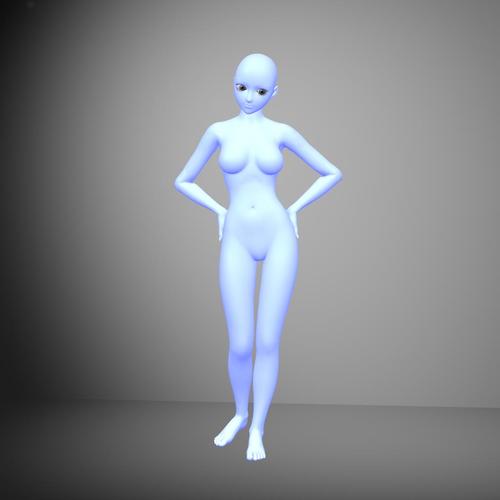
GoochAiko.jpg
1024 x 1024 - 34K
Daz 3D is part of 
Connect
DAZ Productions, Inc.
7533 S Center View Ct #4664
West Jordan, UT 84084
Licensing Agreement | Terms of Service | Privacy Policy | EULA
© 2025 Daz Productions Inc. All Rights Reserved.
Comments
That's a good one to work with.
It's a pretty good code that isn't too difficult to 'translate' into Shader Builder.
Main challenge I ran into was that Mike used an Illuminance loop in his code, which Shader Builder doesn't have. So I wrote a User Function to replace that bit of code and it worked just fine. :)
Well, here's my attempt from a couple years back...
now I can't remember if it was that one, or a different one I converted.
Nice. :) I think that looks like Simple Plastic, but I could be wrong.
I've also managed to screen her now. :p Added some primitive objects to the scene too so I could see how the shaders look on models with less complex UV maps.
It's the gooch...I just played around with the settings a bit, no presets for it.
I also did the screen one.
Most of the displacement shaders are easy to do, some of the other surface ones are easy, but most of the light ones aren't working or very hard to do, but I did get a couple of those working. I did get a couple others converted/working, not just the ones from the Companion.
Lots of dun ones to play with here...
http://www.renderman.org/RMR/RMRShaders.html#TYPES
I wish we had better documentation about some of the Shader Builder features. It feels like I'm fumbling around a lot with understanding Shader Builder functionality like Macros, Functions, Rendertime Script blocks, etc.
Sometimes I wish I could give it the RSL Surface Code and ask it to generate the Shader Block Network for me to see how it works. :)
You can just compile a straight RSL shader too, instead of going through Shader Builder, but as I recall you then have to create your own runtime scripts. This was covered in the old DS3 scripting docs.
Yeah, it's a lot more difficult to do straight code.
Yeah, and I have the 3Delight (free version) available to do the compiling, etc. if I wanted. Shader Builder to me always had the potential to be a killer tool ever since the early days of DS 4. Just feels a bit like the forgotten stepchild with the Shader Mixer tool available now and the lack of documentation on the Builder tool itself.
It isn't complete, but there is a bit of documentation for Shader Builder in the old ArtZone Wiki section (migrated from ArtZone in November 2011) ... which has been linked from the top of the page in the current section since March 2012. There is actually more for Shader Builder than for a number of other, lower common denominator, areas.
-Rob
Here's a bunch of the ones I did...
A Cook-torr
B Fresnel
C Gooch
D Plastic,
E Plastic (this one has a variable 'texture')
F Cook-torr with diffuse texture map
G 'Fake' Rim Light, with variable ring
H Ashikhmin
I Glass wit fresnel and reflections
J 'Wireframe'/Cage
K Carpaint
The light in the scene is the envlight2 from 3Delight...
Interesting shader work here!
I'm always amazed at what people can do with the Shader Builder sadly the skills required still elude me.
Nice work there, MJC. I've also been reading some of the information at http://www.fundza.com/. Already learned some stuff that I can use to tweak some of the things I've done. For instance, I think I can fix some issues with the screen in Aiko's model by changing which coordinate space is used for the grid.
Am already working in my head on some ideas for my own shaders I'd like to write.
Also continuing to work on some of my beginner DS tutorials.
And here's a render I did, last February, showing off the carpaint shader, much better than in that sample shot...
I really should make some time to put together some presets for that one. It is one of my favorites.
Rob (really hoping he sees this)...
I looked at some of the macros and such that you provided as examples with Shader Builder. I noticed you use the %1% and §1§ constructs a lot rather than referring to parameters by name. Is this part of the key to getthing these to work properly? I've had a heck of a time getting output parameters to be recognized by the other blocks in the network.
For Aiko's connected shader behaivor you can change "current" space to "NDC" space.
Yes, it is. Take a look at this page in the docs that were on ArtZone. I included descriptions for %% and §§ on the page.
-Rob
I did read that. :) I just don't think I realized until I was looking at some of the example shaders that using the numbers instead of the names might make a difference.
There are some code bits in my shaders right now that are written as user functions just because that was the only way I could get hand coded RSL code to work. But I don't like function calls when performance is a goal. I think macros would be better. I just need to understand them better. :)
For Aiko's connected shader behaivor you can change "current" space to "NDC" space.
Cool! I tried a couple of other coordinate spaces. "object" worked for the shoulders, and tightened up the seam in the legs, but didn't completely remove it. I didn't think to try Normalized Device Coordinates (NDC) as that space wasn't mentioned in the references I was reading on the transform function.
Cool! I tried a couple of other coordinate spaces. "object" worked for the shoulders, and tightened up the seam in the legs, but didn't completely remove it. I didn't think to try Normalized Device Coordinates (NDC) as that space wasn't mentioned in the references I was reading on the transform function.
I read at least 5 books in RSL, only one speak about NDC.
The transform didn't work out as hoped. :( I tried several options for the "to space". Nothing helped much. I put the results of my test up on my blog.
Project: Renderman Shaders
It is my code and result in G2M
point Pp = transform("NDC",P);
Ci = color(xcomp(Pp),ycomp(Pp),0);
edit: to erase useless lines
Interesting gilkshe. I'll have to see tonight when I get home if it is a model issue. I've been using Aiko 4. It could just be that her UV mapping doesn't lend itself well to this sort of shader. My straight ShowST example shows plenty of seams. Granted, my ShowST shader doesn't transform the coordinates. Will have to try that as well.
The code I'm using for the screen is something like this...
I also tried it (based on some example code) putting t into the z coordinate, but it didn't change the results for the tests I was running.
Yes, it is. Take a look at this page in the docs that were on ArtZone. I included descriptions for %% and §§ on the page.
-Rob
Just wanted to say, Rob, that using the numbers helped. I also realized I had another issue with my macros. I wasn't adding any code to the Evaluation tab. Looking back over your examples, I think that's why I was struggling so much with getting the output in to the rest of the code. :red:
You are transforming the UV values, so of course you see the seams and get a gradient across the map. Shouldn't you be working on the spatial coordinates? Or am I misunderstanding the goal?
You are transforming the UV values, so of course you see the seams and get a gradient across the map. Shouldn't you be working on the spatial coordinates? Or am I misunderstanding the goal?
No, you have the goal correct. :) Basically, in pseudocode style, the Screen shader that I'm using for reference does the following...
So, the code I'm working with assumes it is using the coordinates which would be used for a texture map lookup. I think that works fine when the seams of the UV map correspond to joints or other logical breaks in the model. The problem is that Vicky 4 has a seam in the middle of her thigh.
My first run at figuring out the seams is to use gilkshe's suggestion of transforming the point into another coordinate space. Beyond that, I kind of had the same thought as you're expressing Richard. Maybe s and t aren't the right set of values to be using for this. It seems to work well for simpler models, but with complex UV maps maybe not so much. If transform doesn't work out, I'll have to play around with what I could do with say the P coordinates or something to see if that worked better.
Also it occured to me that even if Transform does work out, I should also try animating the figure a bit to see how the shader stands up when Aiko bends and moves.
In the end, is it REALLY important that my screen shader works the way I'd like it to? Not necessarily. But I'm using this exercise to learn more about coding RSL, the world and object spaces that things live in, etc. So I'm having fun along the way. :)
One use I've come up with for the screen shader, is nets, fences and such...it is blazing fast compared to transmapping them and much 'lighter' than geometry constructions, too.
Back to the original Gooch shader ... I had hidden the diffuse color parameter in my shader since the standard gooch shader doesn't use it. But then I noticed something odd in a render; so I unhid it. And it appears that somehow it is still affecting the overall effect. I'm not sure how since in this sample image, I have Ambient, and Specular strengths set to zero and the shader doesn't refer to the diffuse color setting anywhere.
It works out ok since I can have more variations of surfaces, but I am curious as to where the diffuse color is entering into the math.