Dorm W.I.P. in need of some help (lighting & other)
 Turk_WLF
Posts: 177
Turk_WLF
Posts: 177
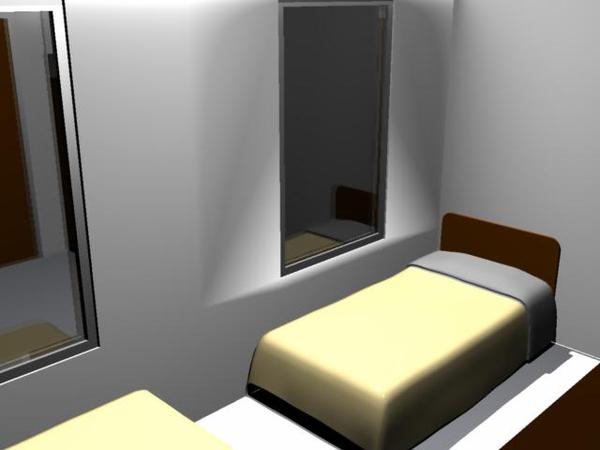
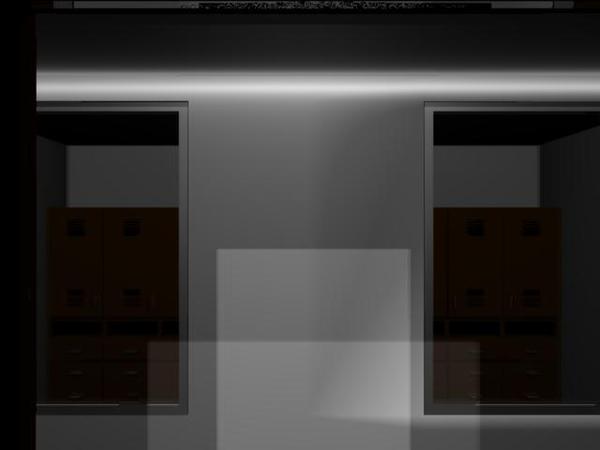
I’m working a dorm room with real world and scale 10’ x 15’ 6” with 8‘ceiling, it’s currently layout just to give the feel of the room.
What I need help with is the lighting which is just a bulb (bulb light) in the center of the room at the moment. My goal is to make it as realistic as I can.
Later on I’ll need help with making the walls look painted & how to get the wood to look correct for the piece.
(it's a night scene)
Thanks,

1-4_corner.jpg
640 x 480 - 20K
3-4_corner.jpg
640 x 480 - 21K

2-3_corner.jpg
640 x 480 - 21K

1-2_corner.jpg
640 x 480 - 20K
Doorway.jpg
640 x 480 - 16K
Post edited by Turk_WLF on
Daz 3D is part of 
Connect
DAZ Productions, Inc.
7533 S Center View Ct #4664
West Jordan, UT 84084
Licensing Agreement | Terms of Service | Privacy Policy | EULA
© 2025 Daz Productions Inc. All Rights Reserved.
Comments
What is the goal for the scene? An animation, a still render?
Looking cool so far!
Many might disagree with this technique, but I'm throwing it out there anyways in case you might like it.
For light fixtures, like the one I see on the ceiling, I prefer to use a spot light instead of a bulb. Then I set the angle to 90 and the angle falloff to around 30. Then I'll set the distance to 30 feet with a falloff set high, like 60. Distance and falloff for distance need tweaks according to the room and what sort of effect you want. But now we don't have any light on the ceiling. So I duplicate the spot and flip it, reduce the distance and brightness. Both of these lights need to be low enough to not touch the mesh of the fixture, unless you set it to ignore the fixture - I prefer to just place the lights below the fixture. Note that you can get closer and closer to objects the smaller you scale the lights.
Really like your modeling though. The scene is really looking great!
I'm planning on using the scene/set as a still for the time being with the hopes of using it as part of an animation when/if I get the other pieces done. The beds aren't my work just fill-ins until I get things done.
You may want to consider IES lighting based on real world lighting which is in Carrara 8.5 Pro and some earlier versions.
Here is a tutorial:
http://www.cgarena.com/freestuff/tutorials/max/ieslights/index.html
The above tutorial can be found in a link at:
http://3d.about.com/od/Creating-3D-The-CG-Pipeline/tp/8-Tips-To-Increase-Realism-In-Your-Renders.htm
This is a helpful learning tip page to consider:
8 Tips to Increase the Photo-Realism in Your Renders
Easy Techniques that Will Make Your 3D Renders More Realistic
Thanks for those links, DA! Very cool stuff!
hello
each surface will reflect light at a certain colour so that is something to think about - also caustics for the mirror
this reflected light will effect shadow colour as well
I love this link :http://3d.about.com/od/Creating-3D-The-CG-Pipeline/tp/How-To-Make-Really-Bad-Cg.htm
Note well the part about coloured light
and also some random quotes from http://forums.cgsociety.org/archive/index.php/t-404342.html
I don't agree with not faking lighting, and don't forget about post work
you could also try making your room an anything glows object with a small radiance eg 12 percent to get a base lighting - and see what happens
for the wood - there's nothing like a texture map of real wood to look like real wood.
If you are doing still images Vs. animation, the lighting set-up will vary.
A longer render time for a still image won't fly for for an animation. With a still image, you could enable Indirect Light. You would still want to keep in mind the light sources and such, but you could get some nice effects at the cost of longer render times.
With the animation, you would want to simulate Indirect Light and place low level, high fall-off lights to simulate reflected light. Carrara's scene wizard has some nice indoor sample scenes that utilize IL and caustics, as well as one that fakes it. It may be worth the time to take a look at them.
Personally, I try and avoid GI in general. If I'm having issues, I may render a low res version and use that as a guide to place the lights that I want to simulate GI, then render the larger version without it.
For interior lighting, I think that it essential to use the gamma correction = 2.2 so that you are working as much as possible with a Linear Workflow (see http://www.daz3d.com/forums/discussion/25644/ if you haven't been following that discussion).
My other recommendations would be to ensure that the Ambient Light brightness is set to zero, use full Indirect Lighting which will model the light bouncing off objects in your scene (it's faster to render than you may think if you haven't used it much). For the light sources, I have had a lot of success using models with glow turned up (so use the 0-10000% slider and set to between 1000 and 10000%, multiply by a color if you want a colored light). (Note this only works with Full Indirect Lighting turned on). A light bulb can be a simple small sphere unless it is to be seen close up, when a bit more modelling may be in order. Place this where any real bulbs would be and see what that gives you. If you are getting dark blotches in your lighting, turn up Lighting Quality in the GI panel to Best (again the render time hit is not that great).
This may be my older system talking Phil, but I disagree with the time hit using IL. I think overall image quality can be improved by learning to simulate GI, both for still image and animations. The advantage for still images is less time to render and less image artifacts like ashing which can be an issue even with the best GI settings.
I agree that sometimes you need to simulate GI, especially if your frame render rate is getting too high for animations. The downside is that it takes longer to set up, and the results will never be quite as accurate, because however clever you are in placing and setting your extra lights, there will always be some subtle effect of the GI that is virtually impossible to imitate. Each artist needs to make their own decisions, on an image by image basis, based on what works for them to get the output they desire.