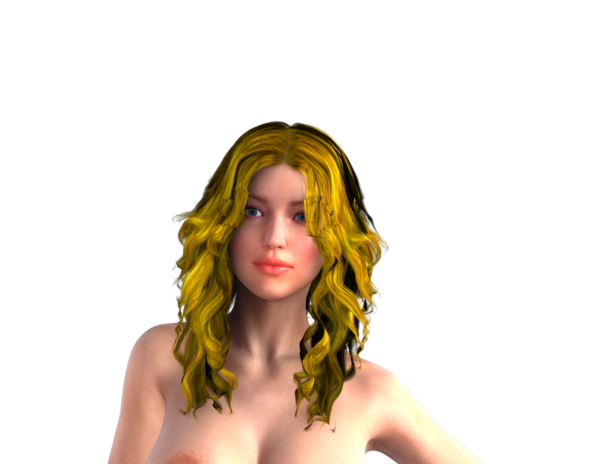
Please help, why is my hair renders look like this?
Hello all,
I need suggestion or help.
well, I tried different hairs but I think, I got the same problem, they all end up looking like a polygoon renders,
and look very unprofessional.
I am using daz 4.6 with default rendererd 3Dlight.
i am using uber unv 2 with shading rate 2.
but i think, i am missing some points, I want to render the hair more realistic.
please, can anyone help me to get rid of this polygonish stuff?
Attached is the samples, All hair looks the same. look too much polygonal, what should i do, bump modifications?
Please, help me


prev.png
892 x 690 - 317K


Comments
What you have (and will for the immediate long while, continue to have) transparency-mapped hair. Check the image in your hair's "Opacity" channel, and load it into the Displacement channel as well. This will give the hair a much more strand-like quality.
Did you try changing the color by putting a color in the Diffuse Color?
Thank you for your reply, Yes, I did follow your suggestion, it gave good result but still, it's not more realistics as in poser.
should I still change another settings? bump? or decrease the strength of the displacements?
Yes, i did this most of the time, but i think, the problem comes from displacement maps or bump maps
Yes, i did this most of the time, but i think, the problem comes from displacement maps or bump mapsbump/displacement will help add depth to the shadows, etc. But mjc is on to something too. When you have a texture map providing color and you change the color value from white to something else, you're multiplying the texture map by that color. If you vary the color much from white, you are bound to significantly change the output.
Also, in the test image you posted, do you have shadow casting turned on for the hair? And is the light you're using set to cast shadows? And if so, it is using raytraced or deep shadow maps for shadow casting?
Finally, in DS you may also want to play with the smoothing feature. I think by default it is turned on with an angle of 89 degrees. You may want to play with that angle some and see if a different angle might smooth some of the bends without damaging the look of the hair too badly.
With transparency mapped hair, what you really have is a bunch of flat/curved planes sticking out of a skull cap. Their 'base' diffuse color is usually white or very light grey. This is so the texture and transparency maps can work, without having to be 'perfect' (pure black/white, no grey). Generally a transparency map for the hair AND the color map are made together, so they match. But most of the time, the transparency map is not an 'all on/off' (pure black/white) map...it's a grey scale map, giving partial transparency in some areas. Now, when the planes that make up the hair are white, those partially transparent areas become lighter...and will show up more, with matching 'hair' from the diffuse color map there with them. When you apply a diffuse color, THAT becomes the basis for what shows up, instead of the actual painted strands...yes they are still there, but are multiplied with color. So now, those partially transparent areas don't just have a single painted strand...they've got surrounding area, too.
If you want to change the color...open a copy of the diffuse map in an image editor and alter the color and save that...don't go adding a diffuse color or you risk 'cartoon hair'.
Thank you for all your replies,
well, I am using this light!
How to turn the option cast shadow for the hair only? I don't know bout that, i tried to google, but cant seem to find (im on daz 4.6)
even if I edit in photoshop, there's still some small polygon flat view.
and btw, when I rotate the breast, neck, face, there's big bug in the shoulder for long hairs.
also, can anyone tell me where to get non-transparent mapped hair?
thanks