reference screenshots, etc etc etc
 Mistara
Posts: 38,675
Mistara
Posts: 38,675
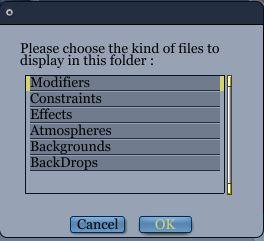
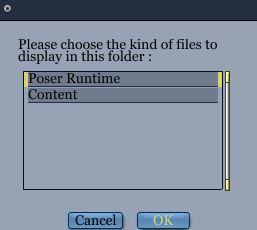
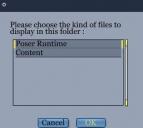
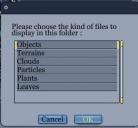
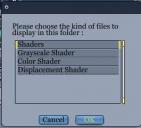
Adding Folders to Tray
i forget what goes where, so i made a ref
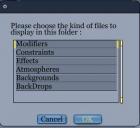
objects
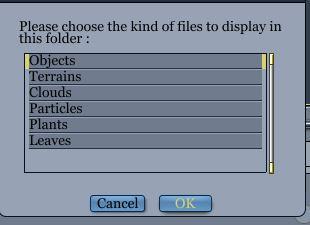
shaders
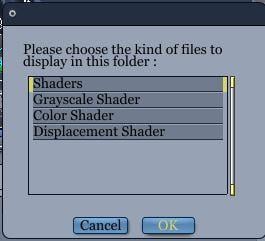
Misc
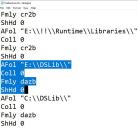
To copy carrara browser tray to another pc, copy over the preferences.txt file
this the path to preference files
C:\Users\your windows10 user name\AppData\Roaming\DAZ 3D\Carrara 8.5
preferences.txt
sometime removing folder in the tray and re adding doesn't fix stuff, seen that sometimes a remnant remains in this rtext file
in that case go to the preferences.text and manually delete 4 lines related to the folder
sometimes a remnant is only 2 lines.
do a find for dazb to zoom to any content folder remnant
Daz 3D is part of 
Connect
DAZ Productions, Inc.
7533 S Center View Ct #4664
West Jordan, UT 84084
Licensing Agreement | Terms of Service | Privacy Policy | EULA
© 2024 Daz Productions Inc. All Rights Reserved.
Comments
other things i brain fart on
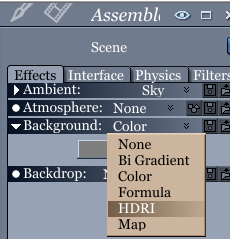
HDRI goes under background
light gels go under the light, effects, gel, map
Sunbeams are under, realistic, sky, in the fog tab (2nd button)
Rainbows are under sky (not realistic sky)
Camera depth of field previewer is under camers,effects
Camera, minimum safe distance, like when red matter is dumped in a planet core,
is under camera, general, distance to near plane, has a minimum of .01
stuck in the hair decision making process, , which way to go?
Bookmarked
Reference of Modifiers - the alpha channel tic box
is the 2nd tab
the Modifiers List -vertex
Soft body settings
Scene Gravity
Here is a playlist I made of the wonderful tutorials by JonStark on getting comfy with Carrara's dynamic hair. Wonderful advice!
Jon Stark's Carrara Dynamic Hair Course
Thanks Mystarra! (and other contributors...) this stuff is priceless when needed!
--ms
or here > https://carraracafe.com/?s=jonstark
web dings and wing dings reference for text primitve
the last 2 lines is split at N
wingdings, wingdings2,wingdings3, webdings
Particle Emiiter presets
Particle Emitter, Obj, Shader Domain
http://colrd.com/palette/23813/?download=css
id you has the patience, follow along to where i gets stuck dohh lol
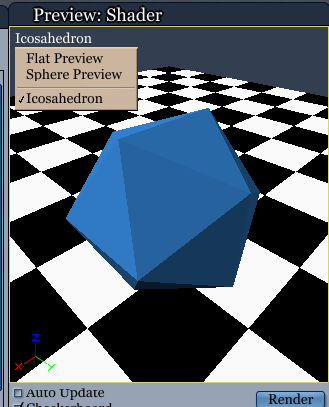
preview shader options
Color Picker Options
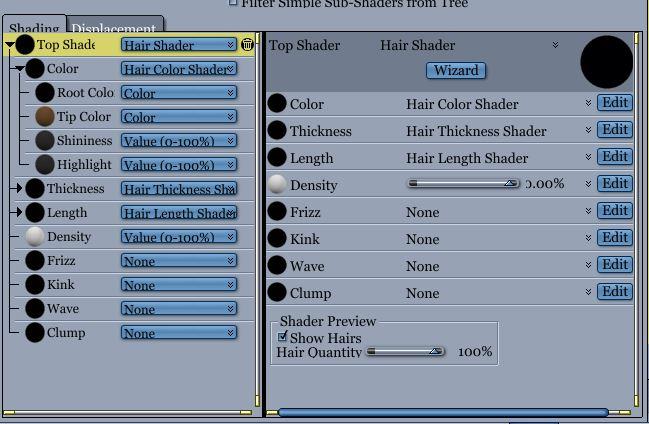
Top Shader options Hair shader options
Top Shader - Lighting model
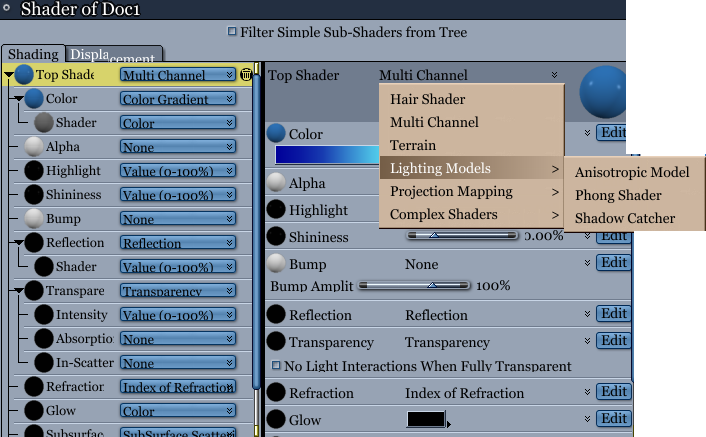
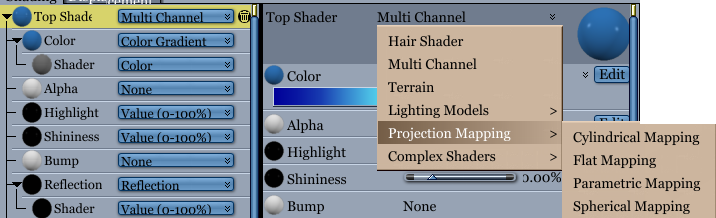
top shader projection mapping (overrides the uv map)
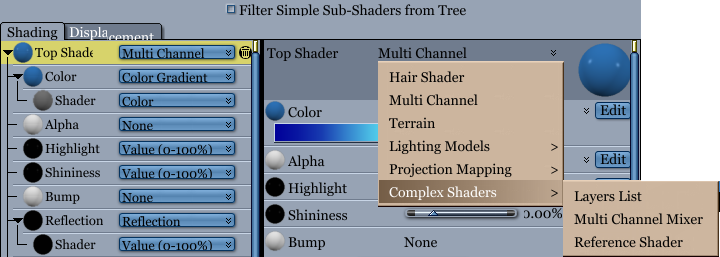
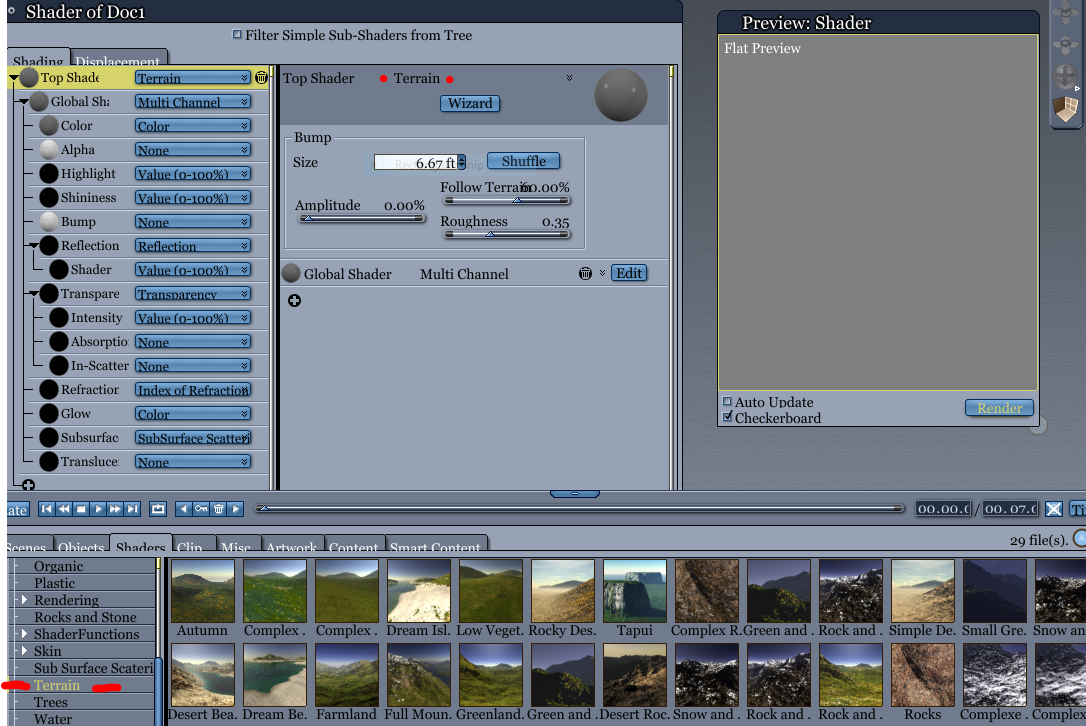
Complex shaders
global shader, Terrain options
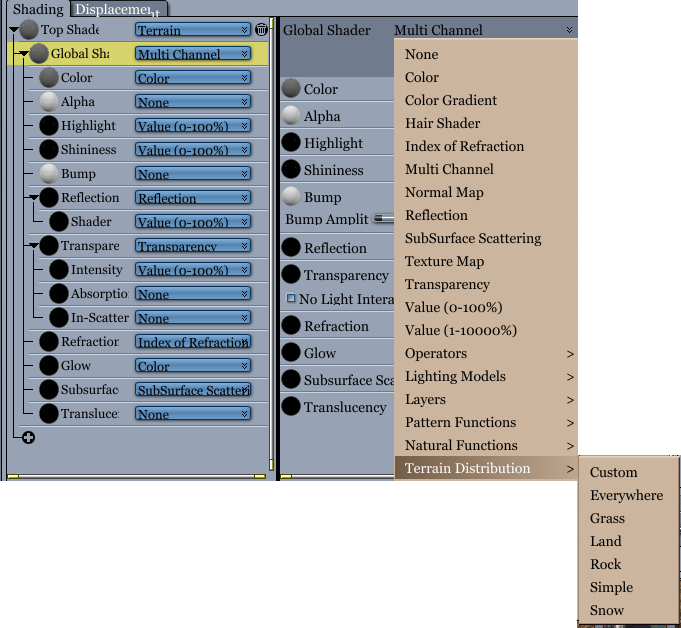

The terrain shader presets
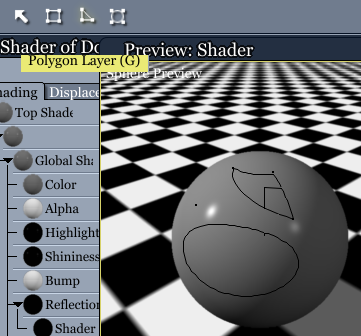
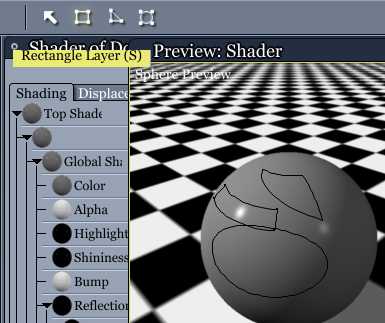
These tools I've ignored, cuz i don't know how to use em, it draws on the preview ball
Oval layer

Polygon Layer, rectangle layer
I see here a layers dropdown for shader and opacity. ???
but then what ???

Bones Influence.
rigging attempt
so i was rigging the webding sickle moon and star.
I anted bone 2 to move the star only. but the points on the moon sickle were moving too
used the bones influence tab, selected the pollies on the sickle, moved the bones influence sliders to make it 100% effected by bone 1.
Convert Text Primitive to Vertex
On the edit menu
quick uv map
set all the text shader domains to 1
select all the pollies first, then clickity add and rename as desired
clickety del til all the xtra domains gone,
DS screenshot, Converting rigging
Edit, Figure, Rigging, Concverrt ...
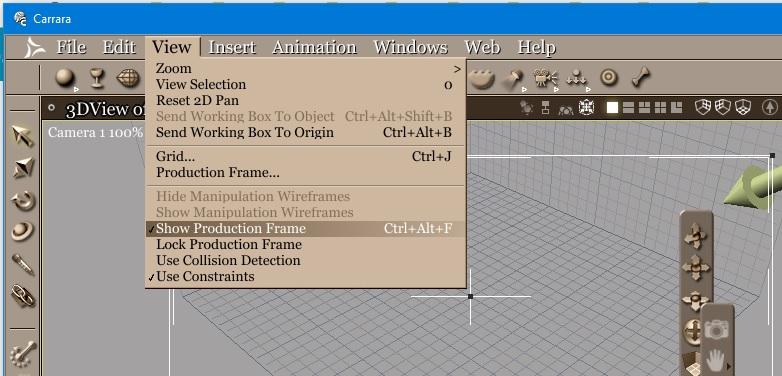
Reference for new to Carrara - THE Production Frame
thinking back to when i was new to Carrara, the first thing i got stuck on was the Production frame.
Carrrara doesn't necessarily render the preview window.
It renders what is Framed.
Toggles production frame visibility
To adjust the borders size of the frame
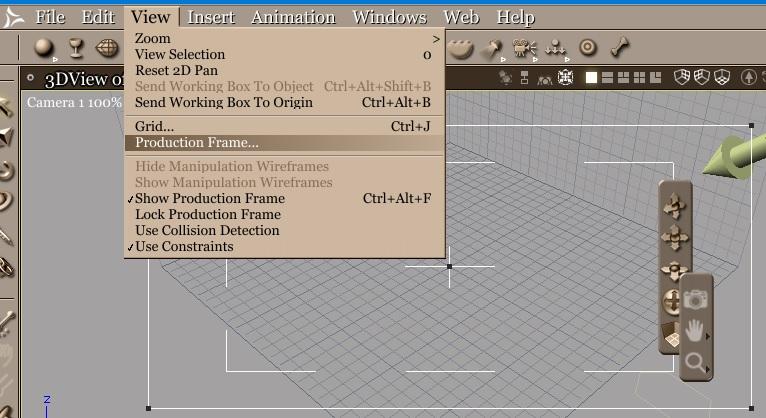
If the production frame isn't letting you adjust the ratio,
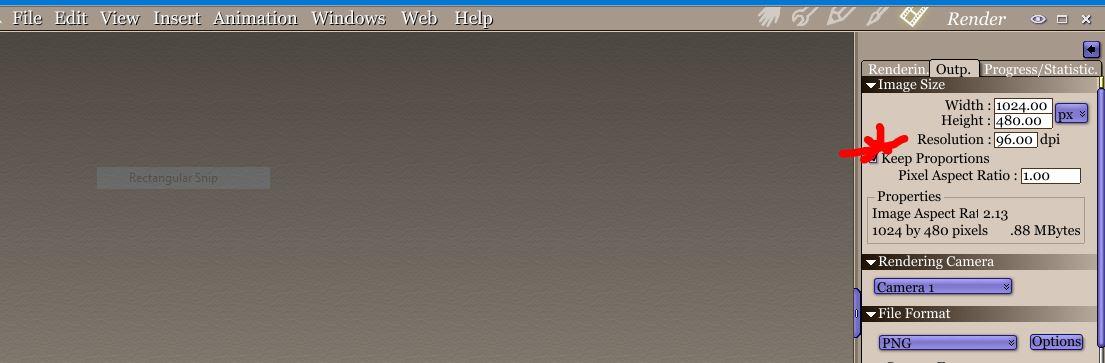
the Keep Proportions prolly needs to be toggled in render settings, output
Plain old Color+Gradient
can hardly believe it
the journy to find color gradient has reached the stattion, lol
the shader dropdown has an option for 'gradient' duhhh omg, going to sleep tonight with a smile lol
Gels SHadows+effects shadow+gels shadow+maps
Carrara native light gels
Barn Doors
gradient shadow
shadow map