How to Create a Mirror Morph for Mesh Grabber
 RGcincy
Posts: 2,834
Mesh Grabber is under active development by ManFriday and at this point does not have a symmetry tool. If you want to create the same modifications on two sides of a figure, you can try to recreate it by hand which is difficult or you can use the method described below.
a. Load a figure (I used G8 male).
b. Go to the Tool Setting Pane and from the drop down box at the top choose Mesh Grabber. Make your Mesh Grabber changes to the figure.
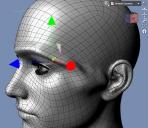
i. Choose either face, edge, or vertex selection type. I used polygon selection and chose polygons above the eyebrow. Since this is on the face, I set Falloff Radius to its lowest level. I then dragged the mesh forward along the z-axis to create an eyebrow ridge.
ii. I repeated the polygon selection on the side of the head and dragged them to the right along the x-axis.
iii .I switched to edge selection type and chose an edge near the junction of the two separate grabs that had a small kink and pulled it forward. This completed the mesh modifications.
c. Next we need to export the changed mesh. Before exporting, go to the Parameters pane and set Mesh Resolution to Base. This step is critical otherwise your morph loading will fail.
d. Hide everything in the Scene pane except the base figure (cameras, eyelashes, other objects, etc.).
e. From the main menu, choose File/Export and give it a name with an indication of which side was modified (in this case, I used eyebrowridgeL.obj as the file name).
f. Reset the mesh to its default shape. With the mesh grabber tool active, click on the figure so a polygon, edge or vertex is selected. Right click in the viewport and choose Reset Mesh Grabber to clear all the changes. Now we can add back in the changes as morphs that you can dial in and out. (Note: you can skip this step and steps g - l if you want to just use the Mesh Grabber deformation without making it into a morph on that side. In that case, jump to step m.)
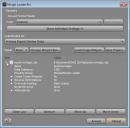
g. Select the base figure in the Scene pane. From the main menu, choose Edit/Object/Morph Loader Pro.
h. Click on the button Choose Morph Files… Select the file you exported previously.
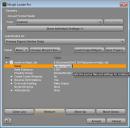
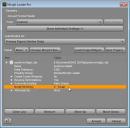
i. Click on the small arrow to the left of the file name. That will expand to a selection of parameters.
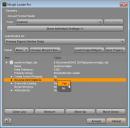
j. Go to the line saying Reverse Transformations and right click on the No and choose Yes instead.
k. Click on the Accept button and you should see a dialog box showing Created morph successfully. If you get a fail notice instead, the most likely cause is you saved the obj files while the figure was set to high resolution.
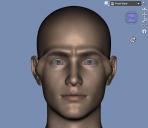
l. Go to the Parameters pane and they’ll be a new parameter field called morphs. Set the newly created morph to 100%. This image below shows the original Mesh Grabber transformations now being used as a morph.
m. Repeat steps h through j for the same exported file. This time, you need to do two additional steps.
i. Double click on the name and change the ending L to an R
ii. Go to the line that says Morph Mirroring and right click on None. Choose X-Swap to move the mesh changes to the right side of the face. (Thanks to barbult for pointing out this feature of Morph Loader Pro).
n. Click on the Accept button. Now the figure will have two morph dials. When both are set to 100% you’ll have right and left side morphs displayed.
o. Before rendering, be sure to restore the figure to be a High Resolution mesh.
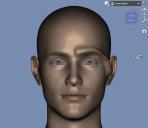
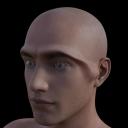
Render of Eyebrow Ridge:
Render of another Mesh Grabber transformation (temple protrusions) that was made into a mirror morph:











Comments
Thank you, RGcincy for this most useful tutorial! I have a question: I understand that the mesh resolution must be set to base. Does the figure also need to be in zeroed position and zeroed shape for this to work? That is, Can I apply this technique to a figure that I have already posed and shapped signigifcantly? Also once both the left and right morphs are created, how can they be exported to use with a different figure (of the same base mesh)?
With morphs, a figure needs to have reverse deformations set to yes, and the pose loaded if one is applied, when not in the default shape; if you look at the screen shots above, you'll notice that one has yes applied anyway.
Just a note to add here: Before you do the second load using morph loader pro (where you rename the morph, set reverse deformations to yes, and select x-swap under morph mirroring) be sure to set the morph dial to zero, not 100, or it will not work correctly.
The link in the OP seems to be dead, so here's one that seems to work https://www.daz3d.com/mesh-grabber-win
That's for the Windows version... the bundle and the Mac version you'll have locate on yer own.
Thank you for this great tutorial! Does https://www.daz3d.com/mesh-grabber-win at this point have any symmetry tools/options?
MG has no native symmetry option. A workaround is to use Geometry Editor to select polygon/vertex/edge with Symmetry option, then Alt Shit + E to switch back to MG, and drag or push...