Motion Blur
 Salem2007
Posts: 513
Salem2007
Posts: 513
I was playing with the motion blur setting in Carrara this weekend trying to achieve a certain look for a still image, but I wasn't able to fully create what I had envisioned. I was trying to create an image of someone swinging a sword from high over the left shoulder to full extension of the right arm--like swinging a baseball bat.
I tried doing this in 2 frames, 5 frames, and a full 24 frames with the blur set up for 2, 4, 6, 10, and 20 extra frames. When I render the motion blur, I only get a blur around the middle and end. I want to render the complete arc of the swing, not just a little in the middle.
This is probably not the way motion blur is intended to be used, and I could probably use some post work to get what I want but I'd like to understand how motion blur works in Carrara so I can use it effectively for other things. Does anyone use motion blur or know of a tutorial for how to use it? I can't help think that I haven't configured the settings properly and trial and error isn't working out.
Thanks in advance!
Daz 3D is part of 
Connect
DAZ Productions, Inc.
7533 S Center View Ct #4664
West Jordan, UT 84084
Licensing Agreement | Terms of Service | Privacy Policy | EULA
© 2025 Daz Productions Inc. All Rights Reserved.
Comments
I have very unintentionally gotten a motion blur effect using layered image sequences saved as gifs with alpha channel which makes me think this is the way to go
render your background image with first pose then add the movement ones with figure alone with alpha as layers and combine them as one image.
Yeah--that's my back up plan...probably the best way to go. What kind of filter would you use to give the images a time-lapse effect? I guess fade them gradually from last to first?
I tested with the blades of a helicopter but I never had good performances.
My solution was to make a render of the blades alone and to add the motion blur in After Effects.
Motion blur is based on the speed of the moving object....IE: if it moves slowly, the blur will be minimal or non-existent....it has to be moving fast to blur the object.:bug:
if you search Faba's tutorials at ShareCG, she has a tutorial for exactly the effect you are describing. I think she used ERC but I have not read the tutorial to be sure....
Another option might be to set the blade to be a particle emitter so it leaves a trail of tiny particles during the swing.
He, a propeller which turns slowly while emitting particles, that must be beautiful to see, especially with a perpendicular force which propel them helical, I want to test that!
Since I've owned Howler, I've found it to be incredibly easy using the rotoscoping tools. I create a selection using the curve tool somewhere in the middle of the action sequence, making the selection slightly larger than I need it to be. For something like this, it would be a very simple shape. Using the Roto tools, I add a keyframe there, which locks the tool from more points being added - which is why I start in the middle of the action. Now go back to frame 1. if the selection is to be non-existent, I simply flaten the shape by dragging the points around, and keyframe that. Scrub through the animation and form the shape, keyframing as I go. When I'm done, I select to use the curve as alpha, and then add a slight Gaussian blur to the selection itself, which is why I make the selection slightly larger.
Now, in the timeline editor, I apply the motion blur or , for this one, perhaps Mystic Vision, and keyframe the effect of the blur as I need it. So it will likely start with zero blur intensity and become full strength in the middle, perhaps fade a bit at the end, depending upon the clip, of course. Anyways, there's a thought if you have Howler.
Thanks all--you gave me some things to think about that had not come to mind. The particle emitter sounds like it could create a cool effect--might have to play with that....
Dart--do you have any examples of the technique you've described? It sounds like it could be a useful option.
Edit:
Making a quick animation avi now - perfect for this example.
Howler can open avi and image sequence animations, and then save them either way as well.
In these techniques, something to be aware of which, especially in this case, works to our advantage: blur and motion blur, etc., type of effects can use pixels of colors outside of the selection. When the effect is being calculated, it ignore that there is a selection for those purposes. But the effect will only actually be applied to the selected area. So we just have to make sure that we apply some sort of blur to the selection itself, to blend the difference between the effect, and what doesn't get effected - you'll see what I mean in this example. Just waiting for the render to finish.
I found this tutorial, but I'll have to load the sample file tonight. Do I need the ERC to use this or is that just a "helper"? It's been on my to-buy list for a while, but it's a bit pricey for me right now....
Edit:
Making a quick animation avi now - perfect for this example.
Howler can open avi and image sequence animations, and then save them either way as well.
In these techniques, something to be aware of which, especially in this case, works to our advantage: blur and motion blur, etc., type of effects can use pixels of colors outside of the selection. When the effect is being calculated, it ignore that there is a selection for those purposes. But the effect will only actually be applied to the selected area. So we just have to make sure that we apply some sort of blur to the selection itself, to blend the difference between the effect, and what doesn't get effected - you'll see what I mean in this example. Just waiting for the render to finish.
Thanks for going to the trouble--I hope it wasn't an inconvenience. Sometimes I need a picture to go with the words---makes it all come together for me!
Good point.
Rotoscoping could be more effective for some things than doing the effect in 3d or allow you to do an effect that you might not be able to achieve by other means.
Not a problem. I've been meaning to do this topic anyways, so you just clenched the deal, so-to-speak! ;)
So without further ado, welcome to another Dartanbeck Babble session, this time on the wonderful working of Howler's rotoscoping tools:
Howler Motion Trail
No music or sound effects, I promise! :ahhh:
As you can see, I could have spent more time to make it nicer, as I was just talking and showing, not going back and fixing. After seeing the results of the tutorial, I would prefer to use my AnyFX Plugin "Rays" radial blur, rather than the mystic vision that I used in here. (EDIT: Mainly because that is the filter I'm used to using, so I'm more accustomed to its settings. That plugin has it's own timeline, but I find that I like the Howler timeline better) However, after the tutorial was done, I pressed the timeline's undo button and ran the Mystic Vision filter again, only this time with far less intensity in that strongest part, and far shorter period for that strongest value, and it turned out great. The gif above is just as it ends up at the end of the tutorial, except much fewer frames to cut down on the size of the gif, and it turned out to play back much slower than an avi, so the drastic nature of my over-saturation of the effect is even more noticeable! LOL But you can at least get an idea of the simple workflow, using only one of the great filters in this awesome tool.
... I responded here but the forum ate my post... :blank:
I don't even remember what I said...
If you are working with a video editing program, you could do this in post. That will likely give you the most options for customizing the look and getting what you want.
I would suggest rendering the animation "as-is." Then do a second render of just the sword blade.
In your editor, place the "blade only" animation on top of the "full" animation. By using different blurs and effects on the top channel, you can dial in whatever you want.
You can also create multiple tracks of the "sword only" channel. By time shifting, blurring and playing with opacity, you can create a number of different motion effects.
Thanks, Dart! I understand a little better, now. I have not plunged into Howler, yet--I have a few other tools I'm trying to make work (Magix Movie Edit and Hit Film). I keep thinking about Howler every time it goes on sale, though. I have an old copy of Photoshop that I used for years, but it doesn't work well with my current OS, so I've been using Gimp for a few months. Maybe I can duplicate your example somehow. I'm going to go through your tutorial as soon as I get time tonight....gotta work first, mow the grass, kids want to ride bikes, etc.....
Sometimes Daz has to wait!
Thanks again for the example and tutorial...I can't wait to give it a try!
My earlier post was eaten as well.....I thought I hit submit. Maybe I took too long to type!
Didn't realize you were making a still. That actually simplifies things.
Instead of a video editor, use any image editor that supports layers. Put the full image on the bottom and the sword image on top. Play with filters and effects to get what you want.
Alternately, you could probably create something directly in Carrara to accomplish the same. I am think along the lines of an object that covers the entire sword motion. Create a "blur" effect in the shader and/or use a texture in the shader to do the "motion blur" you are looking for.
Well, I had an image in mind to start with, but I'm sure I'll want to animate it in the future. I never thought about using shaders for this...interesting. Shaders, Particles, Layers, Filters, Rotoscoping! I'd better start small or I'll experiment for weeks and never finish anything!
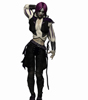
Ok--here are two tries at the still image version. I think I need to tweak some of the layers, but I kind of understand what I'm trying to do. I'm going to try some of your ideas with animation tomorrow. Thanks to everyone for helping! (Please ignore the lighting and set-up..this was a quick and dirty test :-) )