Ormr- Non-destructive, procedural Photoshop alternative. Open Public Beta
 Lissa_xyz
Posts: 6,116
I'm not affiliated in any way, I just happened upon a post over at Blenderartists.org.
It looks promising, and apparently can do raster and vector all in one package. It's a non-destructive, completely procedural editor. It has tablet support, non-destructive editing, will open PSD's WITH all of the layer styles and such in tact (the way PS does now), can use PS brushes.
More features, tech specs, screenshots, and comparisons to PS and Gimp over here: http://getormr.com/features/
Available for both Windows and Mac OSX.
Industry-first truly non-destructive, procedural workflow, no matter what you do.
Native 16-bit per channel HDR architecture for all files and all operations.
Support for all major file formats, including PSD, DNG, HDR, XCF and all RAW formats.
Basic brushes with pen pressure support.
Extensive vector shapes primitives and vector editing tools.
Layers, groups, layer masks and layer blending effects.
Extensive brush customization and libraries.
Best-in-Class PSD format import with layers, groups, masks, and even layer blending effects on both.
Custom color selection dialog with complementary colors.
Customizable vector shape libraries.
Brush strokes that are editable after creation.
Customizable shortcut keys.
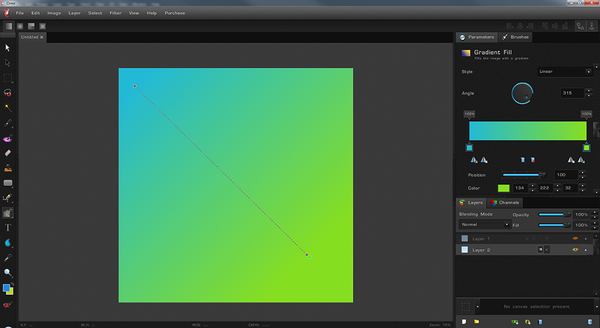
I'm in love with it's gradient tool. Photoshop you have to kind of wing it, this one you can move handles around and edit it on the fly.
It's interface is a little... huge, at least for my tastes.
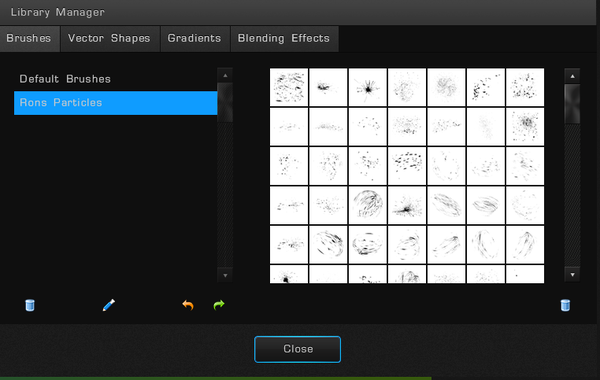
Importing Photoshop's brush libraries takes a bit of time depending on the library. Importing Ron's made it look like the program crashed, but after leaving it be for a minute or so they actually came in fine.


Comments
$25? Why not, I'll try it. GIMP has some shortcomings gradient-wise (also doesn't import psds very well).
Looks interesting, thanks for the link!
Some questions and thoughts.
1. How do I move the viewport? It DOES scroll the zoom when you scroll the mouse wheel but it does NOT let you click or right-click on the view to drag it right, left, up or down. There are no little arrow buttons for doing this either; how does one navigate the view when working in actual pixels mode on a large pic?
2. How do I hotkey brush scaling? They go into a lot of detail on controlling jitter (thanks, I guess?) but apparently felt this wasn't important. It's not mentioned in the docs or in the edit--preferences dialog for keyboard shortcuts, which strikes me as ominous. Sliders only is no way to run an image editor.
3. The gradient has no shaped option - can't use it to create borders as I do that function in the GIMP, apparently.
4. How do I add brush libraries? Again, not in the documentation. Creating new folders beside the "default" folder in the installation directory does not cause those folders to show up as brush libraries.
5. The filter list, made much of in the promotional material, is incredibly short. Without an ability to read PhotoShop plugins or something, there's not enough here to fill a professional toolbox.
So far I'm not sure $25 was a good deal (and that's 50% off) for something with a tenth the features the GIMP has and apparently vastly less customizability in its interface. Either this is only for people who are really sold on the vector/raster features (which I flat don't need), or calling it a "beta" is wildly optimistic for what it can actually do.
1. Hold the Spacebar + Left Click and drag.
2. Alt + Right Click and drag left/right.
3. I'm not familiar with Gimp's gradient shapes. To create a border, create a new layer and fill that with the gradient you want. Hit CTRL+A to select all, and go to Selection > Expand/Contract. Use the distance slider till you get what you want as a border. Do a Selection > Invert. Now hit that little masquerade mask icon at the bottom and it should mask that selection out on your image and expose the gradient layer as a border.
You can do it in a few different ways depending on what layer is on top and what layer is on bottom. I just made 2 diff color layers and experimented to figure out which layer had to be where and whether to invert the selection first or not.
4. File > Import Libraries. Again though, this may take a bit and the app will look as if it crashed, but it's only thinking. You get to the Library Manager in my screenshot by using View > Library Manager. Why they didn't just put the add libraries function in there I have no idea.
5. It's still in beta. Go to Help > Suggest a Feature to suggest more.
I haven't paid for it at all yet. I only did the open beta option. I'm not sure yet if it has a place in my tools. I just really like the vector feel of everything, and Inkscape tends to drive me nuts. Personally, I have CS6 Extended and wouldn't replace it for this as a raster editor. Vectors, maybe (newer versions of PS have smart layers, which can be used for vectors though, but Ormr can do vector gradient).
Thank you! That's very helpful.
There are many ways to use a regular gradient as an image border; I'm actually talking about something quite different (see pic).
Well, sort of. It's not as pretty. lol
Also, there's an easier way for a gradient border. Use the icon to the right of the mask icon and add a stroke. /facepalm Don't know why I didn't look there first. Once you do that though, then you can use the same icon and add a bevel. Use the softness slider in the bevel options to try to 'round' it out though so it's not hard-edged.
Stroke: Position: Inside, Fill: Gradient
Set the size of the bevel around half the width of the stroke and go from there.
Maybe throw in an inner glow effect also set to from edges.