September 2020 - Daz 3D New User Challenge - Depth of Field and Canvases
 L'Adair
Posts: 9,479
L'Adair
Posts: 9,479
New User's Challenge - September, 2020
Sponsored by DAZ 3D
Are you new to the 3D World? Are you at the beginning stages of learning 3D rendering? Have you been around for a little bit but feel you could benefit from some feedback or instruction? Have you been around awhile and would like to help other members start their creative journey? Well then come and join the fun as we host our newest render challenge!
New this year, we are breaking down each month into 2 different challenges. A Beginner Challenge and then also an Intermediate Challenge.
So which "Challenge" should you choose?
Follow the Beginner Challenge if you are:
- New to the New User Challenges
- New to Daz Studio
- Newer to 3D Rendering in General
- Or if you have not participated in the September Depth of Field Challenge in a previous year
Follow the Intermediate Challenge if you have:
- Participated in the New User Challenge for awhile
- Know the basics of Daz Studio and would like to learn more in depth topics
- Been using 3D Rendering Applications for awhile and feel comfortable with learning Intermediate Topics
- Or if you have all ready participated in the September Depth of Field Challenge in a previous year
*Please be sure to list in your post which Challenge you are participating in*
Closing date for both is September 30, 2020
For a list of the current challenge rules, please see this thread: Challenge Rules
They apply for both versions of the challenge.
So far this year we have covered the following Beginner/Intermediate topics:
Composition/Instancing, & Duplication
Action & Props/Modifiers & Deformers
Scenes & Landscapes/Working Modularly
Portrait Rendering/LIE (Layered Image Editor)
Daz 3D is part of 
Connect
DAZ Productions, Inc.
7533 S Center View Ct #4664
West Jordan, UT 84084
Licensing Agreement | Terms of Service | Privacy Policy | EULA
© 2025 Daz Productions Inc. All Rights Reserved.
Comments
Beginner Challenge - September 2020
"Focus/Depth of Field"
This month's focus will be on Depth of Field/Focus.
Depth of Field is basically controlling what part of the image is in sharp focus. A couple of explanations, from the world of photography (so not everything is applicable, but the definitions and basics do apply when rendering).
http://www.cambridgeincolour.com/tutorials/depth-of-field.htm
http://digital-photography-school.com/understanding-depth-field-beginners/
Inspiration
Tips and Examples, Studio:
http://flipmode3d.com/depth-of-field-daz-studio/
http://www.versluis.com/2015/04/how-to-render-with-depth-of-field-in-daz-studio/
http://www.sharecg.com/v/52258/browse/3/PDF-Tutorial/DAZ-Studio-Tutorial-Depth-of-Field
http://www.daz3d.com/forums/discussion/19195/daz-depth-of-field-settings-a-general-starting-point
https://www.youtube.com/watch?v=EuAIDTH0YoA (Depth Of Field In Daz Studio 4 10)
https://www.youtube.com/watch?v=V0jMBdrMo40 (Daz Studio Depth of Field)
Tips and Examples, Poser:
http://www.keindesign.de/stefan/poser/dof_p5.html
http://www.trekkiegrrrl.dk/DOFtut1.htm
Tips and Examples, Bryce:
http://www.daz3d.com/forums/discussion/3855/
Tips and Examples, Carrara:
https://www.youtube.com/watch?v=gliniNqq8_k
Other Helpful Links
When following tutorials, be cognizant of the different applications (Bryce, Daz Studio, Poser, Carrara Blender, etc.) and different render engines (3Delight, Iray, Reality, etc). Techniques for one may not apply directly to another. If you have some favorite portrait lighting and composition tips, please share them in this WIP thread.
Composition Golden Ratio helpers:
Bryce
DAZ Studio (Also, DS has a built in Rule of Thirds guide; just select Show Thirds Guide in the Viewport context menu)
Don't forget to look at previous themed contests where information and hints are available. Here is the depth of field challenge from last September.
For a list of the current contest rules, please see this thread : Challenge Rules.
Intermediate Challenge - September 2020
"Canvases"
This is a general render challenge with the focus on rendering separate layers, or canvases, for compositing in an image editor, such as Photoshop or Gimp. Daz Studio supports Canvases natively via the Iray render engine, found in Render Settings > Advanced > Canvases. Creating separate layers in 3Delight is also possible with the use of premium vendor products.
Iray Canvases are very powerful, allowing a lot of control over your final image. They can also be very confusing until you understand how to create a canvas and how to use the resulting image. Like any tool, the more experience you get with it, the more the necessary details will become second nature.
A quick Overview of Iray Canvases:
Using the tools provided in the Canvases settings, you can "tell" Daz Studio to create multiple layers of image information with a single render. There are options to specify Type, (beauty, diffuse, specular, depth, etc.,) and options to specify Nodes, (aka objects.) An option to use Alpha exists for most types and will create an alpha layer for the EXR file, which can be loaded as transparency or an alpha channel.
Once you've enabled Canvases, a new section will show in the Render Settings for Canvases, where you can select which canvas will be rendered to the render window. Tone Mapping is on by default and will be applied to the image in the Render Window. This give you a good reference image if your Beauty canvas is selected.
When the render completes and you save the image, Daz Studio will save a folder for the Canvases in the same folder as the saved image, with the same name and "_canvases" added. The canvases in that folder are all 32-bit color images in the EXR format. These EXR images will need to be processed to use. They are very much like a "camera raw" image from a Digital SLR camera.
The "magic" of using canvases is in how you process the various 32-bit files into layers and composite them to create a final image.
Information on Using Iray Canvases in Daz Studio:
It's important to remember Iray was introduced to DS over five years ago and some details about Canvases have changed during that time. Most of the information from older tutorials linked here will be accurate and worth the time to view. Occasionally, you may find something that is no longer the case. Feel free to let us know what those are. For that reason, the upload date of videos is included with the link. (Forum Member names are included, where known.)
Videos
Forum Threads
Adobe/Photoshop
3Delight Options
We normally do not include store products as options in these challenges. However, it only seems fair to mention these products as DS does not have a native canvas feature for 3Delight, so those working with 3Delight—who may well already own one or both of these products—can also enter the intermediate challenge.
Videos
As the "host" of the challenge this month, I want to include my own DOF tutorial.
I have a background in photography, even sold some of my work on my own website. But when I started with Daz, I couldn't make heads or tails of the DOF feature of the camera. I found and used a tutorial in the forums and managed to muddle through an image or two, but I still didn't understand what I did that made it work.
And then one day, it clicked. One day, I finally realized what each of the settings did when DOF was turned on.
So I wrote a tutorial which I posted to one of my Art Studio threads. The thing is, the tutorial is flawed. If you follow the tutorial as written, you'll find the framing of your scene has changed. The tutorial shows you a trick to get the framing back. But as it turns out, none of that is really necessary: that's the flaw.
At the same time, if you follow along with the tutorial, I think you'll have a better understanding of what each of the settings do. So I left it as is, and added links to a couple of video tutorials at the bottom of the post.
We all learn differently, and if you have trouble following the information in the links in the OP, maybe my tutorial will help make the information "click" for you. So here's the link to my post "How To Get A Blurred Background In Daz Studio Using The DOF Camera Options."
The video tutorials I added at the bottom of that post are from @deathbycanon and @DAZ_ann0314. The links to both are under Tips and Examples, Studio, in the second post of this thread. Both are excellent resources.
We want you to have fun while you learn, so if anything about DOF is giving you trouble, please ask us about it in this thread.
Beginner Challenge - "Focus/Depth of Field"
Here's my start, going with the beginner challenge due to the fact that DoF is something that I hardly ever use and when I do it feels like I struggle to find a balance on what's in focus and what's out of focus.
Have you taken a look at my DOF Tutorial? Here is one of the images, which might make it easier to visualize the in focus areas:
The two "boxes" with horizontal and vertical lines through the center show the area that will be in focus. Notice the tiny green line crossing the blue? That is where the camera is at it's sharpest focus, but it does begin to blur between that point and the boxes in front and behind it. The closer the two boxes are to each other, the stronger the blur in front of and behind your focal point; And further apart those boxes are, the weaker the blur.
You can actually see these guides by viewing the scene in Perspective View while your DOF camera is selected. And you can see the changes to these boxes if you change the F-Stop in the camera's Camera parameters, while in Perspective View.
I hope this helps.
I actualy have your tutorial bookmarked for referance, I think the problem that I have is I tend to have the focus very tight on the main subject with not much else in the area of effect.
Also using a second camera just for seeing how your adjustments on the camera your rendering from will make things a touch easier if you have to save and exit the program for whatever reason. Just select the second camera when you come back as your viewpoint, select the main camera for your editing, and you don't have to find the angle you were looking and things . Just remember to parent the second camera to the main so that if you move the main camera the second camera keeps it's relationship to it.
As for my start, the DoF was using the defalt settings for now, I plan to try to have what's happening in the background be less blured while trying to keep what's in focus at this time.
Here's my entry to the beginner challenge, all effects created in DAZ Studio with a teeny bit of postwork warming it and such. I am new to DAZ and photoshop as of about two months ago and still figuring everything out so I am always up for comments and suggestions.
Title: 8
Version B here for the beginner challenge.
I added my main character, changed what was being displayed in the hologram, added a second hologram that was a larger version of one of the craft in the main hologram, and tried to adjust the DoF settings.
For those who decide to try out the Intermediate Challenge on Canvases, the Daz Studio Tutorial I did that is linked above is now completely indexed so you can skip what you don't need to know and easily get right to the parts you are interested in. If you hover over the Timeline you can now also see the headings and sections right on the Timeline now (I did that on all my other videos as well) Still need to Index the Photoshop Tutorial and then get the GIMP one done. I figured I would mention since I know the indexes make things much easier to move around

PS, for anyone who looked at those tutorials and thought the length looked daunting, the process is easy its just a very powerful feature so there was a lot to show
My Daz Studio Depth of Field Tutorial above is also indexed now as well for anyone who may want to follow that one (or who may be struggling remembering how to change or adjust something)
Wow, @Daz_ann0314! Indexing those videos looks like a lot of work. Thank you for going the extra mile.
On topic, the Part Two: Photoshop Tutorial is Indexed as well now
Please know that if you look at the videos and they seem daunting, it is because I try my very best to present as much of the information as I can on the topic (I rather say too much than not enough) but obviously if there are section that cover something you all ready know or prefer to skip, just click ahead to other sections you have more interest in. If anyone has any questions on any of these 3 videos (one is still coming for GIMP), please let me know.
Romantic Evening
Beginner Challenge
Wanted to get a more defined DOF, so was tight in on the couple.
I do not usually enter the contests, and I do so here only to encourage people to learn to use Canvases!
A few days ago I noticed this thread. Canvases are something I have heard about, but not investigated yet even though it is on my list to learn. Well, I watched a few videos and I find it terrible that I did not learn this sooner. While it is not so useful for animation or for images that do not need high quality - it is an absolutely tremendous tool for quality art.
That said, this first image was made last month as part of my own experiment doing quick and easy images for powerpoint presentations. Just a straightforward render - no depth of field, no canvases, etc.
After finding this thread and discovering canvases, I tried to improve this image and made this:
Better but I was not satisfied. After some forum discussion, I realized that I was stuck in powerpoint mode [ the large space is designed to be covered with text ] and I was not in artist mode. Hence, I redid the scene with canvases in mind from the start. I also choose a 6 X 9 book format for canvas proportions. This is the current results in the gallery where you can open it full size :
So, just for formality, this is a Canvas entry.
Title: Dystopian Future
Programs: Daz Studio, Photoshop
I feel this image could benefit from tighter DoF on the characters to give it more of a dreamy background feel, I would try with the focus point in the middle of their torsos and the fstop box just wide enough to fit them in.
you could possibly pull it even further in/back to start just in front of their back shoulders seeing as you pretty much can't see them anyway.
You mentioned the DoF was tight on the characters which makes for some pretty nice background blur/glow on the mountains, I'm not sure where you have the focus point but I feel like you could shift it back a little and not worry about keeping their legs in focus too much, mostly want to focus on their faces and upper body interaction anyway.
I like her expression, his not so much, not sure how you'd make it better but he feels like a robot pretending or like he doesn't really want to be there. You could try maybe have him kissing the top of her head/hair there instead of them just touching heads.
I'm not sure what you're going for with this yet, the planet hologram pretty much fades out completely but the ship one does make more sense for the setting, maybe add some highlighted red areas to the ship hologram and have the character leaned over with his palms slammed down on the holodeck staring/grimacing at the 'damage' or invader progress. You could also then tighten the dof to focus on his face with the hologram slightly between us and him. It would be a rather different feel/image though and possibly not in line with what you're going for.
Thank you for the advice! I went back to my piece and changed the DoF, along with a few other details such as the camera angle and her outfit and hair color. Here is the updated version of my entry to the beginner contest: Any other advice is always welcome :)
Title: 8
Thank you for putting those together. I have watched both and it has changed the way I think about setting up scenes.
So glad you found it useful If you have any questions please let me know.
I have a question for those of you using the videos I made, how many of you were waiting on the GIMP version? I was curious how many were waiting on it (if any)
a gimp version would be AMAZING, if it's not too much work
After the Fall
Beginner Challenge
Software: Daz Studio 4.12
This has had a post render denoise applied to it. The rain and emissive lights (there are about 50 emissive surfaces in the visible portion of the shot) combine to extend this render time considerably (after 12 hours it was still hovering around 20% convergence). I still have quite a bit of learning to do with regards to scene optimizing (in addtion to needing to upgrade my GPU). I am starting to understand why post-work effects are so popular as they would shave a lot of render time.
This is a companion render to one in my gallery. I have been playing with Depth of Field for a few weeks now, and this challenge was a great chance to try and work with a more complex scene. The DoF is fairly tightly centered around the central figure, with both the bike in the foreground (and parts of the rain) and the wreck in the background out of focus.
Comments and suggestions are welcome. Until this challenge I had not even heard of the canvass features of Iray so I plan to composite a scene for that challenge as well.
Tirick
Title: A Light in the Darkness
Beginner Challenge
Software: Daz3D
First time trying to use DoF, so any feedback would be appreciated!
This is not going to be an entry, I just wanted to show the effect of having objects in front of and behind your focal point.
Not sure if it has been mentioned, in the scene everything that is going to be out of focus can be rendered at base resolotion, you can in most cases remove the bump and normal maps to save resources as when rendered you wont see that much detail anyway.
Oh that is great advice, thank you! I'll have to try playing with that.
All done. Just be forwarned I did some silly stuff because I don't use GIMP very often LOL That said I did cover everything I did in the Photoshop version (I just fumbled a tiny touch in a couple spots LOL) That said, if you have any questions, please let me know...
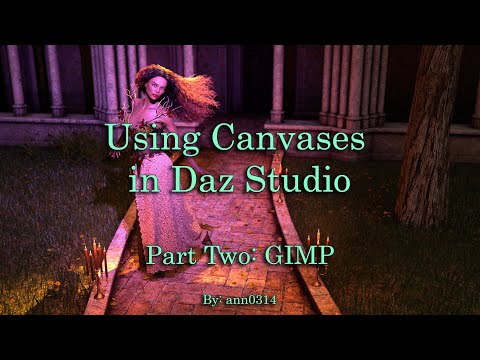
The video is all indexed out like the others so you can skip around and go to just what you want to know about:
Thank you for the GIMP tutorial, @DAZ_ann0314! I've added it to the post on Canvases at the beginning of the thread.
(And I also noticed it's already indexed… You're a rock star in my book!)
Thanks for the feedback. It has been manic at work, but I wanted to have a tweak. The Focal point was just in front of their faces previously with front field outside legs. Now, focal point is on the shoulder, with front field coming through thighs. I completely agree about the man's original expression. I liked the idea about a head kiss or some such, but I didn't want to lose all of his face, so have tried a compromise pose.
Image Title: Fear of the dark
Beginner Challenge
Used Software: Daz3D, Gimp
Hello,
I'm into Daz since more than half a year and try always to improve myself. Recently I start to use DOF in lot of my renders. In my entry for this challenge I put a tight DOF on the face of the woman. I want to achieve to be more focused on her expression and make the danger in the background to be more undefined.
I hope I not overdone it with the out of focus backgroud. To increase the visibilty of the monsters I let thier eyes glow and cast a dark rim light on them.
I rendered the light sources on different canvases and composed them into one image with Gimp. I hope this doesn't conflict with the other challenge.
The Charmer
This is the first version of my entry for this challenge. I think it may need more light. Constructive feedback welcome.
Trying focus and depth of field. Haven't really used this too much before so any constructive feedback would be appreciated. :)
Title: Failing Consciousness
Challenge: DOF (Beginner Challenge)
Software: Daz3D + Photoshop (just to fix those fireflies!)
@katywhite - I don't know if it's just my monitor, but your image is really dark (other than the foreground, which is really bright), This could also explain all the fireflies when you rendered. Did you have the headlamp on your camera on, or even set to auto somewhere? That can really mess up your lighting, especially in a dark render.