Ambient Light Comparison Daz Studio
 fredgoff
Posts: 9
The other day as I was reading through various posts on lighting, I came a cross an intriguing reference to point cloud occlusion in conjunction with UberEnvrionment's Bounce Light. Normally doing anything with bounce light means go on a vacation and come back in two weeks to see what your render looks like. But apparently, using point cloud can make ambient rendering up to 8x faster. So I thought I'd run a scene through each type of setup and see what the final looked like.
Here's my system:
3.2 GHz i3
12 GB of RAM
As you can see, it's kind of low end in today's market.
For the scene itself, the base lighting is:
One spot light set as a key light, white, 60 degree spread, ray traced shadows set at 500% softness
One spot light as a back/rim light, white, 60 degree spread, 50% intensity, ray traced shadows set at 500% softness.
For the hair on the model, I applied the Ubersurface and turned ray tracing off.
Here are the settings for each image along with render times:
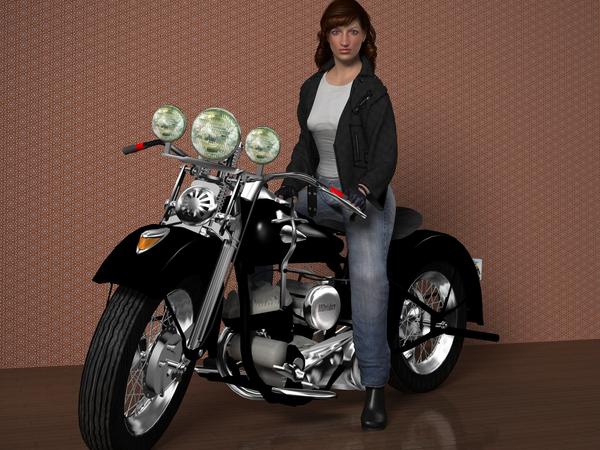
Image 1 (no ambient)
Key light intensity set to 90%
Max Ray Trace Depth: 2
Shading Rate: 0.5
All other settings left at default
Render Time: 3:12
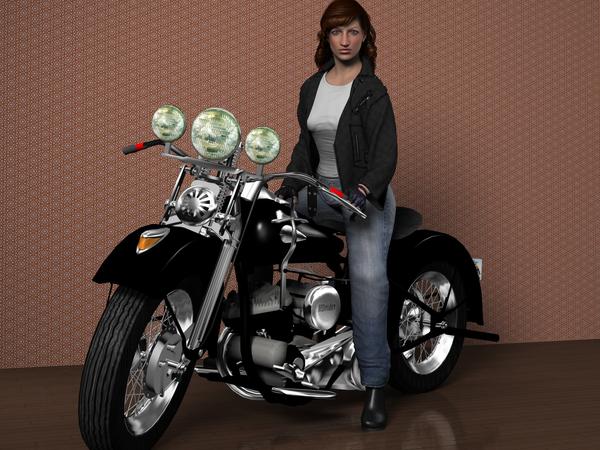
Image 2 (Ambient Occlusion)
Key Light intensity set to 70%
Age of Armour Advanced Ambient, set to 40%, alternate samples on hair, all other settings default.
Max Ray Trace Depth: 2
Shading Rate 0.5
All other render settings at default
Render Time: 9:00
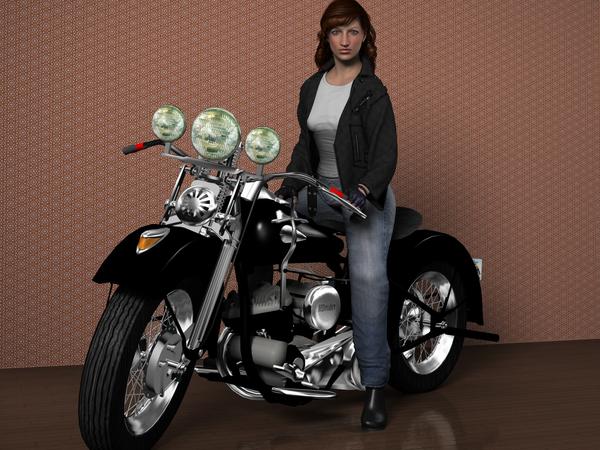
Image 3 (Point Cloud Occlusion)
Key light intensity set to 70%
Render Settings using 3delight scripted, choosing Point Cloud
Max Ray Trace Depth: 2
Shading Rate 0.50
Simply Occlusion Light: 50%
Cloud Shading Rate 0.10 (I had to turn it down this low to get rid of artifacts on the neck)
Hit Sides: Both
Clamp: On (never render anything final with clamp off. It looks horrible)
Max Distance: 10
All other render settings left at default
Render time: 19:20
Image 4 (Point Cloud with Bounce)
Key light intensity set to 70%
Bounce light provided by Uberenvironment2
Environment Mode: Bounce Light (GI)
Occlusion Samples: 128
Shading Rate: 16
Max Error: 0.8
Maximum Trace Distance: 500
Render Settings using scripted 3delight point cloud
Max Ray Trace Depth: 2
Shading Rate: 0.5
Simple Occlusion Light 40% (If you don't turn this on, the bounce light has nothing to work with and you get a no ambient render)
Cloud Shading Rate 0.10 (again, it had to be this low to get rid of artifacts around the neck)
Hit Sides: Both
Max Solid Angle: 0.050
Clamp: On
Max Distance: 10
All other render settings left at default
Render Time: 54:25
While I'm nowhere near able to do some of the amazing stuff other people on here do, I thought this might be helpful for folks who wanted to decide how much time they want to sacrifice to quality.
I think the bounce light could probably stand some more adjustments. Perhaps lower the indirect intensity, or dial down the simple occlusion light a bit more since the image is a little bit overexposed, IMO. But at a 54 minute render time, I wasn't in much of a mood to tweak and tweak.
Also, the motorcycle is pretty low polygon, but, hey, it was free.
Anyway, hope this helps, and I'm sure some folks with much more powerful machines and better talent than me can come up with some more examples to show the differences in the various types of ambient.




Comments
I tend not to use full GI just ILT with directional shadows.
You shouldn't need the Simple Occlusion light as well as UE.