Weight Map Brush, in Paint Brush mode: How is painting in BLUE done?
 Chopperking1967
Posts: 11
Chopperking1967
Posts: 11
I've just started playing with the Weight Map brush, in Paintbrush Mode, (Daz version 4.6 pro 64bit) and am excited as it looks like it will be the solution to my problem.
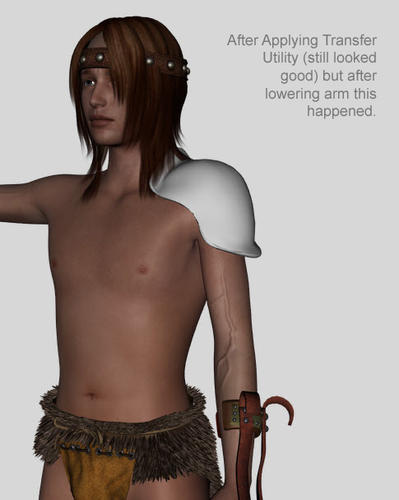
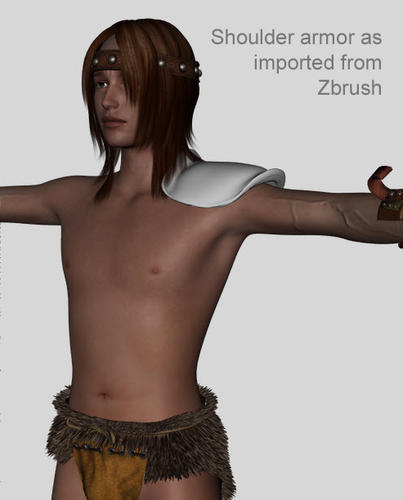
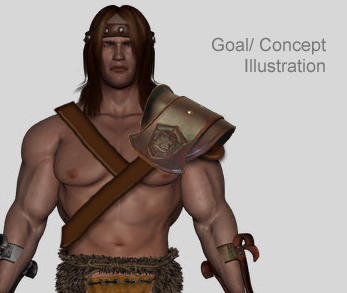
My Goal: Make my shoulder armor plate (pauldron?) hold its shape, rather than conforming too much, when I use the Transfer Utility, and when my Genesis character's arm is raised/ lowered.
I've watched this video, and it gave me a good start: "Rigging Modification Intro Pt 3 Weight Maps Brush" on YouTube.
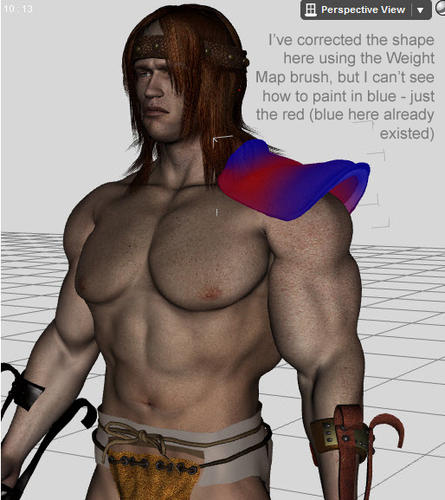
I've been getting the hang of increase the armor's rigidity in the area's I've been painting red. But don't see how to paint "blue" (or erase the red) if I overdo the red areas.
If I'm not being clear, I've included some screen shots of my efforts below:
Please explain how I can paint BLUE - instead of red.
-Trent aka "chopperking"
Daz 3D is part of 
Connect
DAZ Productions, Inc.
7533 S Center View Ct #4664
West Jordan, UT 84084
Licensing Agreement | Terms of Service | Privacy Policy | EULA
© 2025 Daz Productions Inc. All Rights Reserved.
Comments
Press and hold ALT key on the keyboard and paint. Alt + paint removes the weight instead of adding it. Err, that would be for PC, dunno which key is for Mac.
You can also change the shortcuts (and make sure they are correctly assigned in the first place) in Window>Workspace>Customise - look at the lower portion of the dialogue, there should be a tab for the Node weight brush (by default the camera modifiers are shown).
Ben! You rock. Thanks for the answer. :-)
-Chopperking
Great to know. Thanks Richard. :-)