Spotlights render puzzle
 pauljacob11
Posts: 203
pauljacob11
Posts: 203
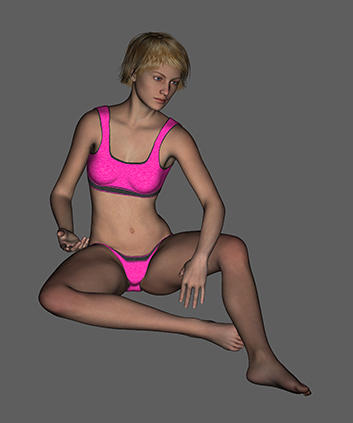
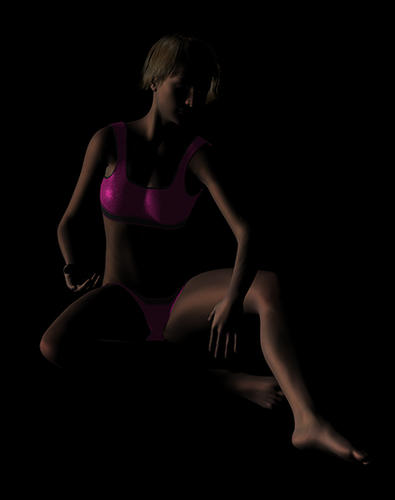
I put two spotlights on the attached model. When I render at 1000x1294 pixels, quality #2, I get a clear render. When I render it @ 3000x3882 pixels, quality #2, I get a dark render.
one.jpg
353 x 423 - 70K
two.jpg
424 x 537 - 60K
Daz 3D is part of 
Connect
DAZ Productions, Inc.
7533 S Center View Ct #4664
West Jordan, UT 84084
Licensing Agreement | Terms of Service | Privacy Policy | EULA
© 2025 Daz Productions Inc. All Rights Reserved.
Comments
The first render looks like just the 'headlight' (default light) is on, i.e. no spotlights in the Scene at all.
The second one looks like the spotlights are there. Could you please try this again, and make sure that both images are exactly the same apart from the dimensions? Render your first image, then change only the size in pixels, and render again immediately afterwards.
Thank you JimmyC for your reply. I did what you suggested with similar results.
pix #1 is a screen capture of the two spotlights which gave a better result than yesterday in pix #2 rendered @1000 pixels. At 3000 pixels same darkness as the image in the Ist post. Then I turned off spotlight #2, and rendered at 3000 and that worked nicely as in pix #3. Then I pushed it up to Quality #3 @ 3000 pixels, and lo and behold the darkness disappeared as in Pix #4.
Is there a light guide I can learn from -- not just the basics but advanced techniques, and it doesn't have to be a DAZ guide, even though that would be preferable.
Also is there a practical way of placing lights? When I think the light is in front of the figure, it's actually behind, and when I position it to the side it's actually half a mile away, and when it's above, it's beyond the moon. There must be an easy and precise way of positioning the lights that is not time- consuming and energy-depleting.
There is, and it is simplicity itself :) When you create a new light, for example a Spotlight, a window pops up, and you can Apply Default Settings, OR, more usefully, Apply Active Viewport Transforms. Check that box, and it will create the new Spotlight at EXACTLY the spot that the camera you are using is positioned.
So, select a camera, even the Default camera will do, move it to where you want your spotlight to be placed, then check Apply Active Viewport Transforms, and the light will be placed exactly where the camera is placed..
By the way, you can look through lights in DAZ Studio as if they were cameras, by selecting them in the viewport dropdown. You can then use the camera controls to move them after they have been placed.
I don't know what your render problems are at the moment, but using OpenGL will not give very good results. You should really try option 4, the 3Delight renderer which is much superior.
Thank you jimmyC for your help and the links, much appreciated. What I really need is a new PC and at least 8.0 GB RAM. Santa's been notified and hopefully I'll have them this Christmas.
You are most welcome, and I hope Santa is listening too :)
One thing to keep in mind when creating new lights in D|S, especially spotlights, is that by default they always appear at the middle of the scene, pointing away from the default camera position. It's a big help in positioning spotlights if you "look through" each one as you move it, using the drop-down camera menu at the top of the Viewport. This lets you see if the light is actually turned to point at your object, and the light cone is wide enough to illuminate the whole thing (if that's what you want). It's very easy to get this wrong; I've done it way too often myself. :red:
One thing to keep in mind when creating new lights in D|S, especially spotlights, is that by default they always appear at the middle of the scene, pointing away from the default camera position. It's a big help in positioning spotlights if you "look through" each one as you move it, using the drop-down camera menu at the top of the Viewport. This lets you see if the light is actually turned to point at your object, and the light cone is wide enough to illuminate the whole thing (if that's what you want). It's very easy to get this wrong; I've done it way too often myself. :red:
Thanks SpottedKitty for the tips, will add them to my spotlight notes. Much appreciated.