Using height maps to model? Very Old Thread!!
 Hermit Crab
Posts: 842
Hermit Crab
Posts: 842
Hi everyone,
I could guess that what I tried today is a probably a well-known technique in the world of Carrara. You guys have done it all!
A post in another forum reminded me that, years ago, I had seen a tutorial on creating building facades in Bryce by using height maps.
So I tried the same very quickly today in Bryce and Carrara.
My shots are awful, I admit.
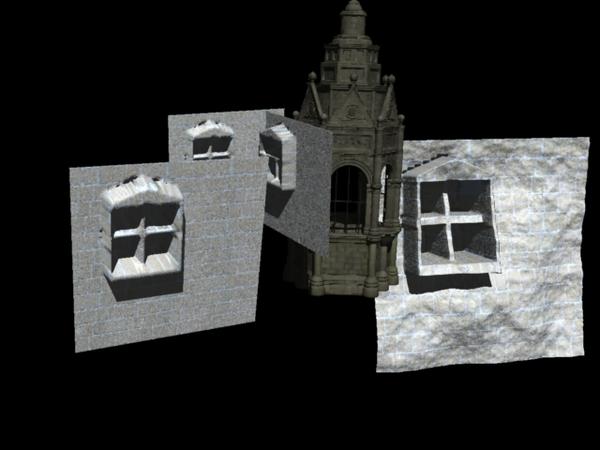
I show the Bryce result duplicated a few times and the Carrara version along with a random DAZ model.
Has anyone found this technique to be worthwhile? (For backgrounds or gravestones, for example).
Daz 3D is part of 
Connect
DAZ Productions, Inc.
7533 S Center View Ct #4664
West Jordan, UT 84084
Licensing Agreement | Terms of Service | Privacy Policy | EULA
© 2025 Daz Productions Inc. All Rights Reserved.
Comments
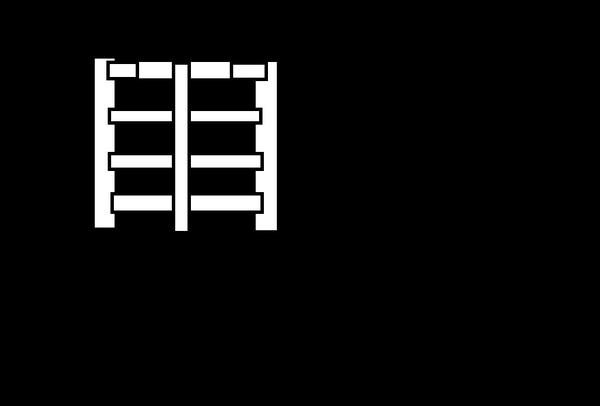
OOPS!!
Wrong picture for height map!
This is the one!
I have in the past
Is cool painting in the map editor too
These days though I use displacement instead
And the heightmap is usually a good basis for a fitting opacity mask for the shader tree. I have seen the terrain modeler used for some special cases, such as buildings rising from a terrain, a frame for a painting, and thatch for a roof. It really depends on what it is going to be used for because the heightmap will only extend in one direction, meaning that the backside will not be enclosed.
Thanks for the reply, Wendy.
I was thinking maybe of the background wall of a dark dungeon or some such thing.
Or maybe even trying relief sculpting.
I've done a fair bit of traditional art in the past - although you'd never tell from the things I post. Tests and experiments, never anything to be proud of:) :)
I guess a paint package and fifty or so shades of grey might be in order.:)
Thanks Diomede64 for your reply - I only saw it after my post to Wendy.
I appreciate the information you give and am encouraged to explore it a bit further. Before starting the topic I should have checked things such as how big terrains are before constructing walls with them and whether 3d painting could be used without the need to UV map.
Also, whether they could be improved in the vertex room.
I could imagine taking parts out in the VM to be used as duplicates. For example, perhaps a window sill could be extracted/duplicated and used as a layer of snow cover.
Right now I'm kind of interested in old castle walls and such like.
Terrains can be scaled to whatever you like, and the resolution of the terrain can also be set. Just pop a terrain into a scene and look at the controls. Terrains can also be rectangular.
Terrains can be painted on. Carrara applies its own internal UV so no need to convert it to paint on it.
For a stand alone object, I think one of the other modelers will be best in many circumstances.
However, I could definitely see the terrain modeler being used for a wall or a line of posts rising along a terrain. The key is to blur a region that has a wall, or a road, or a line of posts, so the tops are flattened. There are tutorial examples around. I know PhilW and Mark Bremmer each show how to construct roads through terrains, and the same principles would apply to creating walls. There are some examples in the WIP thread for the challenge that had the great race.
Here is some brainstorming for your dungeon wall idea. To create a wall made up of rough blocks/rocks connected by mortar, make a white/black brick pattern heightmap in photoshop or other image editor. Then make a duplicate of the map but reverse the black and the white. In Carrara or Bryce, insert a terrain and set the mountain settings pretty rough. Export the terrain map. Bring the terrain map into photoshop and copy the brick pattern to a new layer. Use the brick layer to select the mortar area. In the rough terrain layer, use the mortar selection to blur a relatively flat area. Save it out. Back in Carrara, open a new file and insert a terrain. Remove the default mountain filter. Import the heightmap that has the rough mountain and blurred mortar lines. Reduce the height to suit your tastes. Import a second map into the same terrain modeler. This time, import the map that has the mortar regions as black and the blocks as white. This will raise the rough rocky regions and leave the mortar recessed. Adjust height to taste. Turn the terrain 90 degrees. You should have a wall with recessed mortar and rough-sided blocks. The two duplicate mortar maps should also serve as opacity masks for the "layers list" shader tree, so it should be easy to assign different shaders for the mortar and the blocks.
The terrain editor has also been used to create an ocean.
just to illustrate the opacity masks, not the blurring to make flat tops -
OK, sorry Marcus, I now see that you were way ahead of me.
However, I think the long paragraph in my brainstorming post explains a decent way to get better results than your Carrara example in your post. Using the duplicate inverse mortar maps would be a very convenient way to raise bricks/stones from the surface and isolate them for shading, while preserving the recessed mortar. You could apply the same idea for walls with window sills, frames, or anything else you like.
And as EP points out, yes, you can paint directly on the terrain.
Diomede64 & evilproducer:
Thanks, both for your very helpful replies.
Here it's 2AM and I just logged on to thank you before disappearing for the night.
I'll need to re-read your full explanation tomorrow diomede but I'm very impressed by the illustrations.
I wouldn't say I was ahead of you - I was partly thinking of a landscape tutorial in an old book I have, the Carrara 3 Handbook.
There, the tutor duplicates a terrain mountain range and places them slightly offset. One terrain is textured as snow and fills the hollows while the other is textured to look like rocks jutting through.
Evil, thanks for the UV info - it makes it more worthwhile to try.
Regards
Get a good night's sleep!
That tutorial certainly isn't wrong. I wonder if the terrain shaders have been improved upon since then? Now you can drive different shaders by elevation and slope, plus more. You can even use those functions on non-terrain objects to drive different effects.
I had that same book, and the Carrara 5 handbook. Loved them both. For a background mountain, I followed a similar suggestion from the handbooks by duplicating a terrain, applying the spiky filter to the second, then shading the second green. It made a distant mountain look like it had forests on the slopes. A lot of clever little suggestions in those things. I went through a phase of buying old 3D-related tutorial books used on Amazon. Got some good resources cheap as long as they were for the older editions. Still helpful for me.
This is an old thread which I remembered as I was reading all the interesting Carrara discussions going on at the moment.
Bryce has been mentioned a few times and there seems to be a particular interest in creating props and such from scratch.
Since starting this thread in 2014 I haven't pursued the idea any further until a few minutes ago when I used the picture above to recreate a terrain in Carrara and also in Bryce.
The Carrara terrain has been duplicated and the Bryce version is in the scene for comparison. (I 'flattened' the Carrara version a little.
What may be of interest is that the Bryce terrain can be exported in many formats including .OBJ (I show this in Carrara's editor) but I'm not sure if the same can be done with a Carrara terrain.
Regards to all.
Yes! I find this to be really useful in many situations - especially if I just need something in the background.
You also know how I like Project Dogwaffle Howler, right?
Well since Howler 9.5, I think it was, we can export obj files along with height maps and such using the 3D Designer - so this technique also works in Howler along with Carrara and Bryce - each having a different set of benefits.
Like in Howler, adding erosion can be a lot faster up front than by using erosion in Carrara's Terrain modeler, but I think we get different results too... so it's fun the compare.
These were just simple tests I was doing when Howler got those new features:
For this one, I rendered an Enhance C shader by DCG in Carrara, brought that into Howler's 3D Designer, exported an obj and brought that into Carrara
Same technique here except that I just made the height map in Howler
In Infinite Skills' Realism Rendering course for Carrara, PhilW gives us a real treat of an example of using this procedure in Carrara to do some wonderful additional interior assets! The funny part is that he wasn't aware that I was doing it, and I wasn't aware that he was doing it - yet it was all happening at the same times! :)
the terrain should export as obj, I have done so, make sure morphs and skinning ticked
It's truly amazing how much detail we can 'sculpt' using maps in our terrain editor.