multi channel mixer, what curve filter does
 Mistara
Posts: 38,675
You currently have no notifications.
 Mistara
Posts: 38,675

Licensing Agreement | Terms of Service | Privacy Policy | EULA
© 2024 Daz Productions Inc. All Rights Reserved.

Comments
In short, there's "Linear", which is a straight line between two points. A curve alters that path, making it non-linear.
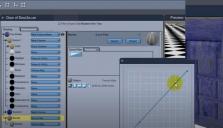
A "Curve Filter" most often is like a 'hands-on' curve that allows us to manipulate what the curve is doing, and where along the path it changes. In the following simple example, we'll see how the curve doesn't really need to be a curve at all, but just a manipulation of the linear result.
Simple example: We can reverse the behavior of something by dragging the left side of the curve (which defaults at the bottom of the graph) to the top and drag the right side of the curve (which defaults at the top of the graph) to the bottom.
It's a common photography touch-up trick to add a point along the left side of the curve and pull it a bit lower and fairly close to that left side, then reverse that on the right side. This will make something that looks similar to our Bezier curve.
Keep the left side (Black/Dark) low for an extended period beyond linear, and upping the highs on the right a bit early help to increase contrast, but in a more custom way, which helps colors and detals stand out and cause the subject of the image to "pop"! :)
Well a series of pictures can reveal all...
The basic shader with gradient in the colour channel and a curve filter added to control the radial... What we have here is basically a graph with the x-axis governing the rate of change and the y-axis the amount of change over time. In pic one the line is along the bottom so there's no amount of change and the first colour in the gradient is the result (red)
The next image shows the line along the top so there's maximum amount of change but no rate of change so the result is the final colour of the gradient (blue)
Now the line rises in a straight line from the bottom to the top and the gradient is drawn from red to blue
You can fall in a straight line too from top to bottom and the gradient is drawn from blue to red - Are you getting the idea?
You can control the amount of rise and fall as shown next with the line moving from the bottom to the top rapidly
If the line zigzags from the top to the bottom you get a repeating radial as shown ... now it's over to you to experiment. Have fun!
I've used straight lines in the editor so the effect is plain to see - but do experiment with smooth (curved lines) for greater flexibility.
curve filter is fascinating.
...and powerful!
FENgari, that's a cool presentation! :)
I like presenting images too, but Carrara's cranked wide open these days simulating and rendering! ;)
did you notice the part in the tutorial with the keyframed blending? so kewl mann
how do you make the height shaders?
use a terrain shader
otherwise global rather than local and a projection option
You can also use Environment Functions -> Elevation...
1. Take a simple gradient [Blue -> Green -> Yellow]
2. Add Elevation and set the Height to half the object height; the Blend to anything up to half the Height (see image)
3. Render using Carrara's native renderer and sit back and admire the beauty...
4. Add some G'MIC for good measure...
Don't you just love, love, love Carrara !!!!


Cool !
theres a lot of settings in marble. experimenting to make a lightning pattern.
or maybe use the tree generator to make lightning
Another example of the Curve Filter...
Full story here...