Bryce vs. LuxRender
 Electro-Elvis
Posts: 892
Electro-Elvis
Posts: 892
Hi everybody
The title is a bit blatantly. I could finally manage to make my first acceptable Reality 4/LuxRender. I mean, it was the first time I had the feeling, the program does what I want it to do, at least mostly. That was the reason to make a comparison with Bryce and LuxRender. I am afraid, the quality of all 3 renders is not top-notch. Hope you found it nevertheless interesting.
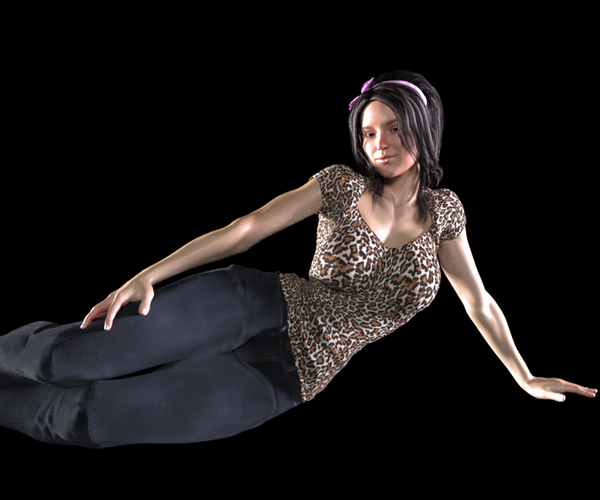
1. Picture: Bryce TA and Dome Light, render time about 20 hours, 16 rays per pixel (RPP)
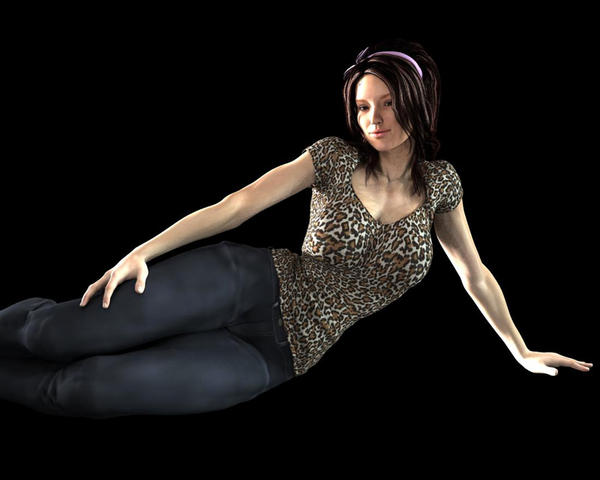
2. Picture: Bryce TA and Obscure Lighting, render time about 12 hours, 64 RPP
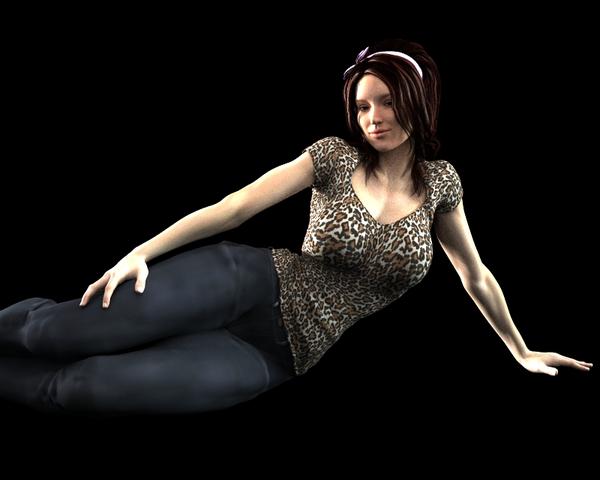
3. Picture: Reality 4 / LuxRender, render time about 3 hours
Daz 3D is part of 
Connect
DAZ Productions, Inc.
7533 S Center View Ct #4664
West Jordan, UT 84084
Licensing Agreement | Terms of Service | Privacy Policy | EULA
© 2025 Daz Productions Inc. All Rights Reserved.
Comments
Oh my what have we here?
1. Was the LuxRender submission rendered with unbiased settings? I know Lux has some other options, just want to be sure the third render is indeed a fully unbiased one.
Comparisons.
First I'd say that the mere similarity of these images says Bryce TA is really quite good indeed. More to specifics.
In the TA+ Light Dome version, the render time was quite long. Generally the shading seems very similar to the LuxRender version, you can see a notable difference in the shading under the breast for example compared to the Obscure light submission. It's always been my theory that point lights tend to fix some of what is still not quite perfect about TA. But that render time is unacceptable. There are probably ways to use this combination with much faster render times with no loss in quality. Another nice perk is that the dome can provide specular lighting, a calculation that is missing from TA alone (diffuse bounces only), thus correcting the GI algorithm to some degree resulting in a more accurate render as evidence by the similarities with the LuxRender. Amazing work here!
In the TA Obscure, we see a massive speed increase which already makes me want to give it my vote. That shading under the breasts for example is much more pronounced than it is in the LuxRender and TA dome submissions, but it is still pleasing to look at. The shading around the thighs of the jeans is also different. Obscure light offers some really grand possibilities and qualities and seems to keep pace with LuxRender very well. Impressive to say the least
LuxRender. The black colored floor and off site light sources make it difficult to be sure how this scene is actually supposed to look. If no light can bounce upward from the floor then explaining all the highlights will be a challenge.
Now, which did you render first, the Lux version or the Bryce versions? It matters, because of what we will assume was the correct ideal. It is quite possible to render a sample in Lux, and then tweak the Bryce settings to produce results that are visually quite similar. If this was the case that is cool as heck as I find it nice to know that Bryce can be made to look this way. What would impress me even more is if you'd said you'd rendered the Bryce versions first and that when you plugged it into Lux it happened to come out looking roughly the same. Either way, this degree of similarity would not have been what I assumed I;d find to bravo, major bravo.
Now, to really get to the nitty gritty lets try render something OTHER than humans. Lets start with a simple room with light coming in from a window and see how the light bounces around the surfaces. When we start comparing those types of situations we will see more readily where the differences occur.
'
Fun fun. Thanks so much for this demonstration. Hopefully, this is only the beginning.
My preference is the first image, it appears the more natural of the three. The woman's eyes are more distinct in the first image, while a bit abnormal in the third. Skin tone of the first image is better than the second, and the washed out look of the third. Me personally would gladly endure a lone render if it produced better results.
Thank both of you, Guss and Rashad, very much for your comments. I was quite busy and I am afraid, I was not able answer earlier.
@Guss. I tend to prefer the first one, too. So I have to admit, that I have not tweaked anything in the LuxRender, simply because I am not very familiar with it yet. I have to access it over DAZ Studio and Reality 4, which means for me to struggle with DAZ Studio and Reality ;-)
The only thing I changed was the default setting for the light, which is "auto linear" which means, that my parameters for the three light sources have no influence at all. That's why I changed this setting to "linear", that allows you to change the intensity and the colour of the lihgt source during the render is running, which is a very nice feature.
@Rashad. I have written my answer directly under each of your detailled comments, which I really appreciate.
I confess, the Lux Render was first, because all startet with my attempt to achive an acceptable Lux render. Afterwards I finally got one, I wonder how similar light settings in Bryce would look like. As far as I know, a direct way from Bryce to Lux Render is not possible(but I'd be happy if someone shows me I am wrong), because IMHO the Lux Render has not the most user friendly interface. Without the bridge software "Reality 4" between DAZ studio and the Lux Render, I had no clue, how to deliver the objects, figures and lights into the Lux Render
It was fun for me, too. I hope I have the time soon to make further comparison renders.
On a general note, Intensity has no effect to light except when the option Apply to light source is enabled. This is an amplifier/booster for HDRI Effect.
Concerning OL, OG, TA-Gels, OGL and HT driven OGL: I made memos from these videos and they are available on my website. Go to Bryce Documents > Memos > Lighting. These 1-page memos don't replace the videos (link to them on the page) but once you've watched and understood the video, the memo can serve as a quick reference guide. The memos have the essence of the respective video condensed to the essential.
Many thanks Horo for your appreciated information.
Interesting, very interesting. As Rashad said, rendering something other than humans might help expose more of the nuanced differences between the engines. Humans are a problem - generally true - but for render testing for Bryce there are issues with transparency which will make your tests very long winded when it comes to rendering the hair. Also there is the problem of realism and subject which detract from a critical analysis. Even with good sub surface scattering for skin, a CGI figure rarely looks realistic, but the closer to real you get, the more likely you are to end up in the "Uncanny Valley". So for light tests, I find that Cornell box scenes offer a sufficiently challenging test environment.
My view, the top of the three renders is the nicest I think. But such a scene is more of a challenge to your skill as a digital artist than it is of the render engines for the above reasons.
Thanks for the Interesting post, Electro-Elvis. I too prefer the top render. I have tried to render a given scene via Reality/DAZ studio, vs Bryce, and usually the lighting setups are so radically different that the final scene "look" cannot be directly compared. Ie I did not try very hard to get the lighting to look exactly the same in each render, but merely had my "preferred" lighting setup in each case.
It would be indeed the more interesting comparison to try to get +- similar lighting results in each as you have done thus enabling a better comparison - and try out various scene types. I will check Horo's lighting advice first too. May even add in a Carrara render as well - as I'm just working through Phil Wilke's newish Realistic lighting tutorials. Going to be a good learning experience, I think.
AND I must add- I'll also take on board Rashid's lighting advice on this too... - also interesting.