Normal Map or Bump Map for G2F skin shaders?
 Diomede
Posts: 15,165
Diomede
Posts: 15,165
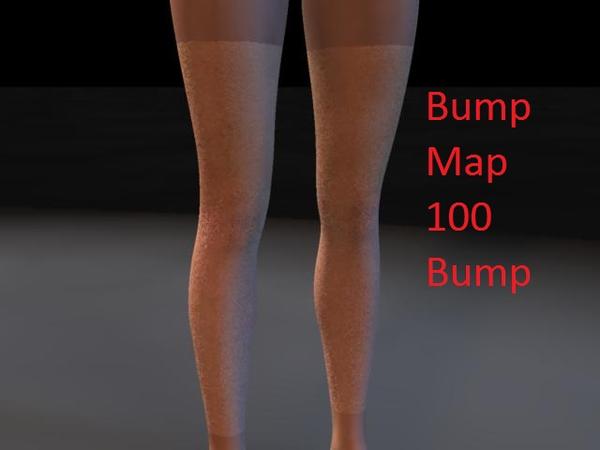
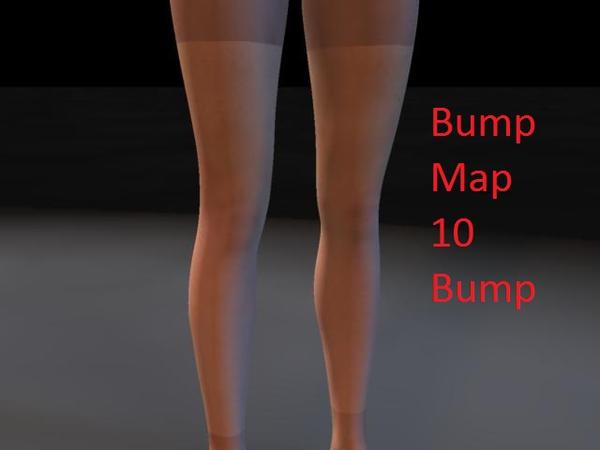
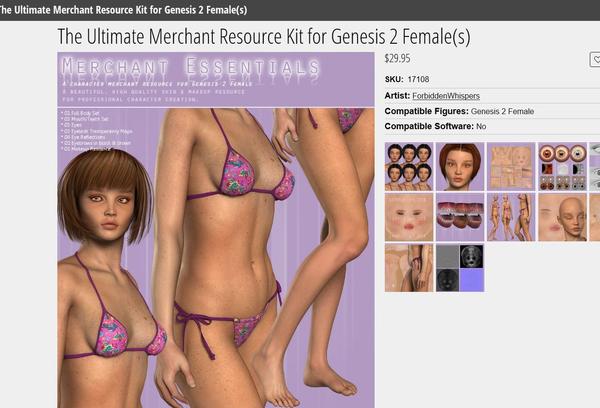
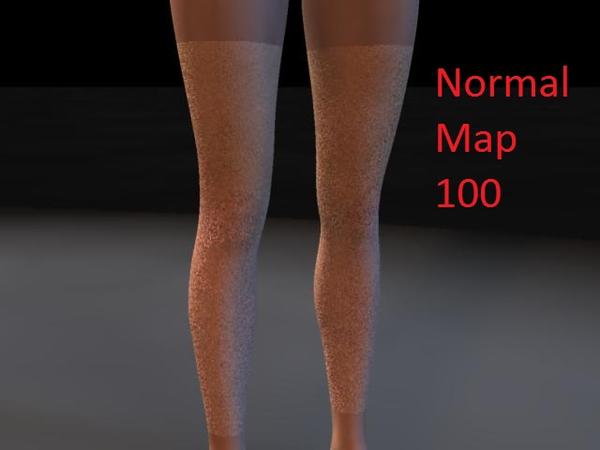
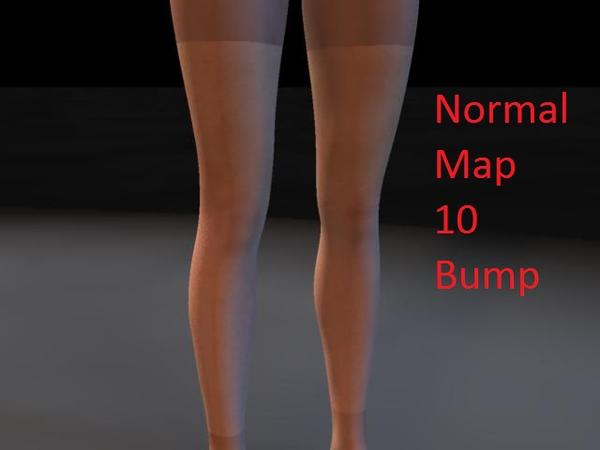
I am dipping my toe in the "photo-real" pool. To get started, I am trying to learn skin shaders. I picked up a G2 Female merchant resource by Forbidden Whisper that is really designed for Studio. I am trying to adapt the resources for use in Carrara. I have applied it to the legs (not upper thighs or ankles/feet) so you can see the difference from the default shader. I have set the highlight and shininess low but have not changed reflection or subsurface yet.
The resource pack comes with texture maps for limbs, face,... in the categories of
- diffuse
- bump
- displace
- normal
- SSS
I noticed that the Carrara shader tree can load a normal map in the channel for bump. Does anyone have thoughts on whether it is better to use the bump or the normal? I currently have it in a mixer so I could combine them, but I am wondering about system resources, render artifacts, and other potential pitfalls.
Also, I was wondering about the potential to use the other maps to get more detail. The displacement map is way too strong but I think that can be addressed. I will add another post to show my experiment with the displacement map and displacement channel. In the meantime, what are best practices for the bump and normal maps?
Daz 3D is part of 
Connect
DAZ Productions, Inc.
7533 S Center View Ct #4664
West Jordan, UT 84084
Licensing Agreement | Terms of Service | Privacy Policy | EULA
© 2024 Daz Productions Inc. All Rights Reserved.
Comments
Like I mentioned, the displacement map has way too strong an effect. I found I could get a more reasonable use by creating a nested shader tree in the displacement tab.
- in the top displacement tab channel, use an "Add" operator.
- set the top channel of the add to a value of 50%.
- set the second channel of the add to a "Multiply" operator.
- place the displacement map in the top channel of the multiply operator.
- Set the second channel of the multiply to value and put in something small like 1% or 2%.
In the attached pics, I show a close up of the right knee with the multiply value set to 2% and to 20%.
Do you think this could be adapted to use some of the more detailed textures for Studio in Carrara? Or, maybe I am just reinventing the wheel.
I'm actually very excited to see you experiment in this direction, because I consider you to be very talented and have an exacting eye for details, and I anticipate learning quite a lot from watching this thread progress :)
Displacement really isn't useful, except maybe for extreme bumpy parts (like if you want to have the veins sticking out everywhere); it hits the render time quite a bit and is hard to make it 'tuned down' enough so that it's just barely noticeable.
Normal maps are better than bump maps, in that they render faster and can be slightly more accurate in their detail. However what I've found is that if a normal map is made from a bump map (which most are) there won't be a lot of difference in the bumpiness and detail, although I still think they render a little bit faster so still worth doing. I think normal maps need less amplitude than bump maps (in other words, they make the bumps and ridges 'deeper' than a bump map, so you need less strength to get the same effect). that's just an impression though.
There are many others who are much better at realistic human rendering than me (PhilW, Restif, moviehawke1, I could go on) so hopefully others will chime in.
I saw a render not long ago from Restif where he didn't use character texture maps for bumps at all, but instead emulated a tutorial that Holly Wetcircuit did a while back that used a procedural cell shader for the specularity that looked pretty great and realistic. I haven't tested that approach myself yet, but I couldn't help thinking it might in some ways be superior to use a natural function procedural like the cell shader in both the highlight and bump sections together, since it would mean quite a reduction in the scene complexity, getting rid of the spec and bump maps of the character (particularly useful when rendering in Octane, where with my little 2G memory card every bit of memory saved means I can add more complexity to the scene in other areas).
Also you'll want good lighting to refine your skin settings and testing. A carrara shader that looks good with Full GI won't necessarily be right for a non-GI lighting scenario. I have just lately been trying to work on hair shaders to try to find settings that would appear more realistic, and what I've done is take PhilW's portrait studio scene (I'm using the one with the 'fashion' lighting setup) and add to it some lights in a replicator using Rashad's 'fake GI' approach, don't need many, just have 9 bulb lights replicated in a square and set above the Meshlight emitter in PhilW's original scene, turned down low in intensity, and I'm still using real Full GI, but because there aren't that many lights added, the scene still renders relatively quickly. I do think Rashad's awesome method can help correct one of the few weaknesses in the Carrara native renderer, which is that the specularity effects for skin can be diminished/incorrect/not spread enough when using a single point light, and using several point lights in tandem coming from a 'place' gives a much more accurate spec effect and also gives much better visibility to the skin itself (which is very helpful when trying to determine the right bump amount, for example). Oh and I have the gamma correction set to 2.2 to enable the linear rendering on this.
Like I said, I'm working on hair shaders at the moment, not skin, and not doing so well in my refining process so far (please ignore the hair, it's not nearly up to scratch yet lol) but my only point on this is that a stable lighting rig is probably going to be important in determining what's going on with your skin as you fine tune it.
Thanks for the vote of confidence, Jonstark. I consider you one of the skinshader gurus. In fact, I had saved a previous post of yours about skin/eye, etc. settings in a text file and have used that (and PhilW and others) to get started. I do feel like a fish out of water, though, so I'm going to be making a lot of basic mistakes. I really appreciate the support on the forum.
I almost have a working baseline for the Forbidden Whispers G2F resource set that I bought. But I am doing something wrong in trying to get the eyebrows to overlay correctly. Not complaining, just explaining why it looks the way it looks. I'll get it worked out. Same issue regarding makeup.
I already see what you mean about how everything interacts with everything else. Here I've used a slightly altered version of the default 3-point lighting scene in the Carrara browser. The shape of the figure, etc. is all the default G2F.
The hair is the Portia hair by April and the bikini is Hongyu's.
So, if anyone knows some good eyebrow/makeup tutorials for using these resource sets, I'd appreciate it. Or, am I expected to apply them to the base face map in an external program like Photoshop? Seems like should be able to use an overlay or something.
Yay! Some eyebrows are showing up. This can't be the intended method, but I used a mixer then put the eyebrow in file in the mixer channel and inverted the color. Won't work for makeup though.
Carrara doesn't do "micro polygon" displacement - displacement is based on ACTUAL polygons, and it moves the WHOLE thing. It can do reasonably well with sufficient subdivision, but otherwise you can't hope to get the same results as DS or Poser. Save displacement for large-scale effects.
Bump is a weird thing. The "percentage" is based on the area of the map compared to the object, in inches, in the final scene. If you have a one-inch sphere that is completely and exactly covered by the bump map, then 100% will give you one inch. Heh... yeah, right... It was easier for the program to calculate, but it absolutely sucks for us and we've been asking for it to be changed forever.
Now, remember: Poser objects come in as 98 TIMES their original size. Yeah. One "Poser Unit" is 98 inches, and Carrara's native unit is one inch (regardless of what you set the UI to, internally Carrara works in U.S. inches). Any Poser figure you bring in is silently scaled to not quite double... So, how do I get a bump that looks one inch high? ... estimate how big your figure is in inches, DOUBLE IT, then divide by 100.
Long way to go! But here is a little pinup showing off a skin shader built from texture maps from the merchant resource linked above and a Carrara dynamic hair based on some of Jonstark's tutorials. The skirt was draped to the posed position using Stringtheory's undesuit concept.
is this still true, the 98 times? ca8.5
refers to buildings, dinosaurs, every cr2?
thanks!
Just a personal preference here. For me, unless the camera is right up on the figure, I'll typically relocate the bump map to the shininess channel instead (with a little tweaking). It renders much faster when using GI and still creates irregularities in the surface that keep the figure from looking quite so like a mannequin.
ise still in shock over the 98 times thing. that includes Aiko3, V4?
what about genesis and duf props?