Convincing metal with 3Delight
Looking for a bit of advice. I'm trying to create convincing looking metal using 3Delight as the renderer. iRay gives fantastic results using it's built in shaders but it's too slow. I'll be producing 30 second animations and each frame takes ages using iRay.
The attached image is the closest I've come but it's still not quite iRay quality. It does however. render in seconds.
What I've done so far to achieve the image attached.
Imported my Sketchup model
Converted surface to UberSurface and switched on both specular 1 and 2 - both white 100%
Main light is UberEnvironment2 with KHPark. IDL with directional
Added 4 extra distant lights all between 60 and 100% and set to specular only.
Any ideas what I can do to improve? I've tried various additional lights but all they do is wash out the strong contrasts I need for metal.


Comments
It might help if I show you what I'm trying to achieve. This was done in iRay using the brushed metal shader. No additional lights. The only tweak I made was to drop the reflection strength slightly in the surface editor as my model was showing faces during render. I stopped this render at 79% after 25 minutes. No way I can use iray for the hundreds of frames I'll need to produce.
On a separate note, any idea why triangular faces are showing on the bottom right of the model. I exported from sketchup as an .obj and I've checked the mesh of my original. I can't see why faces are showing up in one area and not all round the model.
Well, firstly, even if you are just using a 'sun-sky' in Iray, it will still provide a 'reflective' environment. 3DL doesn't...so you are not getting any reflections. You'll need to enclose your model in an environment in 3DL, stick something on it to act as a environment map and then enable reflections (raytraced) or plug in a 'reflection map' in the reflection channel...
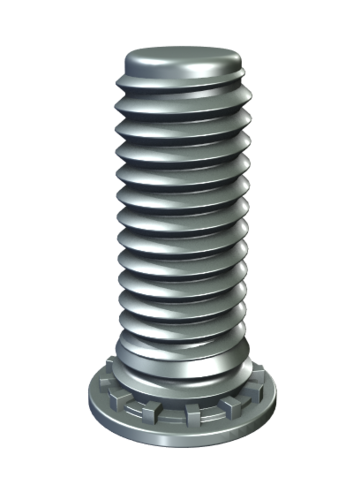
Here's a simple bolt, with just the default DS surface shader, sitting in an 'environment' with reflections set to about 25% strength...it rendered in about 1 min (had an occlusion light on...less time without occlusion)
The second image is with the same map used in #1 plugged into the Reflection Color slot...it rendered (without the occlusion) in about 20 secs.
http://www.daz3d.com/real-metals-for-daz-studio
or free
http://www.sharecg.com/v/27568/gallery/7/Material-and-Shader/Ultimate-Shader-Pack-for-DAZ-Studio-UPDATED_2011
Thanks for reply mjc.
I thought using UE2 with the park material provided an environment that would be reflected.
I can't use an actual environment as I need the model on a transparent background. I'll try plugging in some images into the reflection map on the material as you suggest.
Reckon I'm getting close. No need for environment map - just adding some white reflection and using distant lights with UE2 as a base.
This was very helpful. Thanks Kerya: http://art-collaborations.com/RealMetal.pdf
Don't think I'll ever match the iRay render but this took 6 seconds. I don't want actual environment reflections as I'm trying to simulate a studio shot - this is just about good enough for my needs.
UE2 can provide reflections...but, the environment sphere, is 'off' as far as the render is concerned...`
And, there are a number of 'studio' HDRis around that could be plugged into UE2.
zbyg's sets.... http://zbyg.deviantart.com/art/HDRi-Pack-1-97402522 (and two others) are almost all 'studio' sets
Thanks again mjc. I've got those hdri maps - used them in Twilight Renderer in Sketchup.
Just going to figure out how to plug them into UE2 and we'll see how I get on.
If you load one of the UE2 presets...like HDR Studio, you will notice that the HDR map is in the Color slot...just put which one you want there.
Thanks. Playing with it now. Put the HDR that is the default iray one (ruins) into UE2 and set it down to about 30% - has definitely improved things.
This is taken from DAZ3D Facebook page
Uber Surface: omnifreaker advises the Spec 1 colour should be the same colour as the diffuse and Spec 2 White
Never thought of taking the diffuse down - always have it 100%. I've set diffuse at 75% and reflection at 25% and it makes a subtle but effective difference.
I'm happy with this now and have spent far too long tweaking :)
Not iRay but not bad at all and looks very much like a photo of one of our products. 30 seconds render I can live with.
Thanks for everyone's help and advice. I learnt a lot doing this.
Well, it seems the answer was to spend some money :)
I bought Reflection Maps from Dimension Theory. This is first attempt. Took 10 seconds to render.
I reckon with a bit of tweaking I can get this better than the iRay render which takes 30 minutes.
Should have used an environmental sphere in the first place. Still, I've learned a lot. Thanks for everyone's input