beyond killer farts - animated smoke trails with muzzle blasts [Commercial]
 staigerman
Posts: 236
staigerman
Posts: 236
Quick update for those who have PD Howler 9.6 - grab the free update to 9.6++ from the Howler > download section at thebest3d.com
http://www.thebest3d.com/howler/download/index.html
Plus, if you got Howler 9.5, contact us for the free update to 9.6.
New tutorial!
We've explored a few techniques for post work in adding muzzle flares and such in recent weeks. It's time to add smoke and animated it.
Also, we've had another newsletter
Hello again, here is another update from the "Dogwaffler of the Moment" newsletter.
See more and learn more in recent online editions with HTML formatting, with images and links to related videos. Start here to see all past newsletters:
http://www.thebest3d.com/dogwaffle/newsletter
In this issue we continue our fascination and exploration of Pluto and foreign worlds, and we add a muzzle. No, not the kind you put on a bad dog to prevent the biting. Muzzles are also flares in front of machine guns in a video game. Muzles, flares, stars,... a bunch of things you can pick and choose and customize from the effect brushes.
 |
|
Exploring Pluto.... Adrenaline meets Caffeine
These are exciting times, on an evolutionary scale. The pictures from Pluto keep coming in. It will take over a year for the last recorded image to reach us. A lot of data was recorded during the fly-by, but with the very small bandwidth of just a 15 watt emitter, it takes a lot of time to send it all. The data is sent again and again in redundant batches so as to make it possible for the ground antennas to receive it and distinguish it from the background noise, the stars behind. Something like that. It's worth imagining, dreaming about.
So the probe that went past Pluto on July 14, 2015, took a ton of pictures, which are now stored on some device on that probe. Now what?
We're now gradually seeing them get to our screens. Keep an eye on the action here - every day for the next 300-400 days!
http://pluto.jhuapl.edu/Mission/index.php
https://www.nasa.gov/mission_pages/newhorizons/main/index.html
Didn't see the initial event when it was happening? Need a refresher? Watch "Chasing Pluto" to get a sense of how big this is.
https://www.youtube.com/watch?v=k-u6xqmb1Hc
Soooooooo much data was recorded on the probe during the short fly-by's closest approach. While it is now continuing to fly away from us, the data is being transmitted from New Horizons, back to Earth on a 15-Watt emitter. That's a fraction of my wife's hair dryer, or my son's gaming PC,... and yet we can filter the data from the background noise, transmissions arriving daily, and over the next year we'll get to see and discover how big this event really was, on the grand scheme of things, the evolutionary scale, the stuff that matters, ....our place in the universe?
or maybe not yet.
But we can dream and paint about it.
Thank you Nova/PBS/NASA/Mom (Mission Operations Manager)/my tax dollars at work(!)/Google/Youtube/supporting foundations and donors like you!.... did I miss anyone?
'Chasing Pluto': PBS Documentary on Epic New Horizons Flyby
http://www.pbs.org/wgbh/nova/space/chasing-pluto.html
We're continuing to explore the universe, Pluto or other imaginary worlds, and if it helps, we'll add a cup of morning Joe to keep us boldly going where no GPU has gone before.... right here in the kitchen, with our morning cup of coffee.

![]()

Want to try using this for making your own planet? click to view th 1600-pixel version, or click here for the very large original image
Or here's on Planet Pappalecco. Great coffee makes for great planetary explorations.


Flares, Muzzles, Stars, Smoke & Explosions: The Custome FX Brushes
Here is a technique to quickly add muzzles, flares, bright explosive lights and smoke - using Brush FX, or FX brushes.
This image shows the key steps to get there:
http://www.thebest3d.com/slideshow9.5/FX-Brushes-muzzles-flashes-stars-explosions..jpg

Here's a summary of the key steps:
- Brush Tool: It's all about the brush. Dogwaffle is brush centric, this is one place where that shows, we think. It is the top, first tool in the toolbar.
- Brush settings: You can also use 'o' for options to display the brush settings. That's if the application has the keyboard focus.
- Custom tab: This is a great place to start making various types of Custom brushes, from simply blobs to complex animated brushes consisting of multiple frames.
- Brush fx: in the lower left corner in the Custom panel. This will be your gateway to quickly making numerous types of flares and bright flash, muzzle, smoke and stars.
- Select a preset. The preview area shows it rendered out. Use the sliders to adjust some of the key parameters.Note that when you have a preset that you changed and customized, and you think you'll want to use it more than once, it's a good idea to save it in the Media browser. Create a new category folder in it, named something like Flares and Stars or My Muzzles. Whatever speeds up your workflow to find and use it fast.
- Preview-resizer: click and drag in the preview to change the size. Try for example dragging from the center to the outer rim of the preview. This makes a small version. Then drag one about 3-4 times the distance, way out. This will make a very large flare. It will also take longer to render.
- There's an option also to create animated versions. It renders image sequences into the custom brush directly.
Last but certainly not least by a long shot (pun intended), there is the Editor... - use it to create many more variants for your needs. These pre-existing flares are great for seeing them head-on. But if you want a gas exhaust from a rocket engine, or the barrel of a riffle seen from the side, you'll want a more elongated starting image, or you will also need extra transformation filters or the Warp tool and other techniques. Watch the tutorials, old and new.
Here's in fact one more: https://youtu.be/LC4N6zypgng

More Tutorials: Animated Text and Titles
Here are some recently added tutorials for Animated Text for fancy titles, perhaps for use in a game. Oh an first, here's one more on flares, and this one is with PD Particles 9
muzzles and flares - side view
https://youtu.be/h1dCIJqx7Xg
ok, and now on to animated text.
animated titles - part1 - the Brush KeyFramer
animated text, part 2 - moving each letter
animated text, part 3 - brush management and using the Curve tool
And that's it for now.

Thanks for waffling and howling!
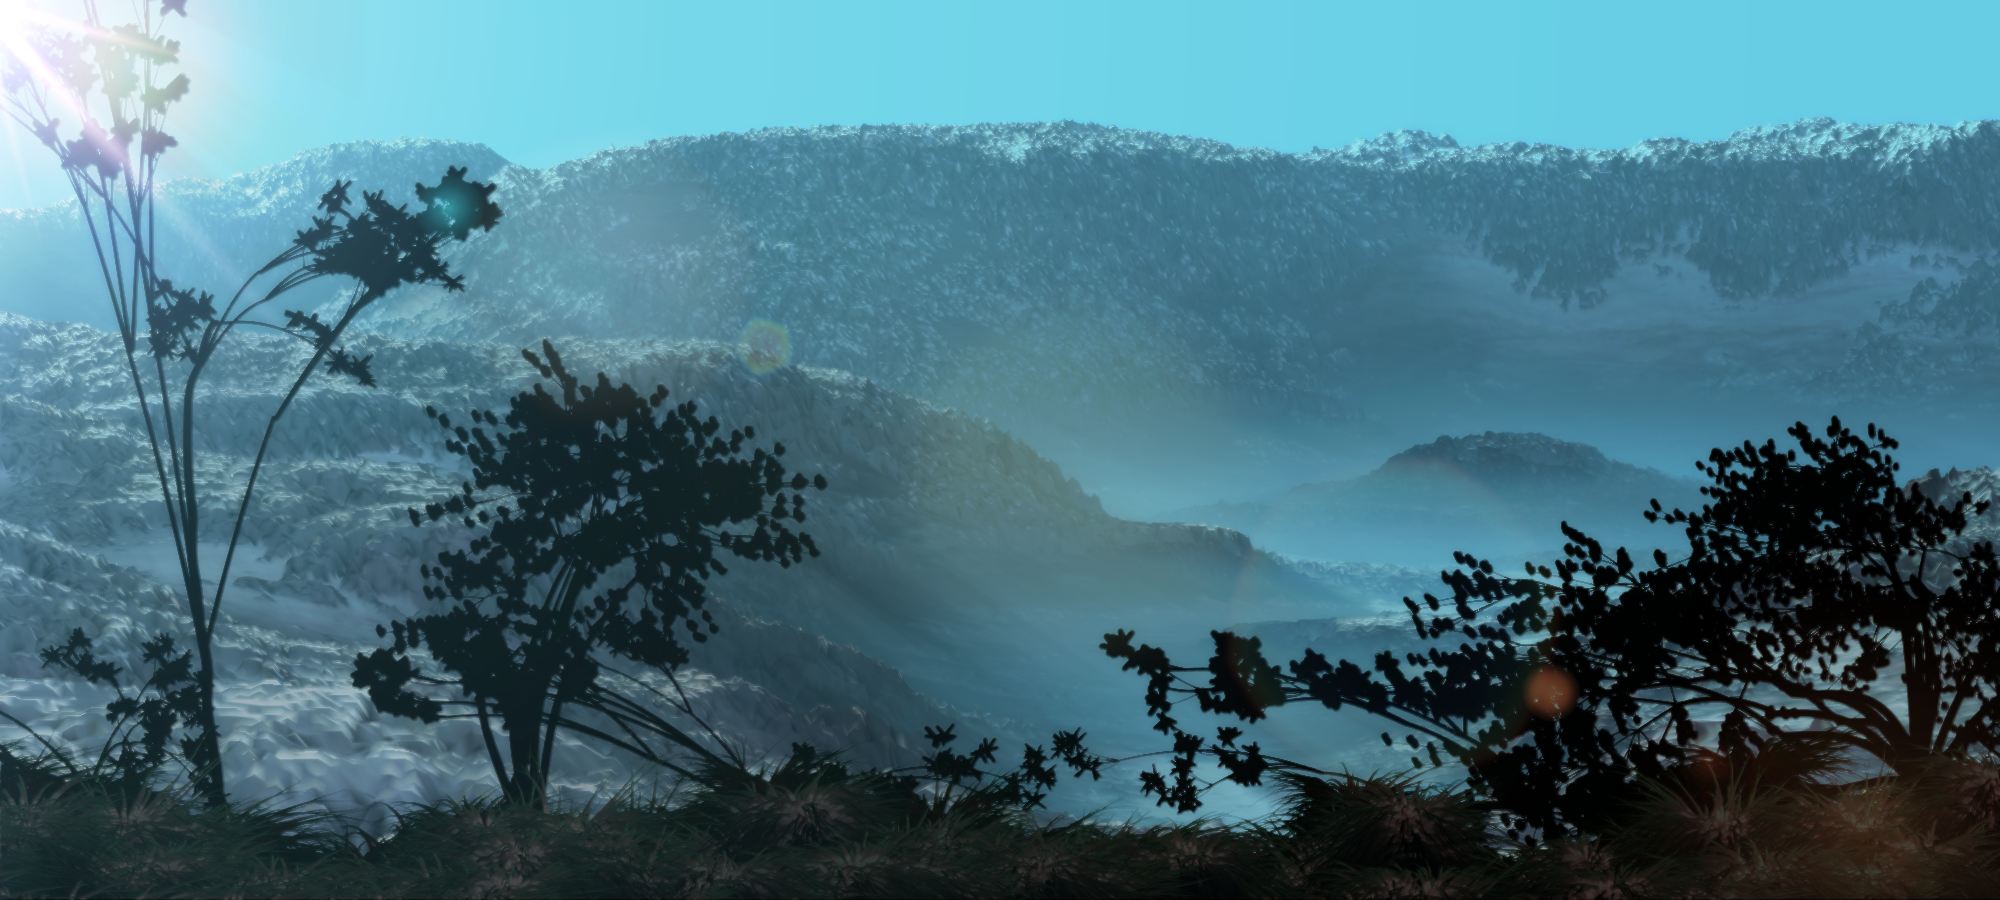
Here is an example: using an elevation map (greyscale) with erosion and sediments, and a color map. The rendered result can easily vary based on chosen options, angles, fog, clouds, lighting, etc...


Daz 3D is part of 
Connect
DAZ Productions, Inc.
7533 S Center View Ct #4664
West Jordan, UT 84084
Licensing Agreement | Terms of Service | Privacy Policy | EULA
© 2025 Daz Productions Inc. All Rights Reserved.