Dear GOD someone help me with lights! (Becoming a newbie guide!)
 jas_va_26
Posts: 74
jas_va_26
Posts: 74
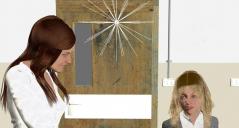
I haven't used any 3d software since about Poser 3. However, I am at a severe loss for what I am doing wrong. No matter how many lights I put in a scene it is black as night. The only renders I am getting that are even remotely correct are with the headlamp only. I tossed some stuff into a scene to demonstrate, and see if anyone could help me here.
The interior is: http://www.daz3d.com/interiors-the-classroom
I have the interior lights and sunlight added.
I then have 3 more point lights with their default settings in the room, one right in front of the faces of the actors, and I have blackness. I have got to be missing something basic here, please help! Whatever I am doing wrong, I'm doing it wrong in everything I do LOL.

Daz 3D is part of 
Connect
DAZ Productions, Inc.
7533 S Center View Ct #4664
West Jordan, UT 84084
Licensing Agreement | Terms of Service | Privacy Policy | EULA
© 2025 Daz Productions Inc. All Rights Reserved.
Comments
It looks like those lights are for the 3Delight render engine instead of iray.Swap your render to 3Delight instead of iray and see if that helps.
Return to just a basic scene with one character and one point light. That way you can more readily work back up to the full scene.
If you pick the Iray renderer first, the lights you add *from that point on* will be Iray lights. As noted above, it's important not to mix 3DL and Iray lights -- they work differently. It won't (usually) work to load an existing scene designed for 3DL then try to render it under Iray. At the leat, you need to hide the 3DL lights, and add Iray versions in their place.
So if I am starting with a blank scene, and the render is set to IRAY, when I create a point light, it should be an Iray light? Is there a setting I am missing in the light peramaters to make a light an IRAY light?
I guess I am lost... (still) and thank you for helping. If there is a decent link or youtube video that can help show me the difference for this that would be great also.
If you have a single point light you are going to need to adjust the Tone Mapping section of Render Settings a lot - think how dinm a room is lit by only a single bulb. Lower the Shutter Spped and fStop, raise the Film ISO and test the result.
Check out this thread http://www.daz3d.com/forums/discussion/comment/869079/#Comment_869079
i made some test render there that might be useful to you. It spans over several posts.
You don't want the thing labeled "point light" in the new light creation list - that's not an Iray light. You want (I think it's labeled) a plain "spotlight", not a "linear spotlight". You can set the geometry of that plain spotlight to various shapes (cylinder, sphere, disk, rectangle, point) - by default its shape is "point light". Try one of those in your scene. Adjust its lumens to like 750 to start and do what Richard said above with the tone mapping settings (they're found in the render settings tab).
Try an ISO setting of 400, an f-stop of around 4 or 5.6, and a shutter speed of 1/60 to start with and adjust from there. Higher ISO for darker scenes (1600 is the recommended limit, and that only in extreme darkness), lower fstop lets in more light (2 lets in the most light, 64 is the lowest real world setting I've found so far and lets in the least light), bigger fractional shutter speed lets in more light (but the values when entered in studio are inverse - you're inputting the denominator in the shutter speed value, so bigger number entered means less light captured) i.e. 1/1 = most light in, 1/2000 = least light in.
There are several in depth thread here that go into more detail on this stuff. This one
IRAY: start here
Is a long read, but has tons of great info.
???? Everything I look at I get more confused, and thanks for helping a newbie here everyone. I have my create menu when I expand it, am I missing something?
Pointlights are perfectly legitimate lights for Iray and can have geoemtry and photometric settings.
No, the initial Public Beta of DS 4.8 had separate entries for Iray lights but in the later builds and the release version there si one light, the properties of which change depending on the render engine.
Well, then I am back to square one . So I toss a dozen point lights in a scene, crank up the lumens, and nothing, it is like the 1800's and has candle light lighting at best. However I park a far away light out a window, it looks like aliens are outside for the abduction.
lee_lhs,
I think you may have started me on the right track here! I am so impressed by the quality of the IRAY engine, but I will say there is a seriously steep learning curve for getting back into this. I've been trying to make a mesh light I guess, based on an object in the room. I've also been confused because I don't have the "Sun Dial" and other settings I've seen in many of the items on you tube. It also may not help that I don't have an nvidea card in this computer at the moment, however my understanding is that doesn't matter if you simply leave it to CPU rendering. (although it is slower)
The frustrating part is I go to follow along a you tube video and my options are totally different. I will get the hang of this. Thanks again everyone for all the help. There will be a newbie guide made out of this, covering not only the IRAY stuff I'm learning, but the hey welcome back to the world of 3D modeling after 8 years!
This may become a rambling post, but I think the core here is I have yet to find a good post yet of: "This is IRAY, Make it light this way." Somehow I accidently clicked on the Dome? light that dropped an object in as "UberEnviornment2" into the scene. Well, there is at least outside illumination. The camera headlamp is still the only IRAY light I have had make a difference, but I have a render going at the moment, that looks really good so I'm going to let it finish. After that I'm going to go though lee_lhs's post and see what I can do.
For IRay:
Render settings>Editor>Environment>Done and Scene (leave Draw Doe off for now. Don't add a skydome
Create a new spotlight. Set the geometry (point, rectangle, disc, sphere, etc. Set a large size, units in cm. Acts like a softbox. Start w/ 50000 lumens.
Add a camera
Render settings> Editor>General> start witha smallish size (750x1000)
Get the light where you want it Get the camerea where you want it. Turn off the headlamp.
Render settings> Advanced> confirm your graphics card is checked (if Nvidia).
Render Settings>editor>optimization>Instancing> speed.
If a closed room, won't get any dome light.
Try not to have an ifinite environemnt, at least use a backdrop to start.
You're ready to render
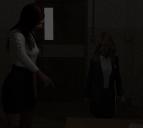
Attached is a 45 second 750x1000 2 light render
If you want to try mesh lights, this should give you a starting point. Click on the attached link (below) to download my example MeshLights.zip file. It contains the 3 point mesh light set-up that I created/used to render the attached image. Hopefully this will be an easy install, it's the first time I've set up something to share for DS - just un-zip it and copy the "Light Presets" folder to the proper Lights Presets location/folder on your computer, then open DS and the lights should be available in your light presets. You can use thase as a starting point, and modify (move, change settings, etc.) to get a feel for how mesh llights work with Iray.
Be sure to create a new camera to "render through", and turn off the head lamp on this camera. In render settings, go to Environment change Environment Mode to scene only, and you should get results like the attached render.
Good luck!
Bear in mind that mesh lights are slower in Iray than the built in lights. You can achieve the same effect by picking a geometry then making the size larger. Effectively creates softboxes.
One nice thing about Meshlights...you can also use them in any renderer without changing their location...just manually reassign the shader. For 3DL apply the UberArea (or other area light shader) to the pre-existing meshes. Luxus/Reality...assign the proper material...and so on.
The image I posted still took less than 6 min. using a laptop with a GTX 970M. I still haven't completely warmed up to the photometric lights (old habits die hard - plus I still use Octane a lot with Carrara), though I do often use them in combination with mesh lights.
Here are a few thoughts on Iray which produces briliant photoreal renders but which has a steep learning curve:
1. Get rid of any 3DL skydome; it stops Iray from rendering. Ideally, skin tones should be optimised for Iray. Most scenes seem to render OK but many have Iray options.
2. When you select NVIDIA Iray rendering, the lights default to photometric. Make sure you've selected Environment 'dome and scene' and that the 'draw dome' is ON. The dome is the HDRI, the scene is everything else.
3. For external scenes, start using an HDRI map designed for Iray; the DS shop has lots of good ones. THe HDRI image will not appear in the viewport so open up a small auxilliary viewport, select 'Iray' and you can see your complete image and modify things interactively. You don't need to add any more lights as this gives you light and background dome in one go. You can rotate the dome to get the light you want but it all rotates (including background dome image), not just the light. Don't shift the origin of the HDRI as it messes up the perspective. Don't add a sun dial as this confuses things with two light sources. You can add fill lights if you want.
4. For external scenes without HDRI use the photometric 'distant light' or the sun dial. The distant light defaults to 1500 lumens but this is too strong, set 100 lumens and reduce intensity to 10% for best effects.
4. For internal scenes you need to add photometric lights. Any external lights can still come in through wndows, like real light. No windows, no external light. The lazy way is to remove or hide the ceiling! For internal lights, these are really different from the 'distant light' because the default lumen setting of 1500 lumens is tiny. I increase these to at least 5000 -10000 to start with and for more distant spots up to 500,000. The DS shop offers a package called 'Total Iray Lighting' which is good for internal lights and avoids having to set up loads of lights one by one. Another package is 'Painter's Lights' which is brilliant for lighting figures.
5 Photometric lights can be controlled in terms of geometry, orientation, intensity, colour etc so are very flexible. The overall render is affected by ISO and other 'camera' settings which affect the entire image globally. Experiment.
6. To see vascularity in Iray, increase the SubD render level under 'parameters' from 1 to 2 or 3
That's it. It took me a while to discover all of this but I'm glad I did. Iray renders are so much better han 3DL. Have fun!
Once you get the basics, Iray is a bit easier than 3Delight, because it behaves a lot more like actual light. If you go through the posts I made (around 15 or so), you will find examples, and also the location of the sun-dial. It's best if you set up a simple scene, and experiment around with it.
Draw dome does not need to be on unless you are using a map for a background. You can get the HRDI lighting wihtout drawing the dome.
Well some intresting thoughts after starting to work though this...
1. The Lumen setting for lights, is NOT even close to reality for lumen. So to put simply, say a 200 lumen light is what a police officer would mount on a pistol or carry as a tactical light. A light this power lit up in all directions would pierce a dark room with the power of the sun! Well in DAZ, not so much. Setting a light from 20000-40000 lumen seems to give the desired effect of a single light bulb.
2. I have yet to figure out how to have my sky actually render when I select the dome. In face anything beyond the default UberEnviornment2 light, I cant seem to get it to change, so camera posiiton to keep windows out of the frame is good.
3. A distant light of 50 Lumen is the equivilent of a spot that is near by set to almost 500,000 ??
I have yet to understand how to select the shader tool, then select the lights in the scene and make them emit light.
This is one of the best answers so far!!! As I mentioned I was using lumen based on settings for real world lights.
How do I get to the sundial settings???
Then there is a post I found by lee_lhs: http://www.daz3d.com/forums/discussion/comment/869079/#Comment_869079
This is an incredible write up, which I am following next!
A 12 watt fluorescent bulb puts out about 850 lumens. It's adequate light, typically what someone uses in a reading lamp. I wouldn't call it blazing.
The area of the light matters, and is being ignored in most of these threads. A tiny flashlight bulb may put out only a few hundred lumens, but its beam is highly focused, so the light at the end of the beam is brighter. If you took the 850 lumens of a fluorescent "ice cream" bulb, and focused it all down to a small spot, it would be almost blinding.
I'm not sure what's the deal with mesh lights, and elsewhere I've wondered if there's an error in their calculation. However, I don't think there is (you can see the calculation in the Iray materials definition files that come with D|S). Daz Studio bases light ouput on a standard unit size, which is 1 centimeter. A round 1cm mesh has has a surface area of over 3 cm. Give it a flux of 1,000 lumens, and that's only 313 lumens per square cm. Not all that bright, as it's not focused. Even less bright, as only a small amount of its light energy is directed toward the subject or camera. In fact, just a small sliver of the face of the sphere -- maybe 15% -- contributes to the light projected directly onto a nearby object.
Plane meshes require even larger values because every doubling in size means 1/4 of the light output for the same area. If you create a 1 meter by 1 meter mesh light, and specify lumens, it's the flux for the entire surface, not for each 1cm square. That means if you increase the mesh even larger, those lumens get spread out to a bigger surface. Without focusing, the spreading makes for a dimmer light onto the scene.
Some math: A 1 meter square panel is 10,000 square centimeters. If you specify 1,000,000 lumens, it's only 100 lumens per square centimeter. Because the light isn't focused into a beam, it looks very dim.
Some more math: A 2 meter square panel is 40,000 square centimeters. The same 1,000,000 lumens produces only 25 lumens per square centimeter. Since the larger mesh projects its light into a larger area of the scene, the image looks less bright -- a quarter of its old brightness -- , because the light is spread out.
So, I say D|S's wacky lumens values are actually physically correct, when you consider the variables involved.
One other point: the distant light is measured as light incident on the scene, not the light produced at the source. This is because the distant light is treated as an infinite source with parallel rays. As such, it does not follow the usual inverse square law of uncollimated light sources. As an infinite source, it's infinitely small, so what matters is the light it produces at the scene itself.
This is why you get lots of light from a distant light source of just 100 lumens. That's 100 lumens per square centimeter incident on the scene, and it's the light of a supernova. Direct sun full daylight is more like 9-10 lumens per squre centimeter. (I think; please somebody check my math. According to Wikipedia, direct sunlight has about 93000 lumens per square meter. -- or roughly 9.3 lumens per square centimeter.)
If you want to work with realistic lumens values when not using HDRI/distant light/sun & sky - i.e. you're doing scene only interio lighting, you HAVE to adjust your tone mapping settings - the f-stop, shutter speed and ISO settings in the render settings. If you try to use external tone mapping settings in an indoor scene you won't see much. I posted some useful initial tone mapping settings for indoor shots up thread, try those out to start and adjust from there. To get more light in the render, increase the ISO and reduce the shutter speed or decrease the fstop.
Tobor,
That is what you call getting taken to school! It is also much appreaciated. I hadn't really thought about concentration or focusing factors, as I typically deal with LE or MIL guys pointing lights at bad guys these days, not mathmatical calulations. This is really good thanks for bringing me back to basics on that!
I still can't figure out how to get the damn panel to emit light though. *so much to learn*
With the panel selected in the scene selection pane, click on the sufaces tab for the panel, there's probably only one sub entry for the surface, so select that one. In the list of properties for the surface, scroll until you find the emission (or is it emissive) color parameter. Set it to a non-black color and you should then get an intensity parameter (to set the lumens) and I think also a temperature parameter (not sure about that one). Change the lumens on the surface to increase/decrease the light emitted by your panel's surface.
It's best if you use the pre-made Emissive shader that Daz provides in the DAZ Uber Iray shader set. When you apply this to a selected surface, it "zeros" out all the other nodes, so they don't conflict with the emissive properties. For example, Glossy Layered Wieght should be 0.00 when using a mesh as an emissive source. If you simply apply the Iray Uber base, mess with settings, and then manually apply the Emissive color and intensity, you have to be careful about other settings that can interfere, cause render slowdowns, and so on. Using the Emissive shader sets it all back to what it should be for a light-emitting object.
Once the Emissive shader has been applied, you can alter the emission color, intensity, and other aspects related to the emissive properties.