Tinkercad - Easy Modeling to Create DAZ Studio Assets [Commercial]
 RGcincy
Posts: 2,839
Collaborating with Digital Art Live, I did a session teaching how to use TinkerCad to make assets for Daz Studio. The video tutorial was released in the store today:
Tinkercad - Easy Modeling to Create DAZ Studio Assets
I purchased a 3D printer for Christmas last year and needed a dimensionally accurate method to build models. I tried several free CAD programs and found most to be difficult and unintuitive to use, with many more features than I needed. I came across TinkerCad, a free web-based modeling program. Its intended target is education but I found it quite capable. It outputs .stl and .obj files. The latter can not only be used for 3D printing but in many 3D modeling programs like Daz Studio and Blender.
As I did in my threads for dForce and Big Cities, I’ll be positing examples and some instructions in this thread.
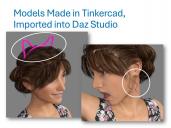
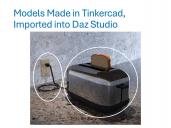
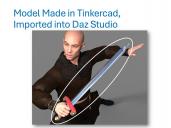
The following images show models (circled) made in Tinkercad and used in Daz Studio.


Comments
How to Make a Shovel
Tinkercad is used from a web browser. After creating an account, you can create models and save them in the cloud to access later. Models you create are private unless you choose to make them public.
Tinkercad works by combining/stacking shapes and using boolean operations. It has a library of its own shapes and many more shapes/objects that were created by other users. These can be used as is or developed into more complex objects. Dimensions are indicated so models can be sized accurately (important for 3D printing, less so for 3D rendering but still helpful). Models can be exported as .stl and .obj files for 3D printing and importation into 3D programs like Daz Studio.
The first image shows a shovel made in TinkercCad and rendered in Daz Studio using Iray. The second image shows the TinkerCad workspace and how the model was built up by adding and scaling shapes, then combining them with Boolean operations.
Just have a couple of questions:
Does Tinkercad need a CPU/GPU, or is it all run from their servers (or whatever is needed to run it)?
Plus, (sort of related) when you (3D)print a model. Do you print a model as it is, or do you have to delete any mesh which intersects another?
It all runs online. You have your own private storage and workspace. Since it's free, you can test it out to see how it works for you.
For 3D printing, I group all the parts of a particular item into one piece using the group button (it does a boolean addition). The obj file that is outputted makes it all one mesh. II use the slicer that came with my Creality K1 printer to print the file and haven't had any issues.
The IP is yours if you keep it private (in your own cloud space). It's not accessible to others to use or adapt.
You can decide to make it public in the TinkerCad gallery. In that case, you are indicating a willingness for others to use it. You can choose which of six Creative Commons licenses that apply. They range from a very broad grant (attribution only) to a narrow one (no derivatives, non-commercial, attribution required). I have not shared any of my designs.
If you choose to download a design someone else posted to the gallery, you accept the license terms they released it under. Most appear to be under ShareAlike which is very broad. But any derivatives you make using that asset has to be released under the same terms.
Two more designs. The first image shows potato chips. I used TinkerCad to make the chip, the stack of chips, the can, and the lid. The second image shows a lamp and shade, an electrical cord, a table, and a vase. All made in TinkerCad (only the flowers were a Daz prop).
How to Make a Toaster
TinkerCad has a different approach to modeling. You make things by scaling and combining shapes, either by stacking or by boolean addition and deletion. This post describes how the toaster I posted a couple of days ago was made. The completed toaster and toast is shown as A in the image below. B - D and 1 - 4 shows how it was assembled in stages.
Toaster Body:
A - shows the completed toaster along with toast
B - show the toaster spread apart. It is made of 4 parts: the main body, a lower section and a two-part handle. The handle parts are just resized rectangles. The main body and lower section are grouped objects as shown in figure C.
C - the main body at the top was made from a rounded cube and 3 rectangles. The rectangles have a "hole" material added to them (diagonal shading). When these are grouped with the cube, the holes boolean delete from the rounded cube (compare top of figure C to top of figure B).
C - the lower section was made from a rounded cube and 1 rectangle. This cube was scaled to be just a little bigger than the cube used for the toaster's main body. The rectangle has a hole material and is positioned (figure D) to delete most of the rounded cube. After grouping of the cube and rectangle, you get the result shown at the bottom of figure B.
Toast:
4 - This started with a shape called "scribble". You paint a 2D shape, then Tinkercad changes it into a 3D shape with depth. A duplicate of this shape is made and scaled down in two dimensions so it can to fit inside the crust area. It is widened in the other direction so it will eventually cut out the middle of the bread.
3 - A hole material is applied to the inner copy and the two parts are centered together.
2 - The two parts are grouped and the inner shape cuts out the middle leaving a crust as shown at the right of figure 2.
2 - A copy of the hole shown in figure 4 is made and the hole material is replaced with a color material. The copy is sized to be the same thickness as the crust and is centered within the crust.
1 - This shows the completed toast inside the toaster. The two parts shown in figure 2 are not grouped, simply positioned one within the other. This lets them keep 2 different colors in TinkerCad, which leads to two different material names when imported into Daz Studio.
Importing into Daz Studio:
The object show in figure A was exported as an .obj file and imported into Daz Studio. Each different color results in a material zone. TinkerCad does not add UV's. You can add an Iray shader but you'll only get a solid color (this is the case for the toaster). For the toast, where I wanted texture, I added UV's by using mCasuals' free UV scripts within Daz Studio. Once UV's are added, maps containing textures, bump, displacement, photos, etc. can be displayed.
How to Make an Electrical Outlet
I often find that common parts of everyday life are missing in 3D scenes, for example, electrical outlets and cords on appliances. I've found that I can use TinkerCad to make those parts. As I did for the toaster, here are some graphics showing how to make them in TinkerCad. The plate, outlets, and electrical plugs are accurate to standard US electrical standards.
Electric Outlet:
1 - Complete design of electrical outlets and cover plate.
2 - Cover plate with electrical outlet removed. The cover plate is a a composite of what's shown in figures 3 and 4. The plate screws is an inverted cone with a rectangular "hole" to cut out the slot.
3 - The holes in the cover plate are cut out with copies of the outlets (figure 5) which have the "hole" material added. The bottom of the plate is cut off with a rectangular "hole".
4 - The cover plate starts as a rounded cube (a standard shape in TinkerCad).
5 - Completed design of the female outlet.
6 - The female outlet showing position of the rectangular "holes' and the ground "hole" to accept the male plug..
6c - The female outlet base is a cylinder.
6b - The outlet base is cut off by two rectangular "holes".
7 - The grounding hole is made from a circle and rectangle grouped together (figure 8).
Male Plug:
A - Complete design of the male plug.
B - Main body of plug made from grouping two rectangles and two meta-filets (a standard shape in TinkerCad). Figure D shows these parts exploded.
C - The grouped shape from figure D having six meta-fillets at the corners. The filets have hole material applied and are grouped to round off the edges.
E - The metal parts of the male plug when the parts shown in figure F are grouped together.
F - The flat tabs are made from a rectangle and two meta-filets to round off the top edges. A cylinder is used to create the hole.
G - The circular grounding tab is made from a cylinder and a half-sphere grouped together.
Electric Cord:
This is made from a set of standard TinkerCad shapes called bent pipe. It lets you set the diameter, bend angle, the radius of a curve, and how long the segments leading in and out are. By using a combination of shapes with different settings, and aligning their ends, you can make a cord that has a bend up (to fit a lamp for example), a curve to bend down (to go over a table edge), a curve to spiral up (to use up excess cord), and a bend to adjust the plug to a height to fit a wall outlet. The lines you see at teh interfaces disappear when a shader is added in Daz Studio.
This should be useful for me to create torture devices.
Quite a lot can be made with TinkerCad
A few more examples (circled): coffee mug, rocket, beanie cap.
I have bought your tutorial and will play with Tinkercad soon.
How did you manage to UV map items created in Tinkercad?
That is my main concern for now.
I have used previous modelling program from Autodesk (Fusion free version),
but UV mapping was not included in it, as well.
Same question.
I cover adding UV's in the video. For solid colors (e.g., solid blue or red), you can use the .obj without UV mapping. To add UV's, I run mCausal's free UV scripts for Daz Studio. There are four that I know of: box, cylindrical, spherical, and planar. Links to mCasuals' site are below
How to Make a Cat Ear Headband
TinkerCad has a library with a large variety of shapes to use as the starting point for a model. We'll be using shapes found in the Basic Shapes section of the Shapes Library: the cylinder (row 1 col 2 and row 2 col 1), scribble (row 2 col 3), and roof (row 3 col 1).
1 - The completed design is shown in figure 1 below. This is formed by grouping the shapes shown in figure 2, 4, and 5. Because they are grouped, they share the same color and will have the same surface material in Daz Studio. If you wnated different surface materials for the ear versus the band, position them in place but leave them ungrouped.
2 - The ear component made using the scribble shape.
3 - A duplicate of 2 is made, and while it is selected, click on the Mirror tool in the top right toolbar. The dark doubled headed arrows appear (figure 3). Choose the lower one (red) and the flipped mirror shape appears in orange. Click on the arrow to flip the shape to what is shown in figure 4.
5 - The headband portion after it is grouped.
6 - The headband is made from two nested cylinders, one slightly smaller diameter than the other. The inner cylinder has a "hole" material added and is thicker than the outer cylinder to cut out the middle section. The roof has a "hole" material added and is rotated to cut out the opening. When these three shapes are grouped, you get the result show in figure 5.
How to Make Pies
A render of two pies, one simple (flat crust) and one more complex (raised filling in center).
What makes building both of these models a little more challenging is the fact we take a slice out of the pie showing the interior structure. Since we want to show the layers and be able to use different shaders on each layer, we need to add a negative shape (a wedge with a hole material added) to cut each section individually. For the more complex pie I also added some negative boolean pieces to make the cut edge a bit rougher. I also added an extra part to represent fruit and juice oozing out at the side of the cut pie.
I won't give details on how to make this as I think the images give a pretty good idea but I'll answer questions if asked.
Simple Pie:
Complex Pie:
Great examples. Thank you for posting them.
Do you think it is possible to create clothes for Genesis 9 with Tinkercad?
TinkerCad isn't very good with organic structures, It might be possible if you treat it like a sewing pattern but then you'd have to come up with a way to open it up to drape. I'll have to think about it.
Thank you for the answer and considering it.
I am thinking of these type of the clothes.
You can use TinkerCad to design a variety of cups and mugs.
Designs as seen in TinkerCad:
Designs as rendered with Iray in Daz Studio: