Cyber Model 4 functionality in Carrara 8.x
Ok, interesting question of curiosity here:
I bought DZFire's AWESOME Cyborg Model 4...
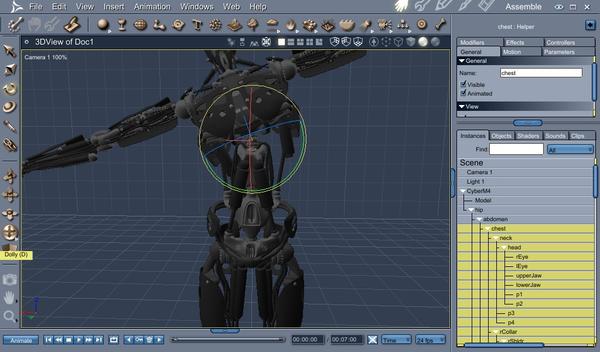
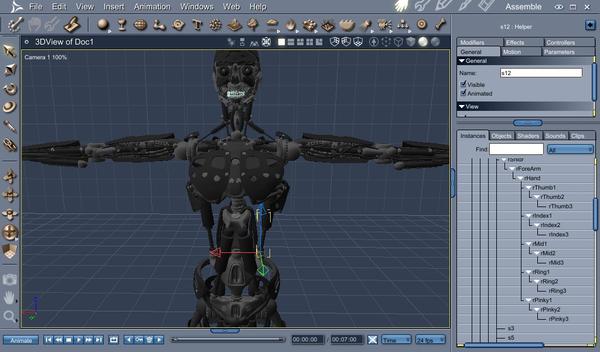
Very fun model. Very cool approach to the figure design with lots of extra bones for the hydraulic pistons (so there not part of the arm / leg bones, no distorting when bending the limb joints). There hydraulics are in 2 parts: piston rod, and piston housing. Each part has a base connected to the model, and the ends connect to form the complete hydraulic piston.
In Daz Studio, when bending any of the joints, even the torso or head or neck, the hydraulic pistons move on their own correctly with the rest of the body. Almost as if the rigging supported multiple children & parent bones.
Not so with Carrara. Just means posing the hydraulic pistons and cylinder houses separately and manually. I'm fine with that, as with most things Carrara, using Poser content, extra little tweaking here and there goes with the program (its worth it though. i don't mind it honestly.)
I've just been wondering, what's in DS that does that automatically for the figure that Carrara doesn't have.
And secondly, if there was an alternate way / workaround to get a similar functionality of having the hydraulic pistons move when posing the model.
Example, Upper Piston P12 is connected to the Chest, while the Lower Piston S12 is connected to the Hip...
Ideas anyone? Carrara Pro 8.1 / 8.5 beta , Windows 7 btw...
Thanks!


Comments
Just found the thread. The feature with the pistons working like they do in Poser and DAZ Studio is the 'Point At' feature. I haven't used Carrara much, but I think if you select the part (ie P12) then click on Modifiers, select "point at" and finally select the corresponding part (ie S12) from the drop down list. the fist part will point at the second part. You'll need to do the same thing for the second part (ie S12 to P12) the two parts; piston rod, and piston housing will work correctly.
Now the fun part, you'll have to do this to all the parts, piston rods, and piston housings. The P parts point at the S parts with the same number and the S parts to the P parts :P
Hope this helps
That doesn't sound difficult. Thank you!!! Glad to know the fix!
Ahhhah.... Thats really clever :)
Hadn't much time to experiment or try using Cyborg Model 4 yet, on a netbook still at the moment so its a bit underpowered to be playing and experimenting.
Thanks DZFire, :)
I tried that already but it didn't work for me.. :-/
Well, shoot...:red:
lol.. the best work around for me was to conform it to Genesis.. though not perfect it can be used a lot easier in Carrara :)
Well, shoot...:red:
Guess this is going to take a bit more work... and trial and error...
Hadnt tried conforming it to Genesis M4 shape yet, though I'm still quite sure there can be a workable solution using Carrara's helpers and point-at functions.
I'm continuing to experiment with it in my limited spare time. Too awesome a product to not keep trying. Even with the manual posing for now, Cyber Model 4 is an instant all-time favorite :)
Thank you
Does anyone understand the issue with the Point At? can I reset the Piston and Socket parts somehow so they stop doing the weird thing they are doing? Is it because they are parented or part of the CR2 structure? Maybe a pin modifier would be better than parenting...?
I've been experimenting with using sets of Point At helpers with Target Helpers parented on each piston and rod casing... Its still hit and miss. I'm figuring its where the Target Helper is needed to be set at, which might be at a much higher axis than the parts themselves.
I haven't played with this model in Carrara but a suggestion might be to experiment with DCG Cognito.
http://www.digitalcarversguild.com/plugin.php?ProductId=6
If someone gets this to work, pls share!
I don't know if it would work... I guess the modifier would be the Pushrod and Piston?
http://www.digitalcarversguild.com/products/cognito/pushrodpiston.mov
Interesting discussion - I haven't got the Cyber Model but using just Point At works fine for a structure I just built using primitives as a quick test. Good technique!
You guys are so clever - helped me find a solution to something I've been pondering for a while to get my steam locomotive pistons animated:)
I used the double point to principle in the first half of the video. In the second half, not so good. All works, except that the conrod mysteriously flips between X,Y,Z =0 and X=.35, Y=0, Z=177.77. For that, I used a target helper for the conrod to point at.
Any ideas - or maybe a different approach?
http://youtu.be/NdwaGnIrU10
So I noticed that when you select a piston instead of seeing a bone, you see a bounding box, and the piston is not parallel to the box, it runs diagonally through it and I believe this is why the point at modifier doesn't work, it uses the angle of that bounding box not the actual model. i couldn't find a way to adjust that so I thought what if I export him as an obj. and just make a whole new skeleton. So I'm currently in the middle of building a new skeleton, it's a lot of work, but I think the movement of the model will be even better than the original M4 rigging and I'll never have to animate those damn pistons by hand ever again. I'll post some results when I get there.
I found an animation saved from DAZ studio will work on this figure in Carrara
So do you set it up in Studio and do the animation there and save it out as an animaition, Aniblock?
I used a duf pose file but I guess you could
I love the way that the conversation is just picked up over three years later...
So I did it, I exported Cyborg Model 4 as an obj and built a whole new skeleton, so point at modifiers actually work now. I have to say I am very happy with the results, and I will never have to animate those pistons again. Next I'm going to do the same thing for Stonemason's prototype, it has the same issue with pistons.