More Non-photorealisitic Renders (NPR II)

18788909293100

Comments

  •  

    I worked a lot with UE2. It is not the best thing for NPR. I got UberSoftLight and it is much better than UE2, but still not as good, as AOA lights. What shader do you use for transparent stuff and hair? PWtoon is not the best choice for it. I use Ubersurface with disabled occlusion. It saves render time dramatically and stil has good NPR look.

    Here is what I have done with your presets and AOA light (plus my humble personal tuning). You have done excellent work. Thank you once more.

    Nicely done !!

    Sometimes for better speed I turn off shadow option in each light . Or using SHADOW MAP than Raytrace . 3Delight seem slower if  raytrace and Opacity used at same time .

    Another option will be what @vrba79 told us . Keep using default shader for opacity stuff and Turning on the Cartoon render mode 

    (It hidden in newer version . You can access it via RENDER SETTING > PREFERENCES > SHOW HIDDEN Properties.)

    In most case it passing through what default  3delight and PW Toon shader setting .  But @richard haseltine can confirm it that true or not 


    And Yeah for AO passes , I love what AoA Ambient Light result than UE2 . It easy to setup and offer better control speed wise when dealing with Opacity map . You can flag it so occlusion will use lower setting or bypass it . Thats why my Hair Base preset having so much Glossy effect as default .


  • VyusurVyusur Posts: 2,235
    edited March 2021

    Original boy

    Toon05.jpg
    1500 x 1950 - 3M
    Post edited by Vyusur on
  • Vyusur said:

    Original boy

    nice color!! 

  • juvesatrianijuvesatriani Posts: 556
    edited March 2021

    SFMAN Scifi Interior

    Another experiment using PW toon - Shadow and AO Pass to generate multiple layer sets in Photoshop .

    using multipass really offers flexibility . I can tweak and coloring all elements just like I want 

    SFMAN Scifi Interior.jpg
    2000 x 851 - 1M
    Scifi Interior Set 3.jpg
    2000 x 851 - 2M
    Post edited by juvesatriani on
  • VyusurVyusur Posts: 2,235

    Thank you, @juvesatriani. Your pictures are awesome!

  • juvesatrianijuvesatriani Posts: 556
    edited March 2021

    JS Multi Pass is a collection of  helper tool that I often use as layer generator when doing NPR /Cel Shading projects in Photoshop
    This kit heavily depend on DAZ Studio - PW toon - AoA ambient light and Free SImple Multipass for 3delight script , 
    and occasionally need help from Free IRAY to 3delight converter and OSO TOON`s RANDOM MAT ID script for better and detail outline pass

    The main inspiration from this kit was from Youtube video called ROBOT WILL PROTECT YOU
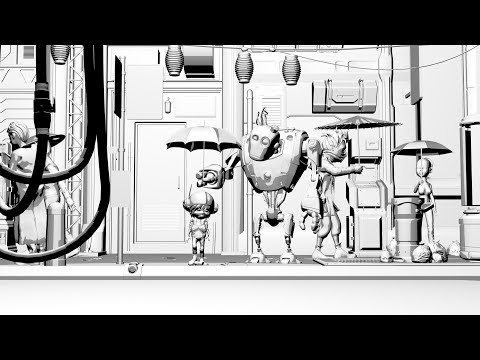
    And my constant struggle with Environment - Props or Building which sometime great in standard render but suck when using toon shader . After all, I need to have more control and flexbility rather than let machine decide it for me about blend mode between element - opacity value etc

    NOTES :
    I  admit this kit maybe not for everyone especially  for people who want ONE CLICK SOLUTION . I guess there are better and excellent way to doing it in DAZ Studio . But until my little brain can grasp other technique and workflow, I think I`ll be stick with this one for a while 

    Here some caveat you need to understand first before decide to use this workflow 

    • You need to setup dedicated render output folder for each projects  . It sucks but it will save you in long run or bigger project
    • Render output name should be set like explained in MINI WALKTROUGH to make Photoshop action companion work properly
    • It run using 3Delight Render Engine only , so it would makes no speed different if you have FANCY GPU card
    • Use PW toon  because easy to setup and fast !!  even if I need to outputting  6-10K resolution for each image passes 
    • Take a lot of HD Space if you use this workflow for animation
    • If someday newer version DAZ STUDIO offer ready to use solution like COMIC BOOK PREVIEW in POSER  maybe this will be obselete
    • The Photoshop Companion Action script only tested in CS6 and recent version , so I`m not sure if work in earlier version although it should be 


    Here links all  tools you need 

    JS Multipass and Photoshop Action
    https://drive.google.com/drive/folders/1Odv-RB5Q7RV_7WGSeEkkpMK5h3ZqQVlv?usp=sharing

    DAZ STUDIO 
    https://www.daz3d.com/dazcentral
    PWToon shader 
    https://www.daz3d.com/pwtoon
    Simple Multipass Render for 3Delight , check the bottom one 
    https://www.daz3d.com/forums/discussion/451996/free-script-simple-multi-pass-render-iray
    Free IRAY to 3Delight script
    https://www.daz3d.com/forums/discussion/139326/irayto3delight-conversion-script/p1
    Advanced Ambient Lighht
    https://www.daz3d.com/advanced-ambient-light

    Optional for better outline solution
    OSO Toon
    https://www.daz3d.com/oso-toon-shader-for-iray

    The mini walkthrough will be in next post 

    Post edited by juvesatriani on
  • juvesatrianijuvesatriani Posts: 556
    edited March 2021

    MINI WALKTHROUGH IN DAZ STUDIO

    If you see long steps below , I know you`ll be thinking  "WOW too much work for getting this style ? !"  
    But trust me its simple . And since this workflow utilizing PW Toon and Default DAZ shader, it will be FAST !

    DF  RENDER PREPARE

    1. Load your scene and set and lock  your camera view . 
    2. SAVE as scene so you can easily revert back
    3. Apply DIFFUSE FLAT RENDER SETTING . Then go to render setting>General
    4. Set your Render Dimension as you wish 
    5. Still in render setting , find Image name option
    6. Type "FLAT DIFFUSE" . Do not change this one
    7. Click three dot in Image PATH option 
    8. You`ll be asked where you want to save render output
    9. Create new folder in my document or desktop for easy  access
    10. Rename it and select that folder if asked
    11. Check my RENDER SETTING Guide to makes sure yours already correct

    DIFFUSE FLAT Render

    1. Select all objects in your scene except the camera .
    2. Go to surface tabs and select all surfaces 
    3. Apply DIFFUSE FLAT/DIFFUSE FLAT ALT shader preset with CTRL + Click
    4. APPLY REMOVE THE LINES SHADER 
    5. Before doing render recheck your render setting 
    6. Press RENDER and check the result in output folder 

    NOTE :
    If your scene came with IRAY material or shader , convert it first using free IRAY to 3Delight script before applying my preset
    Sometimes the creator only using color without image MAP in their object .  So After converting all IRAY material to 3Delight apply DIFFUSE FLAT B instead

    And If you think your DIFFUSE FLAT render output too fuzzy or painterly . Change or bring down Shading Rate close to 1 .

    Re-render and if asked to replace file with same name click YES

    SHADOW PASS RENDER PREPARE
    Make sure you`re already have "Simple Multipass for 3Delight" script in your library

    SHADOW PASS Render

    1. Select all objects in your scene except the camera .
    2. Go to surface tabs and select all surfaces
    3. Apply HARD SHADOW/SOFT SHADOW preset
    4. No need to use CTRL+ CLICK since its only two tone render ( B&W or G&W)
    5. Then Load LIGHT GROUP FOR SHADOW
    6. Change your viewport to cartoon or wire shaded to easily indentified where the shadow fall
    7. Turn On each light and Fine Tuning the shadow position as you wish
    8. You can also use Viewport Light Camera to fine tune the light location
    9. After all Light already set . Turn ON all LIGHT . Do not worry with overbright scene 
    10. Active it Simple Multipass Render Script .  New Menu will popping up and asking where to save and  the file format  . 
    11. Click and point it to folder you`ve created before . Change file type to png 
    12. Then click Multipass Render Button .  Second later , You will see several shadow pass files in output folder .

    AO RENDER PREPARE

    1. Click "AO Render Setting" . And Go to Render Setting > General
    2. Change Image name to "AO"
    3. Make sure image path and everthing already correct 
    4. Check my RENDER SETTING Guide

    AO Render Pass

    1. Delete all lighting
    2. Select all objects in your scene except the camera .
    3. Go to surface tabs and select all surfaces
    4. Apply "REMOVE BD MAPS" first
    5. Then apply "For AO PASS"  Shader Presets
    6. Click "LOAD AoA LIGHT"
    7. Recheck everything in Render Setting just like in render setting guide
    8. Render !! The AO image will show up in your output folder

    NOTE:
    AO pass used to slightly add volume in your NPR image . So you dont need all transparency information .  This method will speed up your render time . But feel free to manually assign the opacity MAP if you really need . But beware your render time will increase 

    If you doesnt have AoA light , you can try to use UE2 or maybe IRAY Clay render technique with lighter or white material in all object 
    Until this guide written , I never try those solution so you can experiment by yourself . Check my AO sample so you can tweak your output  just like mine

    OUTLINE Render Prepare

    1. Click "Outline render setting" Preset . And Go to Render setting
    2. You need to change two thing 
    3. FIrst Go to Renderer FIles and click Image and click OUTLINE directory
    4. Choose browse and Pointed out in your Output Folder like Before
    5. DONT Change the File Prefix . I`ve already set it so Photoshop action  companion can load it properly
    6. Still in Render Setting  go to General and Change File name to "ID"
    7. Check My Outline Render Setting Guide to make sure yours already correct

    OUTLINE RENDER PASS

    1. DELETE ALL LIGHT
    2. If you dont have OSO Iray Toon product just click render 
    3. You`ll see 4 Files in your output folder
    4. If you do have OSO Iray Toon Product , select all obejct and surfaces and click script RANDOM MAT IN EACH OBJECT or SURFACES
    5. And Render . You`ll see 4 Files in your output folder


    NOTE :
    In most case just using NORMAL OUTLINE from DAZ SCRIPTED OUTLINE  render will be enough .But if you want need  more detail outline option in your works . 
    Those Excellent RANDOM MAT Script from OSO IRAY Toon Product really worth for investment and time saver than doing manual way

    Render Setting Guide.jpg
    1219 x 877 - 537K
    Outline Render Setting Guide.jpg
    1216 x 844 - 470K
    Example Output Folder with all render passes.jpg
    1758 x 453 - 376K
    Post edited by juvesatriani on
  • PHOTOSHOP PART

    1. Load and open up JS Multipass Helper Action 
    2. Execute/Play " LOAD and ARRANGE" action
    3. First stop wil asking to choose which files you need to load 
    4. Browse the folder location  and select all rendered files
    5. Click OK and lets the machine works for you
    6. In next minutes , your rendered files will be stack and arrange properly
    7. Now your turn to make it awesome !! via Change Blending- Opacity or shifting value and colors
    8. Check my sample Layer stack Guide to know what you should expected from running this action

    NOTE :
    When testing this action I have anomaly with one Multipass render project .  IF LOAD and ARRANGE action somehow failed , try use ALT LOAD AND ARRANGE action Or manually setup those layer just like shown in Layer Stack Guide 

    When tweaking HS ( highlight shadow ) controller sometimes you see artifact in shadow areas . You can fix that using FILTER>BLUR>SURFACE BLUR and adjust accordingly

    You can choose one or multple shadow as long you lowering opacity the upper stack layer . You can also change Shadow Group Blend Mode to check if there are another cool FX you like

    You can change AO invert blend mode to LINEAR BURN or all dark Variance if you think your project seem having lighter contrast . Change AO layer opacity if you need more volume in your project

    Change 3DLUT profile in Color Lookup to see overal tone change for your images , then adjust HUE SATURATION and COLOR Balance to make it better

    You can add GLOW and GLARE to finalize your image  and there are plenty tutorial in youtube  which better than mine , so check it out and have fun !!

    Juvesatriani

    Loader PShop.jpg
    505 x 388 - 92K
    Loader Pshop Sample_ Select render passes.jpg
    606 x 689 - 254K
    Layer Stacked Example.jpg
    480 x 628 - 167K
  • juvesatrianijuvesatriani Posts: 556
    edited March 2021

    Future Man and The Kingpin

    IRAY renders over Multipass layers 

    FLAT FutureMan+Kingpin.jpg
    2500 x 1243 - 2M
    Post edited by juvesatriani on
  • pavsikakyjpavsikakyj Posts: 139

    juvesatriani said:

    You have done huge and very useful work! Thanks a lot!

  • pavsikakyjpavsikakyj Posts: 139
    edited March 2021

    I reopen PWToon for myself thankth to juvesatriani 


    r.png
    800 x 800 - 1M
    r1.png
    800 x 800 - 1M
    Post edited by pavsikakyj on
  • pavsikakyj said:

    I reopen PWToon for myself thankth to juvesatriani 


    Very clean Toon render !! Glad to hear if those kit useful for you 

    Which one you`ve used ? JS Smooth or Multipass ? or both?

    I`m in progress to find better and easy way to blend Multipass output  + IRAY  so we can utilize emmision + bloom without doing GLOW+Flare manually in Photoshop

    I`m also trying to simplify my Multipass kit  . I`ve found  Shadow  + AO pass  can be done in One click render rather than in separate process  (with help Simple Multiplass for 3Delight Script )

    But to avoid the photoshop  multipass action script failed to load , we should rename Ambient Light output as "AO" . I`ll be doing some test and post the update in main post 

    Happy creating and have fun !


  • juvesatrianijuvesatriani Posts: 556
    edited March 2021

    Villa Pool


    Here another samples  you can get from layering multipass and  quick Photoshop random shifting color and adjustment  . With it You can keep the good texture from the product (Something which always make me struggle when dealing with Background props ) but still having control what kind toon style you want to output .  Cel Shading ? Smooth Toon ? BAD Toon ART ? or  Blend between realism via stacking IRAY render in top of it, you`ve got it in your disposal !!.

    TIP: Since we dont need detail information from IRAY render in this style  , you can render the IRAY pass in half resolution or with low sample count number .  In most case You just need blurred version of Emmision and GLow though


    Balcony Apartemen.jpg
    2000 x 851 - 1M
    Cyver City.jpg
    1000 x 426 - 529K
    waterColor pass.jpg
    681 x 962 - 435K
    Post edited by juvesatriani on
  • pavsikakyjpavsikakyj Posts: 139
    edited March 2021

    juvesatriani said:

    pavsikakyj said:

    I reopen PWToon for myself thankth to juvesatriani 


    Very clean Toon render !! Glad to hear if those kit useful for you 

    Which one you`ve used ? JS Smooth or Multipass ? or both?

    I`m in progress to find better and easy way to blend Multipass output  + IRAY  so we can utilize emmision + bloom without doing GLOW+Flare manually in Photoshop

    I`m also trying to simplify my Multipass kit  . I`ve found  Shadow  + AO pass  can be done in One click render rather than in separate process  (with help Simple Multiplass for 3Delight Script )

    But to avoid the photoshop  multipass action script failed to load , we should rename Ambient Light output as "AO" . I`ll be doing some test and post the update in main post 

    Happy creating and have fun !


    I used default 3Delight one-step render with tweaked PWtoon shaders. And some of your Photoshop actions (Toons smooth, Toon sharpen and Make it flat). For lighting I used IBL Master, AOA Ambient and AOA Distant.
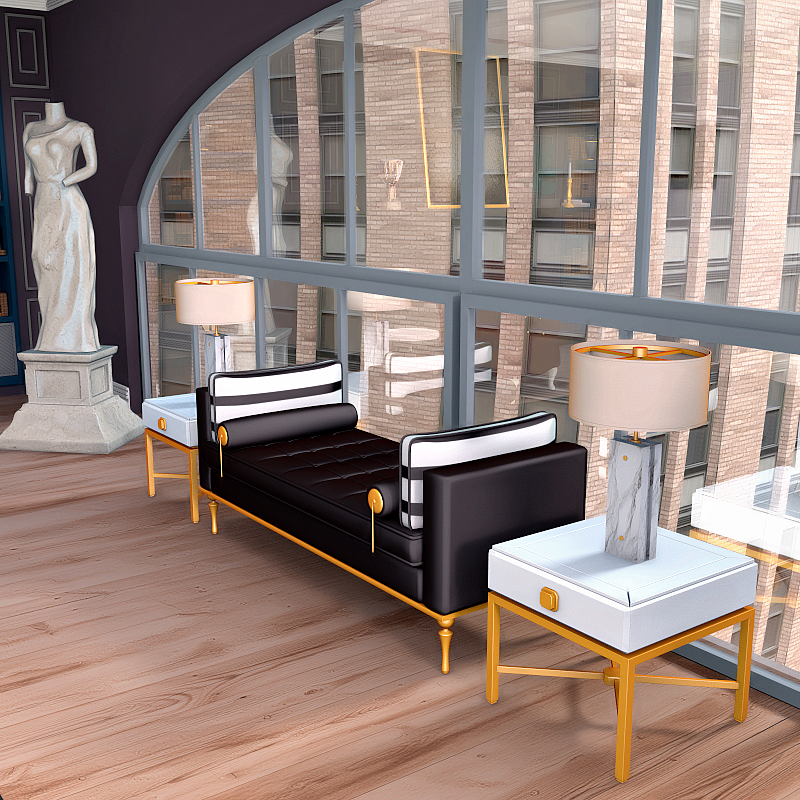
    This one I rendered with 16 sampling:


    By the way. In 3Delight for glowing efects you can try Ubervolume.
     

    r3.png
    800 x 800 - 1M
    Post edited by pavsikakyj on
  • dakinidakini Posts: 142

    juvesatriani,

    Thanks for sharing all of this information about the process you use to create your wonderful images!

    PHOTOSHOP PART

    ...

  • dakini said:

    juvesatriani,

    Thanks for sharing all of this information about the process you use to create your wonderful images!

    juvesatriani said:

    PHOTOSHOP PART

    ...

    Thanks for nice words . I hope its really useful for you 

  • pavsikakyjpavsikakyj Posts: 139
    edited March 2021

    I was wrong about UberSoftLight. It gives even better result ans is way faster than AOA. 

    555_3.png
    1280 x 720 - 2M
    Post edited by pavsikakyj on
  • pavsikakyj said:

    I reopen PWToon for myself thankth to juvesatriani 


    I'm not sure what I'm supposed to see here. This doesn't look NPR to me in any way. I just see a standard 3D render. It's a nice little scene, but this leans more toward photorealism than it does to traditional artwork or even cel shading. As I said, it is a nice scene, though, and I like the reflections and shadows. This looks like a nice set for a scene.

  • vrba79 said:

    Also a reminder that if you just don't have the scratch for PWToon right now, D|S actually comes with a fairly versatile Toon shader set. It even renders faster than PWToon. Here's one render without and then with the outlines turned on. 

    In my experience, I've found that when trying for any sort of NPR/Toon effect, you get better results by turning down (or completely removing) bump maps. In this case, I'm referring to the speckled effect on the column to our far left. It's kind of funny, though. Now that I'v shrunk the image, the speckling doesn't bother me as much as when I saw it full sized. Nevertheless, if you are having trouble with your textures, I suggest the first thing you do is look at the bump maps.

  • pavsikakyj said:

    I was wrong about UberSoftLight. It gives even better result ans is way faster than AOA. 

    The effect works well on the backgrounds and armor, but I'm getting a real disconnect between the flat, illustrated look of the cockpit and her armor and the much more realistic shading on her skin and hair. It could just be my preference, but the two styles are jarring when presented next to each other. BTW, the character design looks good, though.

  • juvesatrianijuvesatriani Posts: 556
    edited March 2021

    guys I Think this free Blender toon shader really easy to use . And since its work in Eevee so it should be Fast and we can see the result in realtime just like Poser`s comic book Preview . I`ll be testing for DAZ figures and see how it goes and maybe create some presets ;)


    Post edited by juvesatriani on
  • pavsikakyjpavsikakyj Posts: 139
    edited March 2021

    mmitchell_houston said:

    pavsikakyj said:

    I was wrong about UberSoftLight. It gives even better result ans is way faster than AOA. 

    The effect works well on the backgrounds and armor, but I'm getting a real disconnect between the flat, illustrated look of the cockpit and her armor and the much more realistic shading on her skin and hair. It could just be my preference, but the two styles are jarring when presented next to each other. BTW, the character design looks good, though.

    I used PWtoon only for her skin. 
    Now I applyed shader on part of the suit and background.


    555.png
    1280 x 720 - 2M
    Post edited by pavsikakyj on
  • vrba79vrba79 Posts: 1,357

    mmitchell_houston said:

    vrba79 said:

    Also a reminder that if you just don't have the scratch for PWToon right now, D|S actually comes with a fairly versatile Toon shader set. It even renders faster than PWToon. Here's one render without and then with the outlines turned on. 

    In my experience, I've found that when trying for any sort of NPR/Toon effect, you get better results by turning down (or completely removing) bump maps. In this case, I'm referring to the speckled effect on the column to our far left. It's kind of funny, though. Now that I'v shrunk the image, the speckling doesn't bother me as much as when I saw it full sized. Nevertheless, if you are having trouble with your textures, I suggest the first thing you do is look at the bump maps.

    Usually good about remembering that, but I was in a hurry to get that render done.

  • juvesatrianijuvesatriani Posts: 556
    edited March 2021

    Overwatch Garage in Toon Style

    Here experiment using Blender EEVEE and Multipass to generate layers in EXR Format . Its far more complex though and not as eas and fast if ocmpared with my PwToon Pass trick . But i think I`m really start to understand what Blender really offer . There is no Toon Shader involve in this image, just blending and stacking layer and various color adjustment


    Overwatch Garage.jpg
    1920 x 1080 - 2M
    Post edited by juvesatriani on
  • ArtiniArtini Posts: 9,427

    juvesatriani said:

    Overwatch Garage in Toon Style

    Here experiment using Blender EEVEE and Multipass to generate layers in EXR Format . Its far more complex though and not as eas and fast if ocmpared with my PwToon Pass trick . But i think I`m really start to understand what Blender really offer . There is no Toon Shader involve in this image, just blending and stacking layer and various color adjustment


    Looks very, very nice. I really enjoy looking at all of your creations.


  • juvesatrianijuvesatriani Posts: 556
    edited March 2021

    Artini said:

    juvesatriani said:

    Overwatch Garage in Toon Style

    Here experiment using Blender EEVEE and Multipass to generate layers in EXR Format . Its far more complex though and not as eas and fast if ocmpared with my PwToon Pass trick . But i think I`m really start to understand what Blender really offer . There is no Toon Shader involve in this image, just blending and stacking layer and various color adjustment


    Looks very, very nice. I really enjoy looking at all of your creations.


    Thanks for nice words.. here`s another view from same scene

    Overwatch Garage Scene Another View


    Another ViewPS.jpg
    1920 x 1080 - 1M
    Post edited by juvesatriani on
  • pavsikakyjpavsikakyj Posts: 139

    juvesatriani said:

    Artini said:

    juvesatriani said:

    Overwatch Garage in Toon Style

    Here experiment using Blender EEVEE and Multipass to generate layers in EXR Format . Its far more complex though and not as eas and fast if ocmpared with my PwToon Pass trick . But i think I`m really start to understand what Blender really offer . There is no Toon Shader involve in this image, just blending and stacking layer and various color adjustment


    Looks very, very nice. I really enjoy looking at all of your creations.


    Thanks for nice words.. here`s another view from same scene

    Overwatch Garage Scene Another View


    Truly amazing result! How about using the shaders, you wrote about, in DAZ?

  • pavsikakyjpavsikakyj Posts: 139
    edited March 2021

    More of tuned PWToon

    Goth2_.jpg
    800 x 1000 - 60K
    Post edited by pavsikakyj on
  • tkdroberttkdrobert Posts: 3,543

    Spiderman, PS4 Suit.

    Spider-Man PS4

This discussion has been closed.