UltrueViolet Light and Glowing Shaders- New Release (Commercial)
 Marshian
Posts: 1,465
My first product is in the store!
_________
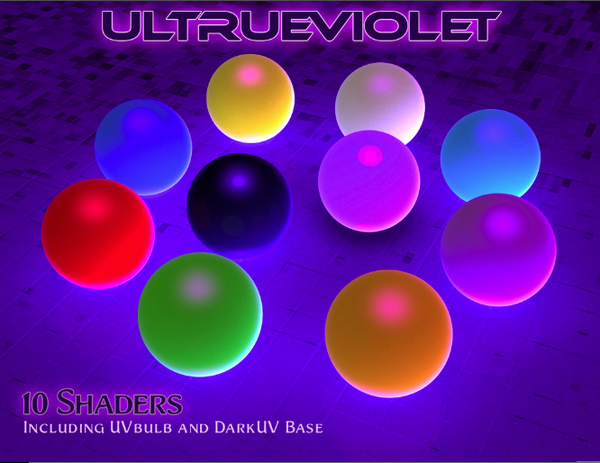
Finally! A light rig/UE2 preset that mimics ultraviolet light and 10 glowing fluorescent shaders that mimic bioluminescence!
Use the light rig to give your scene a violet glow from the inside out. Use the shaders on your figures (clothes, hair, eyes, and skin), creatures, buildings, plants, and landscapes to light up an alien planet at night, explore the deepest ocean, believe a UFO encounter, discover a romantic fairy garden, dance all night at a rave, race and battle in a digital arena...or anything else. Let it all glow!
http://www.daz3d.com/new-releases/ultrueviolet-light-and-glowing-shaders-for-daz-studio
Enjoy!
What's Included & Features
Uberenvironment2 Light Preset And Hdr Set That Mimics Ultraviolet Light (.DUF)
2 Directional Lights That Enhance Surface Glow And Highlights.
10 omUberSurface Shaders
Dark Blue-Violet Base For Non Glowing Surfaces
Ultraviolet Tube: (Mimics Black light Fluorescent Tubes)
Fluorescent Pink
Fluorescent Orange
Fluorescent Red
Fluorescent Blue
Fluorescent Aqua
Fluorescent Green
Fluorescent White
Fluorescent Yellow




Comments
Congratulations on your first product! These are very cool! I can think of a lot of uses for these.:-)
Coldrake
They look very nice and tempting. :) My credit card already said strictly "no" to more spending, but...
I had more renders for the the product page that I didn't choose.
Here is another using the supersuit (with converted shaders), it has not been retouched.
These presets and shaders render really fast by the way- compared to most UberEnvironment lighting I have tried.
I can't wait to see what people do with this lighting rig and set of shaders. Exciting!
Astonished at these results!
How easy, for laymen, is it to use these shaders? Is it just a matter of selecting whichever surfaces you want and double-clicking the shader? Or, because it's using the 'UberEnvironment' thing, is there more involved? I'm a little confused at the difference between the need for a non-glowing 'base' along with the glowing colour options.
The 'Uber' stuff, I'm still not at the level where I understand available tutorials for (beyond the sets I've got which auto-everything), but if these can be used in the same way which, say, 'pwGhost' can, I can imagine a LOT of amazing renders with these.
The shaders are pretty easy to use and work best with the light rig but work well alone too:
• To apply the shader select the items surface in the Surfaces/Editor tab and double click the shaders icon with control or command held down (you'll get a pop up window prompt) then select images > ignore > accept.
• You may need to adjust bump and displacement maps after applying the shaders.
Take note of your bump and/or displacement map settings as you'll need to key those back in. The maps will still be there if you clicked "ignore" on loading the shader.
The UberEnvironment is already set up to work without adjusting anything, it is not directional so you don't need to rotate it and it actually renders really quick compared to most UberEvnironment2 (UE2) lights I've used.
I made the non-glowing base shader as a dark background to make the shaders pop from the contrast. It has specular (highlight) settings that work alongside the UE2 and it mimics the slightly reflective cold-metal surfaces similar to the vehicles in Tron- light cycle, recognizer, tank, etc.
I worked hard to make it easy and it renders quickly- all good. Let me know if you have more questions.
Congratulations! They look very cool!
Many thanks for that additional information.
If I'm understanding things correctly, the non-glowing base isn't a necessity, it's purely just to give surfaces a 'darker', yet still Tron-like look, such as using for gaps between primary, brighter surfaces, correct?
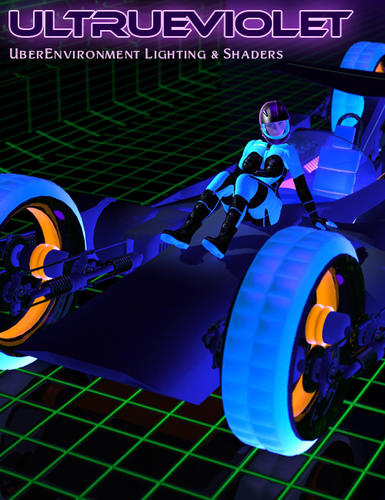
Example: For a tank's caterpillar track, you'd place bright glowing shades for most of it and then use the non-glowing base for the links between them? Or if you were putting it on the Genesis Supersuit, you'd place the non-glowing base on, say, the seams and then apply the brighter glowing shaders on the rest? Like in your above image, I'm guessing you've placed the non-glowing base on the helmet (and possibly her skin) and used the brighter glowing shaders for the interior, right by the jaw?
Apologies if I'm not grasping this; trying to get the what-goes-where-in-what-situation figured out in my head!
You got it right! "Tanks" for the render idea!
To showcase the dark base shader (on the left) - This image has one spotlight so you can see it in normal light and the UV light in the shadows. The image on the right is the same lighting but with the standard default shader- black diffuse.
*Both renders are using the UltrueViolet lights*
Actually, I'm surprised how different they are.
Excellent! You've just scored yourself a sale. :D
Is the non-glowing base also being used for the ground, there? And for the dragon's skin, earlier on?
It occurs to me that, if you use completely 'flat' materials, it could simulate thermal vision, too.
Great Thank you!
The ground- no
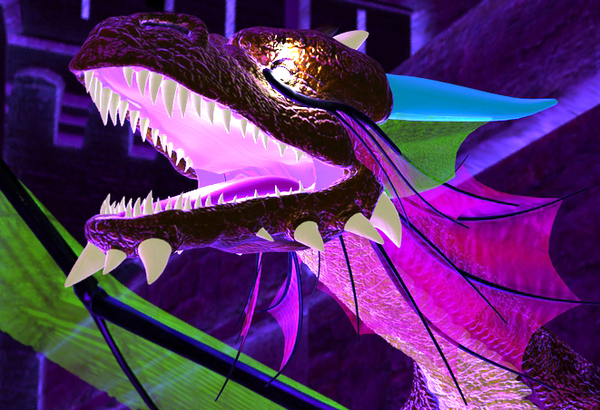
Dragon skin- yes
Ah, reflection from the lighting rig! Nice... I can see that having some interesting effects with even normal shaders...
A great deal of inspiration for this product http://www.daz3d.com/ultrueviolet-light-and-glowing-shaders-for-daz-studio came from Avatar and the night scenes on Pandora. I'm getting great response so I felt like sharing a new render.
Bought your UV shaders the minute I saw it because I thought it was cool :cheese:
Then I realized it's perfect for a Pacific Rim-style render I'm working on :-P
So good to hear. I'll have to see it now- More inspiration.
thank you!
You're welcome and thank you for this awesome shader.
Was just messing around, trying to get the feel for it (am a shader n00b because I render in Reality :-P ) and it works really well with Valendar's Kaiju and add-ons :cheese:
Used UltrueViolet Light set and normal maps on the Kaiju and the water. Tried the glowing shader but it tends to lose detail (and I'm probably doing it wrong anyways :red: ) Added a background and used Rons Rain.
Tried it on the Mecha and still have to figure out what I'm doing wrong because not all its parts come out correctly even with a default render :-S
Wow- So good to see- thanks for sharing.
There are a few settings you can tweak to bring in more detail.
In the Scenes Tab select Ultrueviolet UE2
then Go to Content Library tab> My Library> Light Presets> Omnifreaker> UberEnvironment2> (double click) Set Quality 4XHi. This will help a great deal but will also greatly increase render time.
At the bottom of the Omnifreaker> UberEnvironment2 list are 5 quality settings. In order for users scenes to render quickly and with decent results I picked a middle of the road as the default setting. These settings will increase detail and render time as you go down the list to (Set Quality 4XHi) which is the highest. You could try this first for more detail.
Also- In the Render Settings tab go to Shading Rate and change that to .05 this will bring more detail and clean up some of the "noise".
Also- check your bump and displacement map settings as they need to be adjusted. I had to pick a default for this too so try adjusting the strength, maximum and minimum settings.
A tip to quickly check that a scene is rendering the way you like- In the Render Settings Tab check the box Progressive Rendering and select bucket order "Spiral". This wont show detail right away but an over-all feel that gradually emerges to a clear image.
I hope this pops things out a bit.
Oh yeah- I need to add- clicking on "Progressive Rendering" when you are rendering big images say over 2,000 pixels (H and/or W) could cause DAZ to crash so if you go this big make sure you save first.
I keep finding new uses and quick ways to "blacklight" previous scenes with the Ultrueviolet light and shaders. This render shows what the lights look like on default V5 Bree skin. No post work has been done.
None of the skin maps in this image have the Ultrueviolet shaders applied except for the lips. I applied the shaders to the eyes, nails, crown, and Supersuit. Also- there is a panel in front of the model to create reflections in the suit.
Make sure you click to open it big.
These look great on Terrors of the Deep: Jellyfish, here in the store.... Just playing with them a bit. They are really nice. :)
So Cool- I was hoping to see a render using the Terrors of the Deep Jellyfish. That was one of the products I picked to be in the "You may also like" product area. Right now I'm watching the History channel- A show about USOs (Unidentified Submerged Objects)- your piece fits right in.
Thanks for posting!
:) They were the first thing I thought of when I saw the shaders. LOL I'll try to do a "proper" render this weekend and not just a quickie "let's see how these render" one. *grin*
I look forward to seeing more from you. :) I LOVE shaders.
Kat
I tested many surfaces during product development and was very curious about how "default" skin would render. Since many of these figures/models have several skin surfaces it was important for ease and quickness that any skin would render (similar to real skin in UV light) without having to apply any new shaders.
The shirt here has the Fluorescent White shader applied. The hair has a variety of the UV shaders- couldn't resist some stripes.
I was thinking about buying these while they are in Fast Grab. Anyone able to get good results using these with AoA's Advanced lights? They are almost the only lights I use at this point. Thanks for any info.
...
They seem to do OK. Here is a quick render of the Great Wizard with AoA's Advanced Ambient and Advanced Distant lights. In the first image both shaders and lights were straight "out of the box"; No tweaking. Second image is UV tube applied to clothing and skin and AOA ambient light intensity reduced to 25%.
Thanks for the examples, they look cool. 2nd image kind of looks cell shaded, interesting effect. I will probably get the shaders.
Hi Folks!
Here is another example of the lights and shaders when used together. All surfaces in this render have been "treated"with the shaders except for the skin.
Sketch effect using Fluorescent White shader. AoA Advanced Ambient light set at at 25% intensity
Charlie- thanks for posting! No too familiar with the AoA light but- From here you could make him look like a ghost by changing all diffuse colors to black, velvet to white, and velvet falloff to 3.0. This render uses the UltrueViolet lights.
I'd like to see render if you give these settings a go.
Charlie- thanks for posting! No too familiar with the AoA light but- From here you could make him look like a ghost by changing all diffuse colors to black, velvet to white, and velvet falloff to 3.0. This render uses the UltrueViolet lights.
I'd like to see render if you give these settings a go.
Not really a ghost effect but requested settings have been applied. AoA Ambient 75% intensity and AoA Distant 50% intensity
Soul Train.