Daz 3D is part of 
Connect
DAZ Productions, Inc.
7533 S Center View Ct #4664
West Jordan, UT 84084
Licensing Agreement | Terms of Service | Privacy Policy | EULA
© 2025 Daz Productions Inc. All Rights Reserved.
Comments
At the top of your Content Library there is a search box, put in Clouds and see what you have. They are usually billboards and that is what I use. I have also tried using the diffuse files on a sphere with varying degrees of success.
I also have Speedy Smoke by Sickleyield.
Nothing named clouds, smoke, or fire. I could try diffuse or billboards but I think i will learn post work in gimp. I will try to do art and paint fire. XD
have Speedy Smoke by Sickleyield.
matte painting rocks
I do that all the time and is much faster
How do I go about learning it? I can't afford Photoshop and i only own Clip Studio Paint and GIMP. Do you have any recommendations for me like youtube tutorials? Although i am not an artist, but i am sure i can learn it if I put enough effort and time. Daz already provides a good basic render i can paint over. So I am not trying to be pro at it but it will be good to know how to do it.
Challenge - Beginner Open Render.
Title - Spring Flirt
Software Used - DAZ Studio 4.12 Pro, Clip Studio Paint EX 1.6.2, GIMP 2.10.
Note: I used an HDRI as the main source of light with Increased intensity and The HDRI had a mesh light integrated on it which works like a "3 point light system". The poses were also based on preset I owned but I had to further improvise on them to get the look I wanted. I had to do very little work on this render with the exception of dforce which was really troublesome and made me redo poses again and again. Since there wasn't much challenge here I think this falls under Beginner render. Thank You! @Linwelly for the Awesome Title.
Challenge - Intermediate Open Render.
Title - Appalling Dawn
Software Used - DAZ Studio 4.12 Pro, Clip Studio Paint EX 1.6.2, GIMP 2.10.
Note: Lately I had started to grow interested in Genesis and Victoria 4 models since they are cheap and there is a lot of content so I wanted to try them and after some fiddling, I really loved how this Genesis model turned out. After that, I loaded this environment which fitted The eerie mood nicely. Moving on, I placed a mesh light, Fixed the glossiness of Genesis hair, and changed Render setting under the environment tab. Soon I ended up creating this really nice dawn look with just Environment settings. Next, all I had to do was give the model some cool looking clothing and Emissive Eyes and there we have our vampire encounter in the dawn. Run! She Bites! Since I learned about environment settings and used it instead of HDRI's, I feel like this goes as Intermediate.
Challenge - Beginner Open Render.
Title - Festive Night
Software Used - DAZ Studio 4.12 Pro, Clip Studio Paint EX 1.6.2, GIMP 2.10.
Note: "Old Shambles" Environment is great. I wanted to do a render on this from a long time. I simply loaded a model and put on some nice looking clothing. A pose preset and a bit of adjustment There was a light preset already included in "Old Shambles Product" but it was not good enough and It only lit a bit of the Old Shambles. I had to put a couple of mesh lights around the model to get a nice look and I also used Environment Settings again to fill the lack of light and fill in a nice winter early morning look. I didn't do anything Exceptional here so I feel like this goes in Beginner.
Challenge - Intermediate Open Render.
Title - Moonlight Descent
Software Used - DAZ Studio 4.12 Pro, Clip Studio Paint EX 1.6.2, GIMP 2.10.
Note: This one was very interesting. I wanted to try Genesis 3 after Genesis experiment and now I love all of the Genesis Generation models. I started by going through my prop and environment products then Genesis 3 and Genesis Outfits. Once I had everything ready. I experimented a lot with Environment settings, Tone mapping, HDRI's, and Atmocam2 for this render. In the end, I used a Distant light with 8500 temperature to get the moonlight effect. Then Mesh lights with the same temperature to light the figure, Atmocam to make skies look Cloudy. I rendered it after everything looked amazing until I noticed that mesh lights were creating soft shadows and distant light was creating Hard Shadows and made the model looked Look Unnatural with double shadows. Then I thought about using only a single mesh light that used the exact same direction of distant light and eliminated double shadows. Voila! I managed to get the perfect lighting and with no double shadows. I am still a little distracted by soft shadows in the Water Fountain Which is caused by Mesh light affecting that area but I am too lazy to render it 3rd Time. I could Fix it with spot rendering The water-fountain again with Mesh Lights disabled and overlap that in GIMP but I think its too much trouble. XD I have done lots of rendering and I need a break. Since I did lots of work in this render I think it falls in Intermediate. I only added Stars with a normal 1-pixel size brush through GIMP, There isn't any postwork in any of the renders with the exception of Noise filter and Sharpness.
Thanks, Everyone for all the help!
this is a basic matte tutorial with GIMP
as a starting point to learn matte painting, try to make photos and think what you want to change in it by painting over the photo
could be foliage to cover a house (my favorite) make it postapocalyptic smear trash all over the streets or something or get rid of cars and people
advanced matte paintings don't need Photoshop you can download Autodesk Sketchbook Pro which has gone completely free with all features (Google it)
a common work routine is polygon selection clone brush and layer settings like Multiply etc all the same in PS and GIMP
NOT AN ENTRY
I used various pieces from different products in this piece.
Front Line
2019-12-16 21:54:52.873 Total Rendering Time: 8 minutes 48.18 seconds
Click on image for full size.
NOT an Entry
This is my final version of "Young Finley in the garden with her cat" I have changed the spot light to pale yellow. I think the green hue may be due to the HDRI , but there was a slight green tinge in the spotlight too which didn't help. I've added the previous image for comparison.
This is currently "Not An Entry" as I'm entering it in the Hivewire contest too, but I'm still waiting to find out if I can use it as an entry as I've used the lighting and posing techniques I've learnt to create this image. @L'Adair - can you answer my question?
so much for the BBQ
damn great render fishtales
Great render. My interest in post work is ignited cause of a render a saw couple days ago. A plane was flying over a mountain. Then I saw the same render post worked. It completely outclassed raw. There was a massive thrust fire from the engine outlet. Snowy winds. Extended mountain range. It looked studio-quality art. Then I was thinking maybe if I had done post-work then maybe my renders could look that good as well. The more raw and post-worked renders I saw, the more convinced I was that I am missing out and now I want to give it a try.
Another reason I want to try post-work is that I am also out of money to buy products to support Daz renders while post-work is a free skill. I am just thinking about it for now and it might take me some time to learn post-work skills. Thank you for the demonstration.
Hello everyone,
I really wish I'd have more time this month to really flesh my entry out a bit more. It's for this month's beginner's challenge.
It's called "The good fight", where normal people turn into heroes by staying spread, staying at home, and thus protecting the elderly.
The lighting in this render comes from a dawning sun and a sickly greenish light of the mega-virus. Together they convey quite a
dream-like, unreal, surreal atmosphere.
This is a pure render, without post.
Best regards
I like the color palette it has something retro from the 60's 70's or so
cool
Well before the challange ends, I decided to try and experiment with some things. Tried making the dress more colorfull, ideally I would have made custom textures but i'm not quite skilled enough. Also brightened up the lamp, though I kinda feel like it should be on the whole face. Besides that and messing with the dress's shape i'm not to sure what more there is to do.
Hello Guys.
I think that's my last Render for this Month. Even i started another Rendering. xD
I've redone a little on the black "thing" ;) Changed the Shader to something more visible.
Fixed the DOF to a wider range for more sharpness. (I noticed its better not to blur to much and have more Details.)
I got the same Bug as TristanQEverett with the hair, but noticed to late. After fiddling with the scale, i ended in hiding the Cap. (Not this Render.)
I've also added a tiny not much visible "Lichtenberg-Mark" in the Face. (Made with "Materialize". Very nice Program, easy to use. But not very precise or its just me who is not.)
While this Picture was rendering i found a tutorial for body luminescence. Hell, way to late but very interesting. After i watched it, it came in my mind: Why not use the geoshell directly as emissive source.
That's why i render again now. But this kind of Light Source has some pros and cons. The Pro is: You don't need many other emissive Lights. But, if its to close to the origin surface it poke through. If its in it, it causes the same Fractals as Hair with Caps or Scalps. If its to transparent there is less Light. *arg* :D
Or is it wrong?
But for now, here is the Render with the ordinary emissive Lights.
Title: It's always sunny in my Head.
Challenge: Beginner.
I think this is the final version, if I don't find anything glaring on it when I wake up:
Title: Bedtime Stories
Used software: Daz Studio 4.12 and Photoshop.
Challenge: intermediate: Used duplicate node for the pillows, candles, and the glass thingies under the candles.
Also used powerpose a little as I set up her pose+expression (although 90% of the pose is is presets and her limbs adjusted using the sliders).
For lightning I didn't really use any special effects aside from the computer screen reflection (removed the window light+shadows and mini-godrays to make the scene feel more isolated)
and a volumetric cube.
Kept experimenting with my supposedly creepy-wholesome image. Fixed some misplaced stuff, played a bit with the lightning and materials, a little DOF,
made the reflection on her glasses more prominent (with a new base color and emission color map).
Thank you again for the feedback and also for the tips and tricks, all of them were pretty useful techniques to learn!
For tone mapping I chose eventually PS instead of Daz tonemapping (one reason is that I like being able to undo stuff the other is that I seriously want to learn postwork).
It turned the mood spookier, with creeping shadows which is fine, since the character lives in a world full of unspeakable horrors. Adjusted levels, saturation and color balance
to deepen the shadows. If this type of postwork isn't allowed this month, please tell me and will rework the image asap! :)
Attached the raw (cropped) and postwork versions too.
Any (last minute) feedback and critique is more than welcome and highly appreciated :)
Final Entry - Beginners Contest
The Meeting at Rosemill Moor
Well in the end I decided to revert the color changes, default colors ended up looking better. Besides that I also played around with the lighting a bit more, though i'm not sure if I like it or the eariler version more.
Just in case anyone was interested, I played around with a less bloated shape. It shows a bit more movment and I actually like it. Though for the theme i'm trying to achieve I think the bigger dress works better.
Used software: Daz Studio 4.12 and Adobe Photoshop.
Challenge: Intermediate
Hey guys,
Sorry for the late entry (again!) Hope you all like it. Please let me know what you think!
Sorry for the silly question but how could i include my picture in my comment like everyone else has, so its bigger?
I am interested to know how you made. I want to do some fantasy renders in the future so I wish to know now your methods here.
@TristanQEverett Thanks for your help with resizing my image into my post really appreciate it!
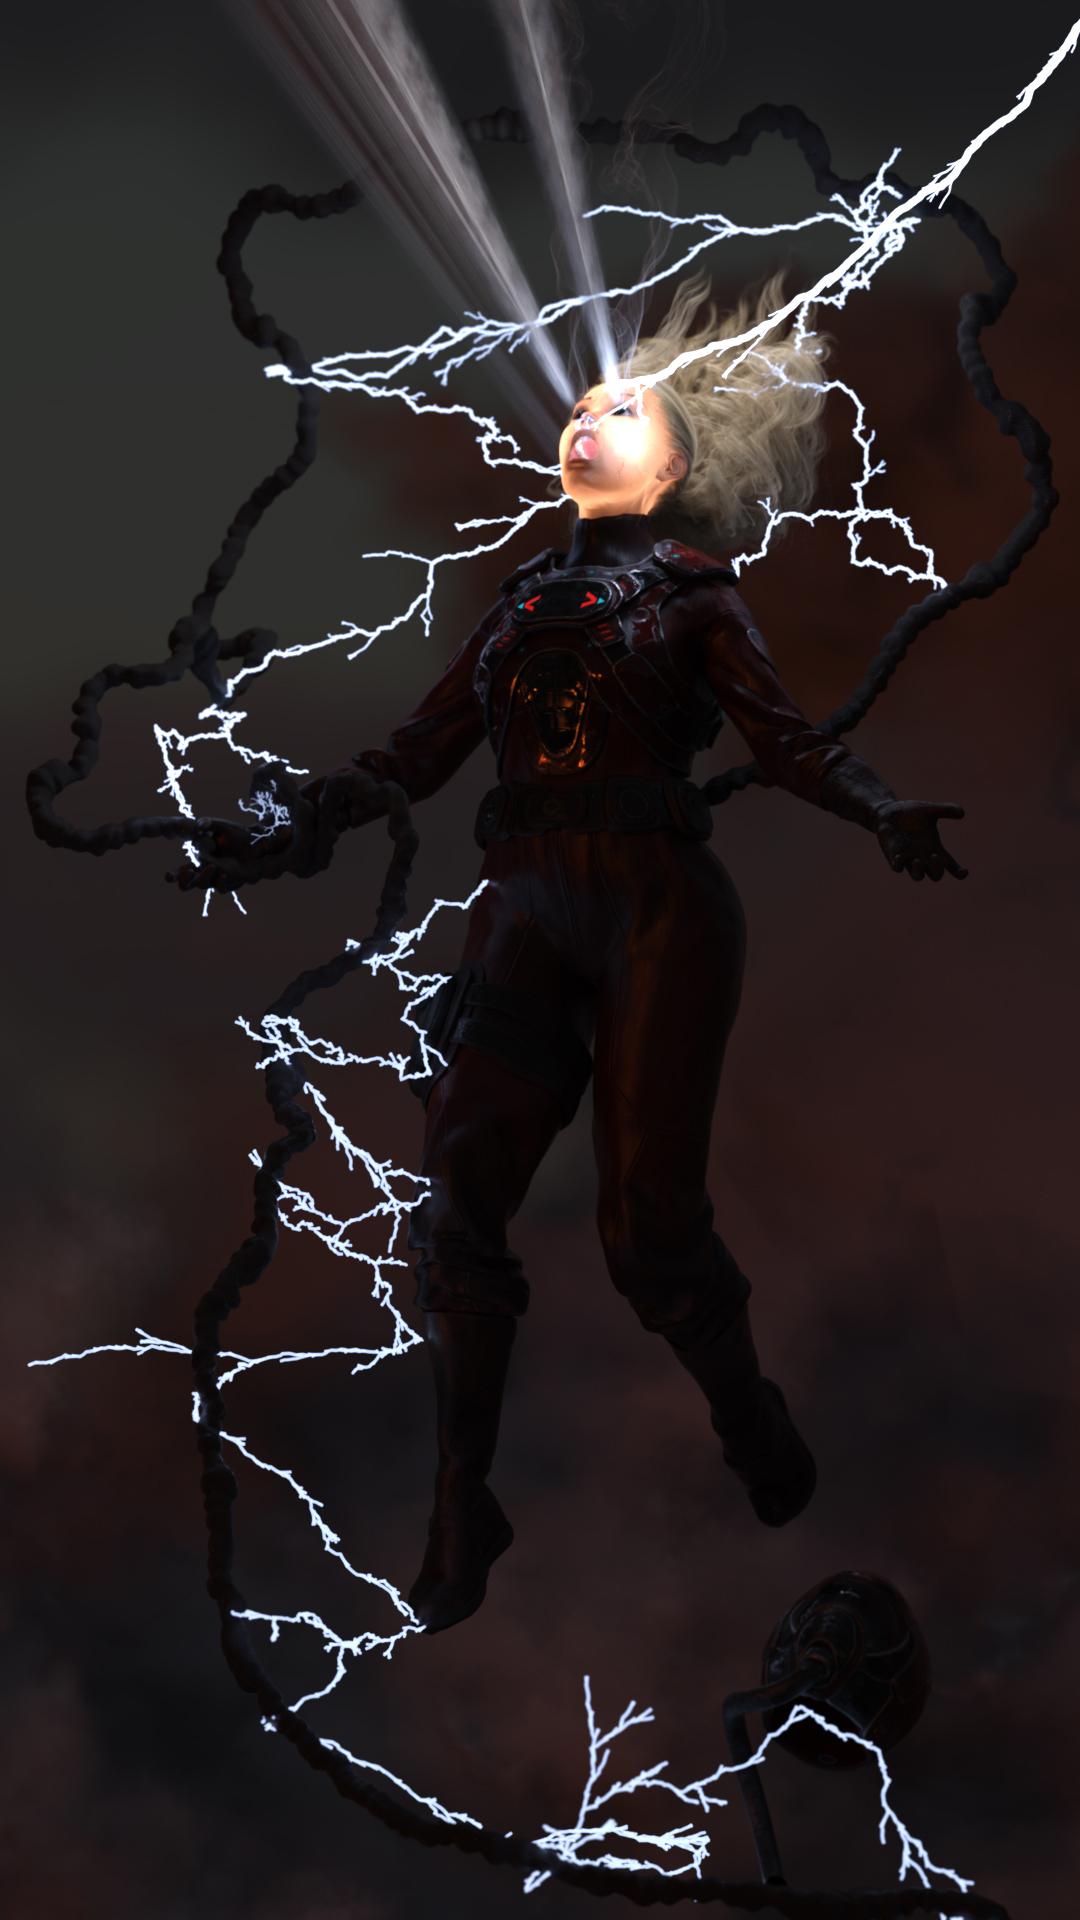
I used a tutorial that really helped me with the inner glow of the character. I did 1 clean render with lighting and clean skin and another render with the glow. I used Adobe Photoshop to blend the 2 together. Used a smoke brush for the hands also in Adobe Photoshop.
Software used: Daz Studio 4.12
In the end I decided to mix both lights, turned out to be the best of both worlds. Thanks for all the feedback on it.
There's a part of me though that feels like something is missing, but I'm not to sure what it is.
I like a lot the innocent and joyful atmosphere of your image, no nose. :3
This challenge is now closed.
Thanks to everyone for participating!
Showcased Participants for the April Beginners Open Render Challenge
no nose
Wicked Whomp
wmiller314
Showcased Participants for the April Intermediate Open Render Challenge
AZDigitalArtist
daer-thing
_ AL1vE _
New User Welcome
moonsirenz
Congratulations everyone!
Great work everyone! Congrats winners...well deserved.
Congratulations everyone!
And thanks for showcasing my image :D
Congratulation to the winners!
@TristanQEverett Today there is some nice fire and smoke props in sale.
The first fire i see in DAZ that looks good and variable.
https://www.daz3d.com/mmx-fire-and-smoke-for-iray