Adding to Cart…

Licensing Agreement | Terms of Service | Privacy Policy | EULA
© 2025 Daz Productions Inc. All Rights Reserved.You currently have no notifications.

Licensing Agreement | Terms of Service | Privacy Policy | EULA
© 2025 Daz Productions Inc. All Rights Reserved.
Comments
Would this procedure be something that would be useful in creating textures for the Hyperion Bar set?
I am a babe in the woods when it comes to this sort of stuff.
I wouldn't; the drawback of geoshells is that it doubles the mesh load for the scene. Which is usually not that big a deal if you're talking about one or two things, but an entire bar? That's a load of geoshell surfaces you are messing with.
Make sure you have selected the geoshell in the scene tab. It should be parented to the object it's a geoshell of.
Second, no idea. Probably not? What are you trying to accomplish?
First
Ok thankes I'll try that. I had saved it with the figure selected
Second
I have a face paint for a character that needs to be usable with her three different skins, I used a geoshell as the face paint needed different surface settings from the skin. The character is going to be for sale and some feed back I got sugested including a easy and obvouse way to remove the geoshell face paint.
EEEEEEeeeeeeeeeeeeekkkkkk scripting sounds waaaaaaaaay more than I am capable of lol
Oh darn .. good point, just trying to understand things. I appreciate your patience.
Is it possible to use Geoshell to achieve a split face character morph such as this:
https://www.deviantart.com/art/Two-Face-199662808
I am wanting to make a Two-Face character but preferably with a more gruesome side so maybe more skeletal or deformed morph using creator creator possibly.
Sure, you'd just do an opacity map to mask it out side by side. Only downside is that any SSS on the top shell wouldn't function (SSS shuts off if you do transparencies)
Another option would be to use my OMS1 shader, which lets you create two different surfaces and mask them together (with or without randomness)
Your shader looks awesome. Can you use these shaders also to make The Thing or Human Torch? It looks very versatile. Is it only iRay compatible?
It's specifically a recoded Iray shader, so, yeah.
You can make all sorts of stuff; you can create masks to have burning face, eyes hands, or magic hands, or liquid hands...
One expansion I've considered is a set of masks for figures so you can do that stuff more easily.
Added it to my wishlist. Hopefully it will go on sale at some point in the future.
Maybe at some point during March Madness!
Thank you so much for this tutorial, you wrote it so that it is easy to understand.
I shall have fun with this.
Again, thank you very much.
Pet
is there a way to make the shell thicker? or would it just be creating a few of them stacked.


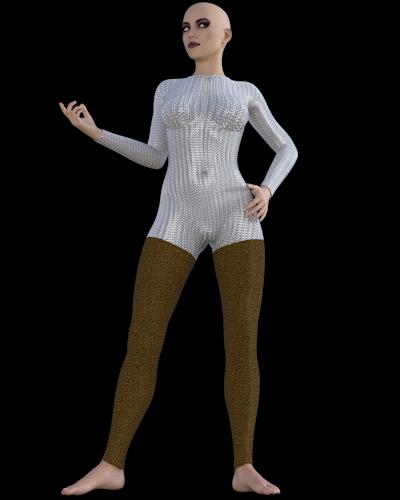
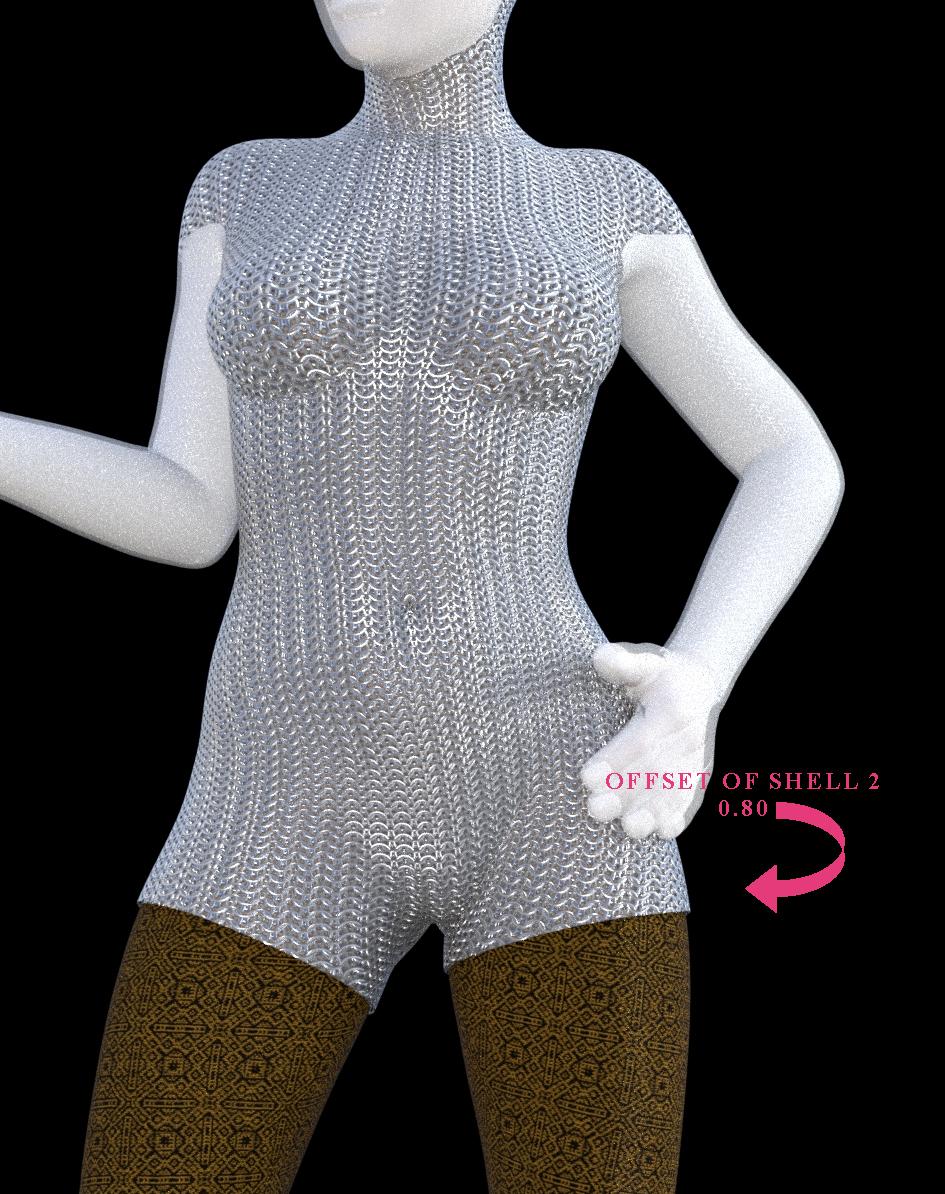
So I have been just trying it out, thanks to this thread ... I have chainmail fabric on torso and arms, and different on legs .. so to simulate leggings or whatever. So it would seem to me that this could be better realized by two shells... one for chainmail higher than legs ... but if the chainmail could be thicker, that would be good.
the 3RD image has two shells. it seems it is difficult to manipulate one or the other ...
One thing you could try is painting a push modifier map, such that the edges 'crimp' in toward the surface, so it appears to be a thick edge.
When I'm done with current render I'll try it out and demonstrate.
Hmm. Apparently you can't paint push node maps with geoshell. Bah.
Oso Toon Shader and Master Shader1 on sale and in my cart!
Yay!
And remember, if you buy 10000 copies maybe my kids will go to college!
Possibly. But if I bought 10000 copies my kids definitely won't be going to college. LOL
thank you d/l sexy skinz there is no instruction file on suing the geo shelll so this should help
Great tutorial, But does anyone know how to export a Geoshell to like character creator. I have tried before and it doesnt keep the pose of the character and keeps the A pose instead of T pose when exported. If anyone can help with that then things will be able to be used for what im doing. lol basicaly using daz and cc3 to make characters for my project.
Zlamour, did you ever figure this out? I'm having the same issue (although, in my case, I'm using 3dxchange and importing directly into iClone). It seems that Daz's FBX exporter turns geoshells into props, which CC3 and 3dxchange see as separate from the figures they are supposed to be attached to. I'm wondering if it's possible to either merge the geoshell with the base geometry before export (this would only work with 3dxchange, though, not CC3), or, failing that, project the geoshell texture maps onto the base mesh maps. Anyone have any ideas?
Oso3D, thanks for the tutorial! Just wondering: Is there a way to bake the textures of the geoshell onto the underlying figure (so that the geoshell can be removed prior to exporting the figure)?
I've tried looking for the No Suit morphs in the store but no luck. Are they part of a particular morh set?
https://www.daz3d.com/no-suit-for-genesis-8-males
https://www.daz3d.com/no-suit-for-genesis-8-females
https://www.daz3d.com/no-suit-morphs-for-genesis-3-male-s
RawArt may well have done more for other figures, just look in his store
Haha.
4 years on...
I've quoted myself as well...
I still need to try them out!
https://www.daz3d.com/no-suit-for-genesis-8-males and https://www.daz3d.com/no-suit-for-genesis-8-females or the equivalents for Gen 3 and Gen 2
@Oso3D, and what about a tattoo?
Can this be used with geoshell?
what i'm looking for is a tattoo that i can wrap around a leg. full 360 tattoo and also have it go up the hip a little making it part of the torso.
Wondering for a long long time how this can be created as using L.I.E. is nearly impossible to do when wanting it fully 360 wrapped around a leg but also moving it across the seams over to the torso.
With a geoshell you'd need to set up the tattoo to cross seams properly in some other 3d paint program.
If you want to have a simple tattoo image projected onto a leg and play nice with seams, you really want to use an Iray decal node, which can be projected from a direction rather than worrying about UV.
But that's another animal entirely. ;)
Short form: the size of the iray decal 'box' is basically 'what part of the body is affected by this.' And you can choose what kind of projection you are using: a straight projection would be planar, and then you need to play with direction to get it to look right. Also make sure it's parented to the body part that's moving.
It's not going to be perfect, especially if you are animating, but if you don't want to mess with a paint program, it's your best bet.