Novica & Forum Members Tips & Product Reviews Pt 13
This discussion has been closed.
Adding to Cart…

Licensing Agreement | Terms of Service | Privacy Policy | EULA
© 2024 Daz Productions Inc. All Rights Reserved.You currently have no notifications.

Licensing Agreement | Terms of Service | Privacy Policy | EULA
© 2024 Daz Productions Inc. All Rights Reserved.
Comments
Love the new hair-style, Novica ...
Love your new avatar @Novica!
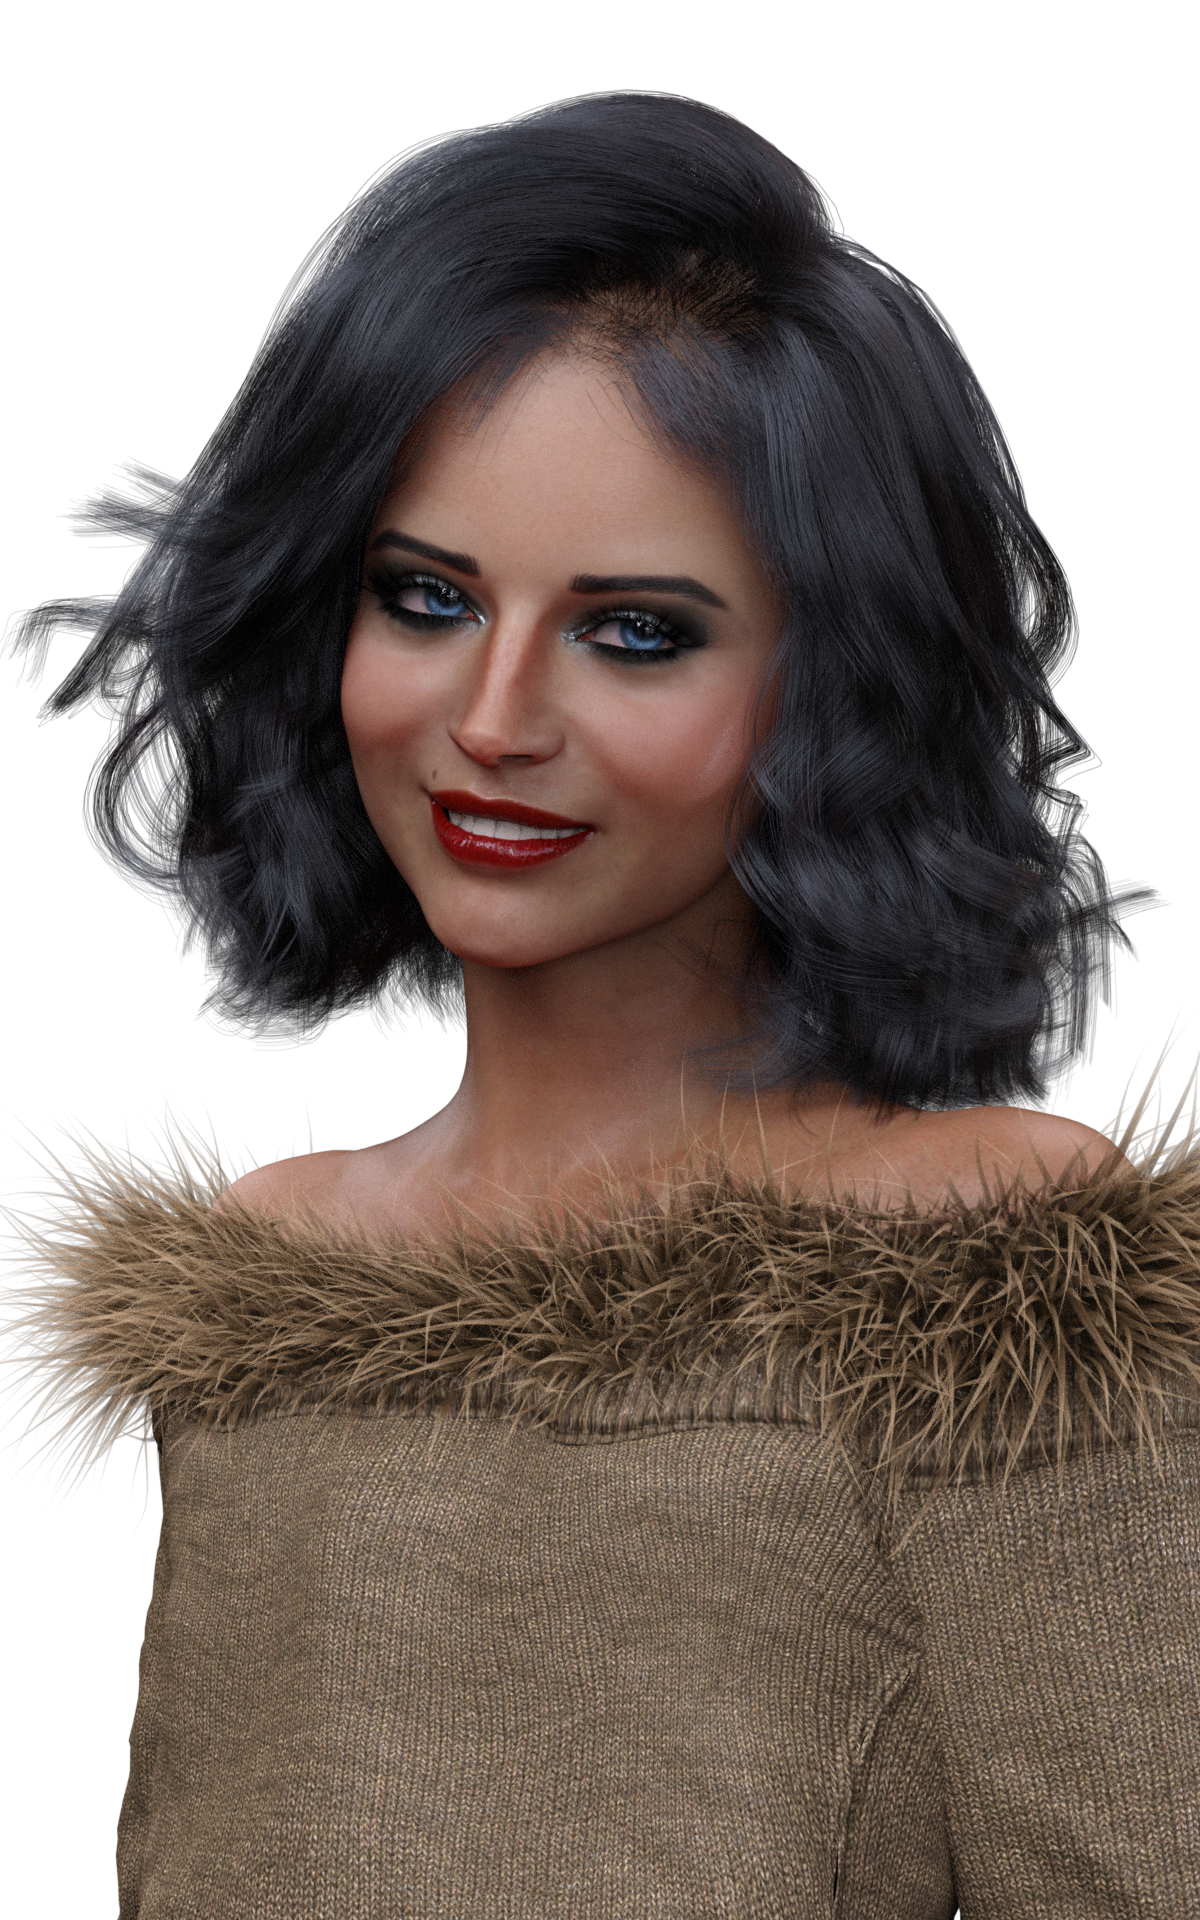
Anybody got this ? What do you think ? dforce Neroli Hair for Genesis 8 and Genesis 3 Females
I was going to buy it, because the hair looks pretty nice and the price is low, but that scalp texture across the forehead just looks strange to me. So as of now, I haven't purchased it. I, too, would be interested in user experiences with it.
Thank you @barbult, I agree with you. Hopefully someone purchased it and will let us know.
I have it in my cart and plan on rendering tests with it as soon as I can after getting home (late) tonight from work. I'll try to make a note to post something up here unless someone else beats me to it. FWIW I really, really like the general style, but am a little concerned about whatever that is that is going on in front on the forehead. Is that a little mass of individual hairs? How did that pass the "WTH?" test. I hope to be able to remove that bit. Otherwise it is a VERY attention getting, attractive style, IMHO.
Hi guys :) The (Neroli hair) scalp does look strong in some of the promos. Not sure if that's my doing, or the Daz artist's doing *shrugs*. My thoughts are try turning down the opacity of the scalp? If it;s still to strong or too low, maybe I can get it fixed. I'd hate to have a product appear as subpar.
RE: Neroli Hair
Well, I bought it. After all, I can always return it if the workarounds aren't satisfactory, so it isn't much of a risk.
Edit: Complaint - There is no indication on the thumbnail of which hair is for G3 and which is for G8. This makes using the product from Smart Content Products folder a real pain.
Edit 2: Complaint 2: The hair pokes inside my G8 characters face and won't simulate properly when intersecting with the character. None of the LeftCurl morphs would move it outside of the character's body. Wind Left is the only thing that would move it out, but then that pulls the right side in.
Thanks for coming on the thread and posting. :) Please see @barbult comment and perhaps consider tweaking that? Love your work and appreciate you very much.
You are very welcome Novica :) Feelin the love


Edit: Complaint - there is no indication on the thumbnail of which hair is for G3 and which is for G8. This makes using the product from Smart Content Products folder a real pain.
So I have minimal knowledge of how smart content works. I have never used it. I do recall a convo I had with a Daz person (tester, qc, other, dunno) and was reassured I did not need to label these because smart content sorts them. As long as smart content is smart. Sigh. Maybe I will go back to labelling if this is a consistent problem? Kinda seems like it is always a problem?
I attached a screenshot of the identical Neroli Hair thumbnails, and a screenshot of a hair product that makes it easy to tell which is G8 hair and which is G3 hair. The latter is preferable. The screenshots show the products in the Smart Content Products tab. IF you select the character then go to the Smart Content Files tab and then check Filter by Context, then DS will show only the hair that fits the selected character, but it will show ALL hairs that fit the character, not just this hair. The Smart Content Products view is useful when you know you want to use a certain product, because all the files for the product (hair, materials, settings, etc.) are there together with appropriate metadata (categories). I think it would be a good idea for PAs to have a working knowledge of Smart Content, since many customers rely on it.
Here is a render of Neroli Hair on a G8F character, which is part Alawa 8 and part Rynne 8. I haven't modified the hair cap at all, so those dark horizontal lines (hairs) on the forehead are still there. I used both Left and Right wind morphs before simulation, to try to get the hair to not intersect her face. I see it is still poking into her cheek a little on her left. I might be able to fix it with Mesh Grabber. Oops, no, I forgot that Mesh Grabber doesn't work on dForce hair.
I used one of the Brunette hair colors with Blonde Tips. I'm not sure what "Tips" means in this context. It seems like the blonde is at both the strand ends and the strand roots.
Don't know about your experience, but lately it seems that the PAs don't seem to know how to nest folders of their created add-on products with the original product. i.e. Ember Horse Texture for Daz Horse 2 and UD Fashionable. Rather bothersome when cataloging products.
I have the utmost respect for @chevybabe25, but this skull cap thing is erm, not optimal. Attached are a default render, a render with the skull cap dialed down to .10% and a Photoshopped image of the ultimate DESIRED result which I could not seem to achieve in render settings. I really, really like the hair, just not that furry scalp forehead situation.
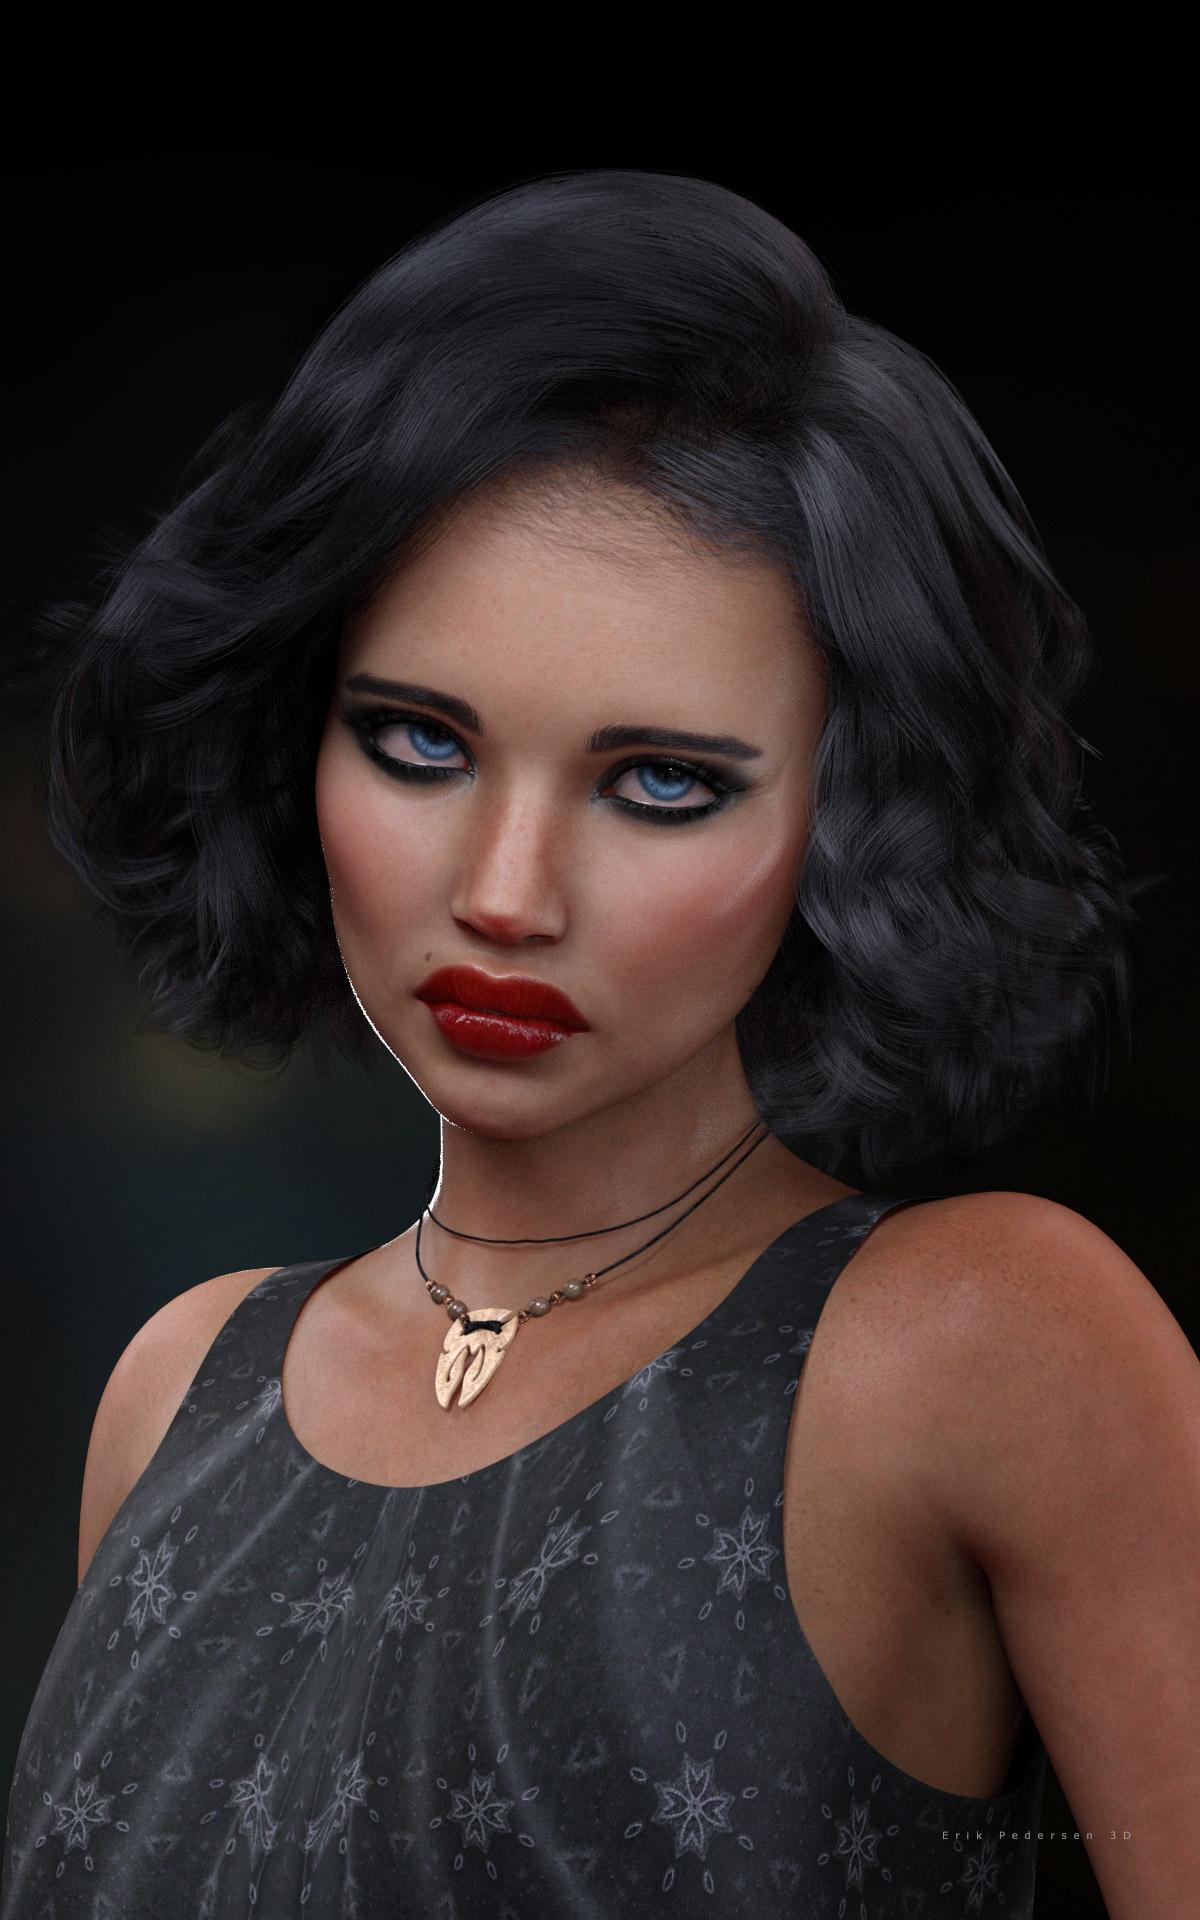
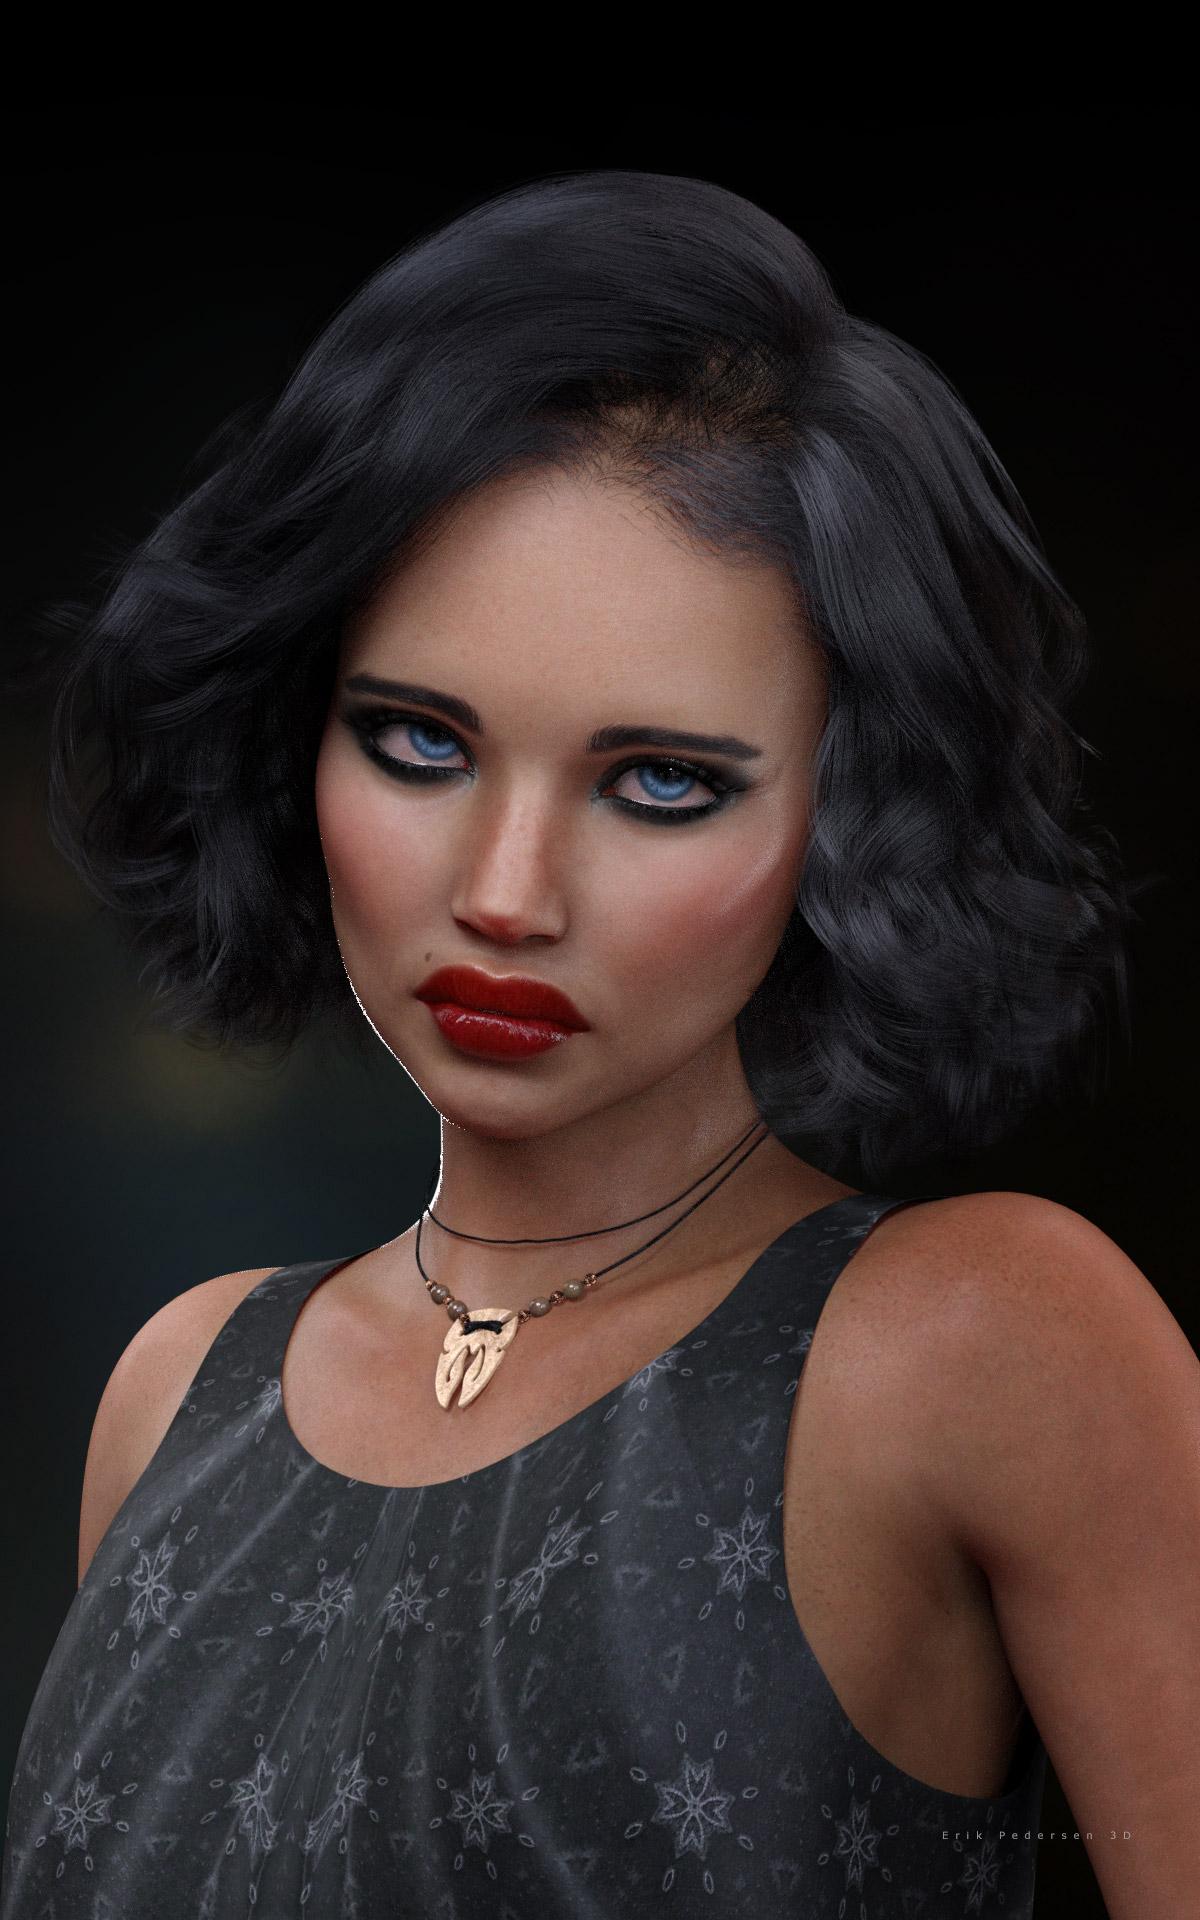
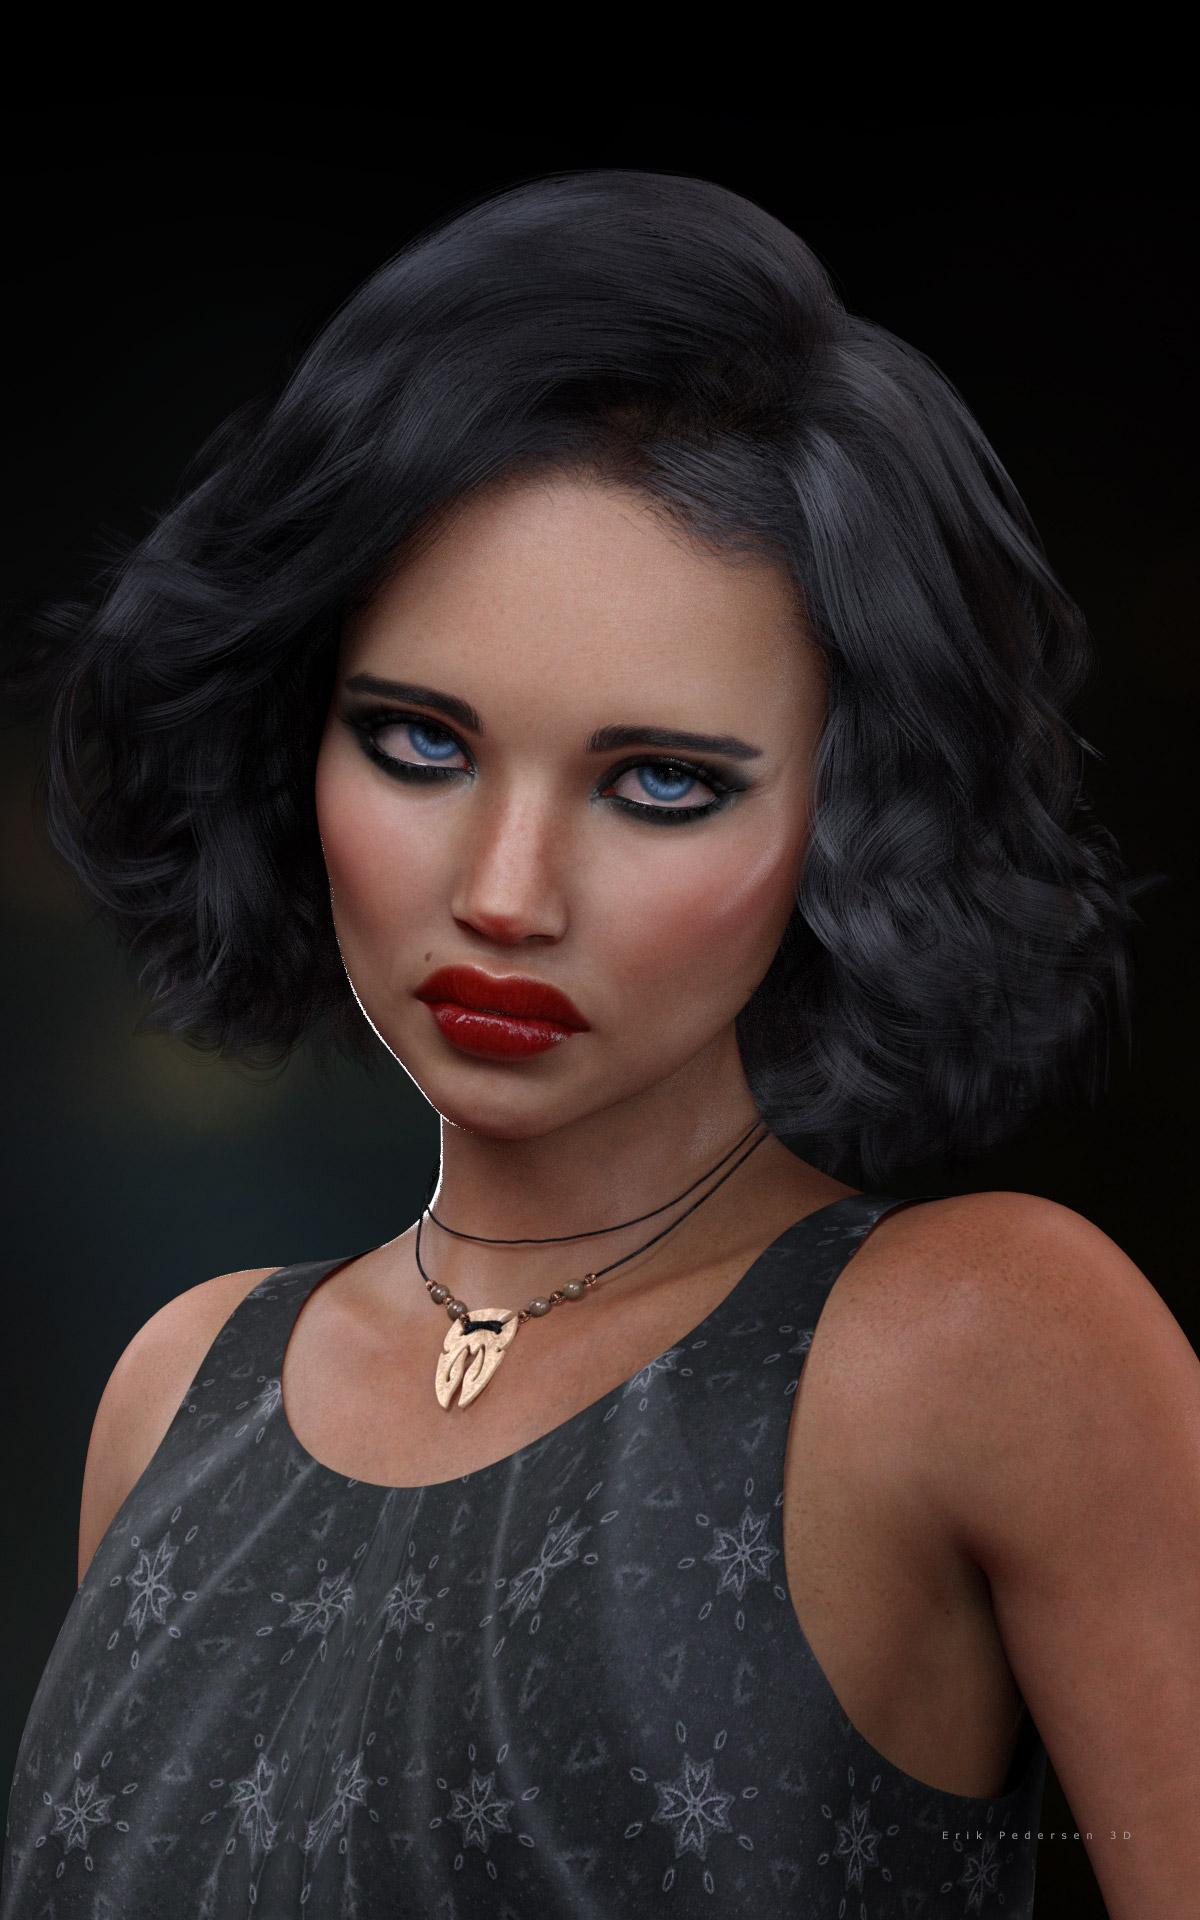
Also, sorry to be nitpicky, but I mean all of this in the most constructive way possible(!), but the installed files show up as "dfroce Neroli Hair" and should be "dforce" - just a typo, but none-the-less.
[EDIT] Forgot to mention, these are NOT simulated, just loaded out of the box.
DEFAULT :
Skull cap at .10% Cutout Opacity
DESIRED result (achieved with Photoshop)
How fast does that hair dforce, and does it work well without dforce? I see it has a variety of morphs so it might work without it. I am one of those people who like having dforce as an option, but is capable of being rendered without it.
I imagine the scalp opacity texture can be edited to deal with the forehead fuzziness.
I tried a plain base G8F shape with Alawa skin. I used the Blonde hair with Pink tips. On this one I can more clearly see the pink just on the ends rather than also on the roots. I was able to simulate it without morphing the hair away from her default face shape.The hair is very sparse in the top center, letting a lot of the cap show in that area. I was surprised at how dark the cap was for a blonde hair. Again, I did not modify the settings of the cap opacity here.
It simulated in less than 4 minutes on my GTX 980 Ti, so it is probably even faster on a modern card. Gogger posted unsimulated renders above.
My renders above are without simulation, but I also didn't use any of the movement morphs, although I did play with them a little. The forehead hairs are on the scalp so opacity makes her seem to have VERY thinning hair on top at the part (See second image below). I took a look at the image files and didn't see anything that made sense to me to edit. Here's a render of the skull cap without the hair.
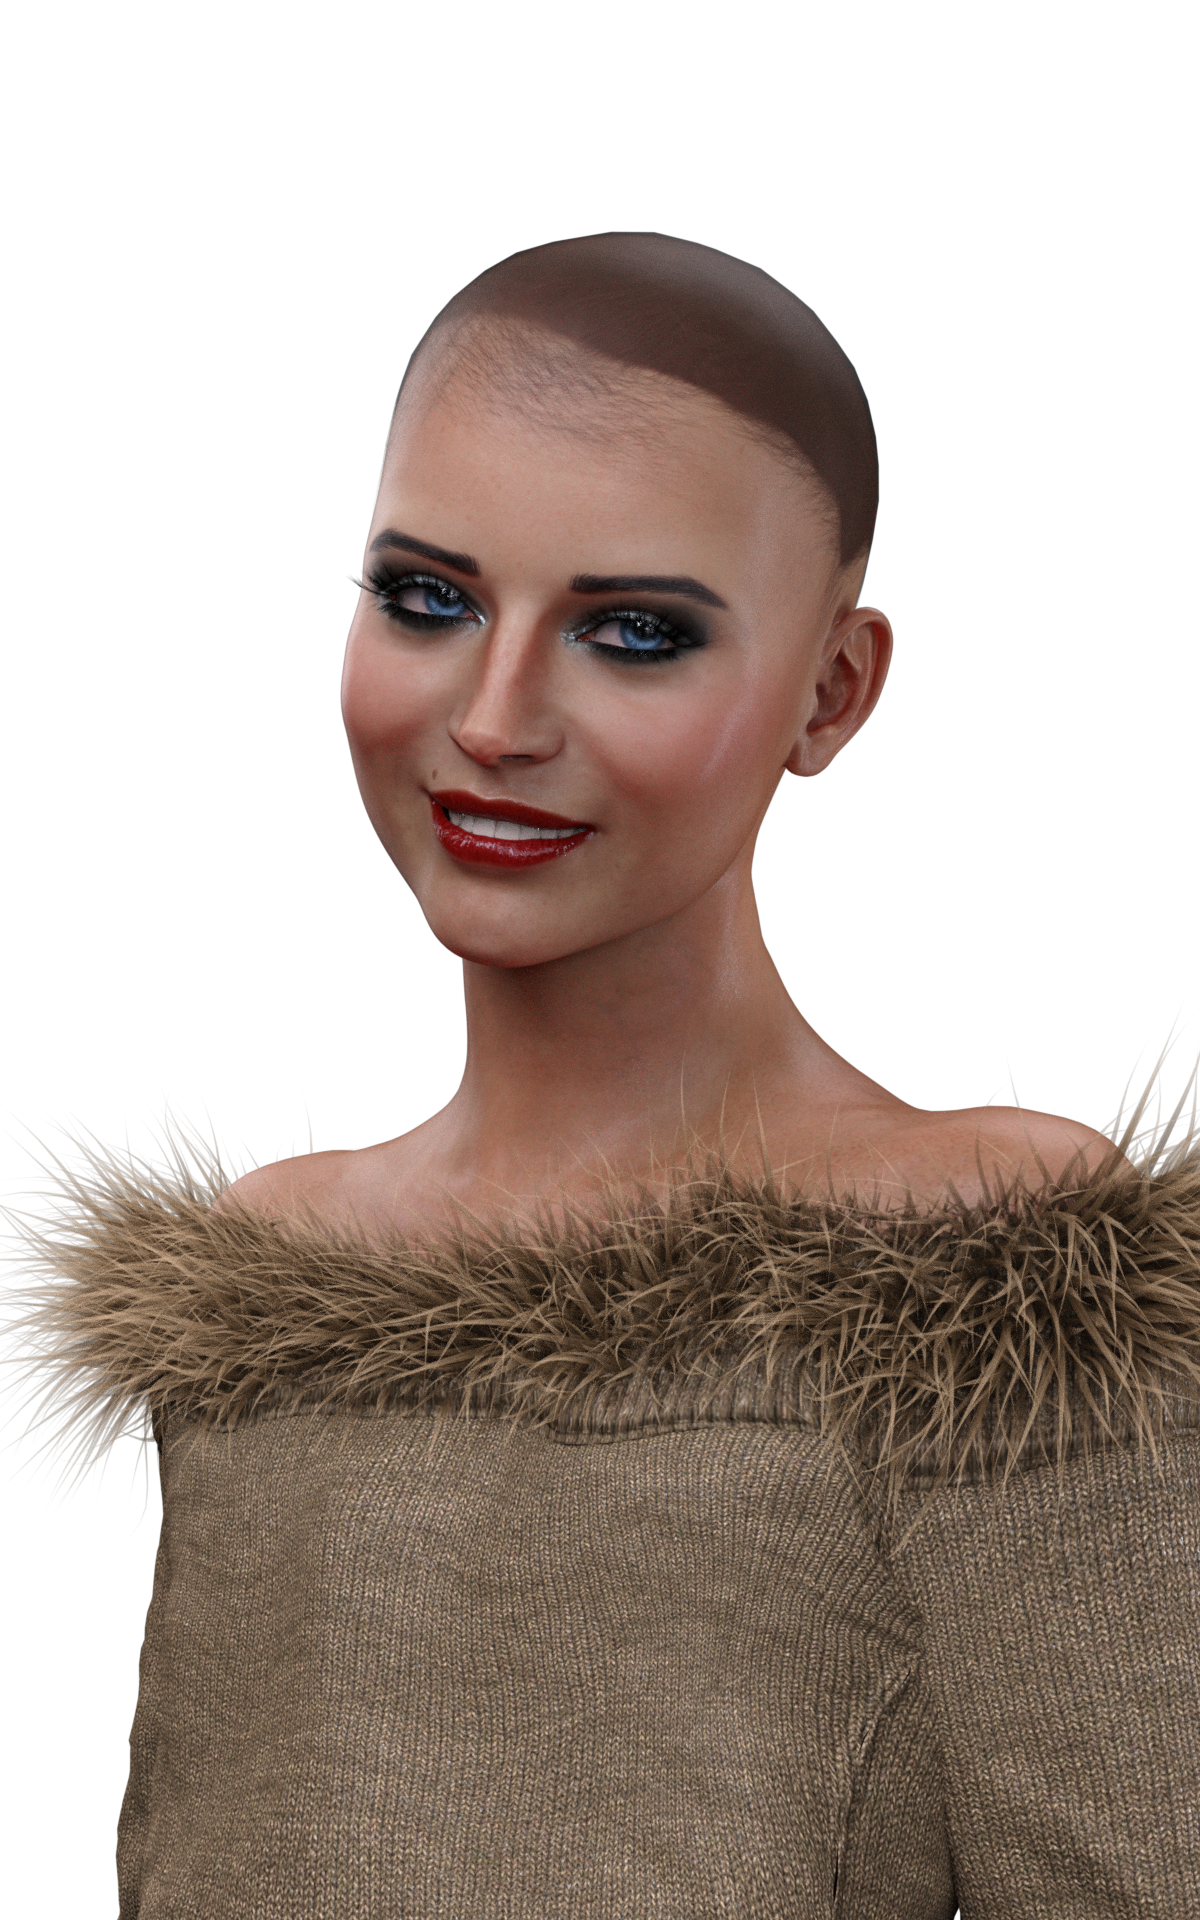
And here is the hair without the skull cap.
To me, it seems like a ?simple? updated (or alternate) skull cap with hair not extending below the hairline from the vendor would resolve the whole issue nicely.
I was very impressed with how well it simulated in this challenging pose. The only problem I had was the black spot on her forehead, caused by the cap intersecting the character mesh. This is a common problem with hair, easily overcome by moving the cap forehead area out away from the character head. Unfortunately, the cap of this hair doesn't have any morphs to do that - not even a simple Expand All. Mesh Grabber will be able to correct this, because the cap is mesh and not dForce hair. I reduced the cap opacity to 0.2 in this render. Her arm on her head hides the thin spot, so I got by with it here.
This is hair color Red 2. I set the cap opacity to 0.2 and fixed the cap/head intersection area with Mesh Grabber.
@barbult Looks a lot better :)
Well, here in Pensacola we are waiting for Hurricane Zeta to arrive over at New Orleans tonight somewhere around 5pm-ish. The winds 30mph- 75mph gusts will be here around 8pm. This storm is moving fast so we at least won't have the hours and hours of pounding wind and rain like we did with Sally. I'm going out to put Stetson in his pasture for at least half an hour in between rain bands if today gets soggy. I don't think it will as it will be hit or miss until later today. After 5pm I think we'll be in continuous rain and he'd be in his stall anyway.
Mississippi has already had a tornado from those bands (at 1am, good heavens!) so everyone in LA, MS, AL and panhandle need to have their weather radios on. These are coming at night which is the worst time!
On a humorous note, remember to "fall back" an hour this weekend. I say it's funny because I saw a post mentioning that and then they said, "Like we WANT another hour of 2020."
I'll return to labelling the thumbnails. It only takes a minute of my time and it clearly saves a headache for those of you that use smart content :)
I will put in an update for the skullcap.. Also, you can adjust the thinning area by clicking on the surface tab, and selecting the surface "initialShadingGroup"
Change the ps hairs from 5 to 8.
Change the ps hair distribution radius from .43 to something higher like 1. You will see the hair spread out more, and it can be adjusted to your liking.
Attached a picture with the above settings and adjusted skullcap :)
That's great news, thank you!
@Novica, Just saw on the news that the storm track has been updated and it will hit downtown New Orleans as a Cat 2. The Panhandle seems to still be in its track. I hope everyone there stays safe.
@Gogger and @barbult, thanks for the renders.
@chevybabe25, I bought the new hair right away but haven't had a chance to look at it yet. So thanks for the update coming and the advice.
You are not the only PA not labeling the thumbnails, I have to keep 'info' tab up and read the code line, stressing out my eyes. Another issue is materials not identified, and dumped by Daz into one folder, 3DL and Iray in one glop, and unless you read the code line, no idea if you are grabbing the right one. And Smart Content metadata is set up by Daz.
Mary
@memcneil70 I've been up all night, deliberately, for the past two days so I will be up all night tonight (through the wee hours of Thursday) when the tornado threat will be ultra high. They are now saying it could go Category 3. (Weather Channel) The track has shifted a tad west I think. Anyway, I'm going to sign off and get some sleep, I am anticipating losing internet again but perhaps not. I never lost power, not even with Sally, but now we have so many damaged limbs still hanging from trees we may lose power this time. I have a full house generator so I'll be fine. Thinking about all of you over in the other states who are going to be the ones this time in the eyewall. At least it will zip through, we were in the darned thing for about six or seven hours! (Sally moved 1-3 mph, Zeta is already doing 17mph forward speed) Currently 90mph at about 8am central.
FYI: 96 to 110 is Category 2. 111 becomes Cat 3. So only 6 more mph to go.
BTW, I'm currently on a font kick, and if you haven't ever tried the free fonts on Font Squirrel, there's a lot of them :) I lost all my fonts when I got the Titan and just hadn't downloaded/installed new ones. Okay, getting some sleep so you all have a great day and ttyl today/ tonight. I'll keep you posted on what's going on weather-wise in Pensacola. :)
Thank you very much for your help and expertise @barbult and @chevybabe25.
I've not tried it with dForce, or other strand-based, hair but with a simple convex shape such as most skullcaps a Push Modifier should work as an expand morph, and with a weight map node added you can target the expansion.
You are very welcome guys :)
Also, @barbult : check the cap and make sure smoothing is on 2 and the subd level should really be set to base resolution. I think some have gone through with high resolution which can also cause the black dots.
Thanks Barbult and Gogger for your examples, and for being on top of it, chevybabe25.
It's very pretty hair but I was not going to buy it due to the fuzzy forhead in the promos, but it looks to be an easy fix!
Thank you for the tips! I'll give this a try today.
Yes, I thought about mesh offset and weight map, too, but now that I have Mesh Grabber, Mesh Grabber is easier for me. Now Mesh Grabber has the ability to save the modified mesh as a morph without manually export/import obj. So that is what I did with the cap later last night.
I'm going to check the smoothing settings suggested by chevybabe25 and see if maybe I don't even need to do any mesh modification