5 New Bryce 7.1 Pro video tutorials for Brycers who want to expand their skills.
 David Brinnen
Posts: 3,136
Video tutorials for Bryce 7.1 Pro. "New" as of the 27th July 2012
Bryce desert landscape - part 1 - a 15 minute tutorial in two parts by David Brinnen
Bryce desert landscape - part 2 - a 15 minute tutorial in two parts by David Brinnen
Bryce still life project - "capsules" - a 15 minute tutorial by David Brinnen
Bryce lake in a landscape - a 15 minute tutorial by David Brinnen
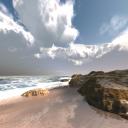
Bryce shoreline - a 15 minute tutorial by David Brinnen
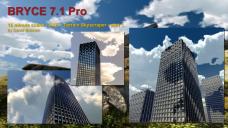
Bryce DTE > terrain skyscraper - part 1 - a 15 minute tutorial by David Brinnen
Bryce DTE > terrain skyscraper - part 2 - a 15 minute tutorial by David Brinnen
What you see here is the result of hours of testing and experimentation. The topics covered are advanced and diverse.
Five - because that is how many images I can attach in one go. These images relate to each tutorial respectively.
Hope you enjoy the tutorials.


Comments
Thank you David!
Is there a way we can download these new videos? I bookmarked them but I'm not always online and I'm afraid I'm not ready yet for intermediate tutorials. I bought your Abstract Wallpapers just now only for the videos! :)
Thanks anyway for creating those videos and for sharing them.
Keep up on doing the good work,
Love, Jeanne
You are welcome Jeanne,
As to the video's... well, the Horo and I are working on sequel to Bryce Mentoring DVD - Videos, Scenes and Resources and will include these new video tutorials along with the exclusive stuff for the new DVD. Other than that, you could use some screen capture software like Camtasia Studio - which is what I use to make the video's in the first place - in case you wondered. But otherwise, they will remain on youtube for the foreseeable future.
If you use FireFox, go to "Add-Ons" and select "DownloadHelper". This is a free plug-in (although they'll gladly take donations) that will let you easily capture streaming video from sites like YouTube and save it to your hard-drive. The default formats are FLV or MP4, although I believe you can add filters or converters to save as AVI or other formats, as well. I personally like the MP4 format, so I haven't played with that part of it. Great little plug-in, and I use it constantly -- I've saved all of DAZ's videos with it. The only bad thing I've experienced is that when saving at 720p or higher, you occasionally get artifacts in the video, but I've experienced that problem with several other streaming-vdeo-capture programs, so I think it's a YouTube issue or an ISP issue (hell, it might even be my computer), but it's not something restricted only to DownloadHelper.
Thanks for these tuts. Results look great, will check them out.
If you use FireFox, go to "Add-Ons" and select "DownloadHelper". This is a free plug-in (although they'll gladly take donations) that will let you easily capture streaming video from sites like YouTube and save it to your hard-drive. The default formats are FLV or MP4, although I believe you can add filters or converters to save as AVI or other formats, as well. I personally like the MP4 format, so I haven't played with that part of it. Great little plug-in, and I use it constantly -- I've saved all of DAZ's videos with it. The only bad thing I've experienced is that when saving at 720p or higher, you occasionally get artifacts in the video, but I've experienced that problem with several other streaming-vdeo-capture programs, so I think it's a YouTube issue or an ISP issue (hell, it might even be my computer), but it's not something restricted only to DownloadHelper.
Thank you Sarsifus!! I use IE but my husband uses Firefox and he is so nice to get me the tutorials. :-)
Love, Jeanne
More Bryce 7.1 Pro tutorials to get your teeth into...
Bryce Depth of Field effect - a 15 minute tutorial by David Brinnen
Bryce Depth of Field effect - for less powerful computers - a video tutorial by David Brinnen
Bryce 'Nuts and Bolts' - using Pan V and Pan H - a video tutorial by David Brinnen
Bryce Abstract 360 HDRI Specular effect - a 15 minute tutorial by David Brinnen
Bryce lighthouse "light beam" effect - a 15 minute tutorial by David Brinnen
Bryce red hot metal effect - a 15 minute tutorial by David Brinnen
Bryce burning coals effect - a 15 minute tutorial by David Brinnen
W.O.O.O.W.W.W.W
Impressive, very impressive!!! O_o
Indeed very imressive!
The last week (and still) I'm having a lot of fun using and following the Abstract wallpapers tutorials. It's an other and very pleasant way to play in Bryce. Thank you for creating that package. I bet you and Horo also had fun creating it. :-)
Love, Jeanne
Thank you ReDave,
Thank you JeanneM. Yes the abstracts were fun, but implementing the anaglyph lens system (Bryce 7 Pro True 3D Rendering) was more fun! But that is still in QA...
Four more tutorials for your consideration.
These are a bit more "hard core" than the previous 10, so you might want to top up your Bryce knowledge with some of the gentler tutorials here first.
Bryce 'Nuts and Bolts' - using Pan V and Pan H - a video tutorial by David Brinnen
Bryce "Nuts and Bolts" - HDRI lighting project - red dragon in a white box - part 1 - a video tutorial by David Brinnen
Bryce "Nuts and Bolts" - HDRI lighting project - red dragon in a white box - part 2 - a video tutorial by David Brinnen
Bryce (TA) True Ambiance still life render of a red dragon - a 15 minute tutorial by David Brinnen
Bryce 10 minute material project - leatherette - a tutorial by David Brinnen
Ooohh, thank you!! I had that link somewhere but I couldn't find it anymore. Could it be on one of your readme files? Well, nevermind. I bookmarked it now AND saved the link in my Bryce folder so I won't loose it again,
There's a lot of stuff to learn on that site! And I'll start with the camera because I couldn't figure out how Horo had the camera inside the sphere! It probably is in the manual somewhere but it was easier to open the first wallpaper and continue from that one. I'm a bit (read very) lazy, I know. :lol:
Keep up on doing the great work and most important: keep up on doing the things you like to do. :)
Love, Jeanne
Thank you Jeanne, well here is another 10 minute Bryce 7.1 Pro material project taking advantage of the new Anisotropic feature.
Bryce 10 minute material project - red pearlescent paint - a tutorial by David Brinnen
Here's the render from the tutorial.
David.... OUTSTANDING tutorial on the Anisotropic feature! Thanks!
Brilliant Video Tutorials. Will have to work my way through them all in time.
Have you done a tutorial on using Light Gels yet? I haven't found any yet, but would love to know how you use them.
Thank you, Moonglow, Wendy.
I've added "using Light Gels" to the to do list.
But I am uploading another lighting video right now - although you tube seems to be making a meal of processing it... I'll post when it is done. It covers the process of upgrading old scenes that use basic lighting (and optimization tricks) to new better lighting also with some consideration to optimization.
Here's a twenty minute video about updating your old Bryce scenes to new Bryce 7.1 Pro lighting.
Bryce 20 minute lighting project - upgrading lighting - a tutorial by David Brinnen
This one is for the hardcore Brycers only. It is pretty advanced. Bryce grass terrains - a 25 minute tutorial by David Brinnen
Wendy, something along these lines?
Bryce light gel underwater effect - a 15 minute tutorial by David Brinnen
Yes, thanks David. Will go and watch that and see if I cando anything half as good.:-)
Thanks a lot for the tutorials, David.
They are all awesome and I hope to learn from them new things to make in Bryce.
You are welcome. OK here's another one. Bit of an obscure topic - probably not ideal for beginners. Bryce "Nuts and Bolts" - object cubic and spherical mapping - a 30 minute tutorial by David Brinnen
Bryce "Nuts and Bolts" - radial lights - a 30 minute tutorial by David Brinnen
For example, this scene is lit with some of those radial lights, if you want to know more about them - much more - possibly too much, commit 30 minutes of your time to watching the video.
David,
Bryce “Nuts and Bolts” - radial lights was fantastic. I appreciate the added note balloons that answer minor questions before we have time to think of them. And no, it wasn't too long. Jammed with useful info.
I found the " Bryce 'Nuts and Bolts' - object cubic and spherical mapping" to be both very interesting and educational. An obscure topic? Not at all. Where would we be without AV tuts such as these? I can't imagine trying to get this info out of a printed manual.
Thanks again!
Thanks a lot for the tutorials.
Thank you Moonglow,
You are welcome RorrKonn,
OK three more tutorials to have a go at - an hours worth of viewing "pleasure"...?
Intermediate: Bryce 10 minute material project - rainbow texture - a tutorial by David Brinnen
Intermediate: Bryce 10 minute material project - using the rainbow texture and scene converter - by David Brinnen
Advanced: Bryce "Nuts and Bolts" - TA optimised radial lights - a 40 minute tutorial by David Brinnen
The first image, the lighting was made using the spherically mapped rainbow as a gel for TA optimised radial lights. More specifically, the render took 5 minutes to complete and it lit by two TA optimised light source with TA scattering correction and boost light used. OK it may not look like much, but as a proof of concept this shows that it should be possible to create an effect somewhere between that of HDRI’s coloured light component and TA’s indirectness that renders very efficiently.
The second image, a Stanford dragon render… TA scattering correction and boost light. I converted Horo’s angular mapped Treppenhalle2.hdr with the Spherical Mapper and spherically mapped that into a light gel that is applied to two TA optimised cubic light sources that also exclude the Stanford dragon and overlap. This projects gel light in which adding rather than multiplying, retains the colour. The same HDRI is used as a backdrop to drive reflection. Standard Bryce sun is also employed as a key light, and drives a bit of diffuse and also specular. The material was made by me from a photograph taken by Horo.
Render time 20 minutes at 256 RPP with Max Ray Depth set to 4.
Third image, lit with a single TA optimised radial light source. As shown in the third video, R = 255, G = 60, B = 25. Material made by me from photographs supplied by Horo - the model a little Wings3D project. Render time about five minutes.
If you really enjoy the tutorials please show your support by considering the Bryce Mentoring DVD
Something a little less challenging. Getting a Little Green Man from DAZ Studio to Bryce - a 10 minute tutorial by David Brinnen
And you got him there without any 404 errors
Not one! I can hardly believe it myself!
Some special effects via True Ambience optimised radial lights and Premium effect render mode TA + scatter correction + boost light.
Rainbow Vicky effect - a 10 minute tutorial by David Brinnen
Another special effect tutorial... this one somewhat advanced, because it is so fiddly. I chose altitude filtering, as opposed to taking the approach used in the lighthouse rays tutorial (which would have been simpler) but that's been done, so here's another way.
Streaming light or "God rays" effect - a 25 minute tutorial by David Brinnen
Doing things with advanced lighting.
Bryce 25 minute lighting project - upgrading advanced lighting - a tutorial by David Brinnen
Trying to work out why advanced lighting can be so difficult - *WARNING* skip this video if you have a low boredom threshold - it is a bit tedious.
Bryce "Nuts and Bolts" - TA RGB response - a 15 minute tutorial by David Brinnen